Применимость
| Модель | Двигатель | Год |
|---|---|---|
| XC90 | — | 2003–2009 |
Removal
Примечание: During installation the underlying surface must maintain a temperature of at least +20°C (68°F).
Removing the front wheel arch extensions
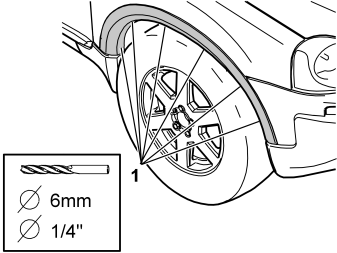
- The front wheel arch extensions are secured with three catches in the lower edge, tape in the top edge, five clips and six pop rivets.Drill out the six pop rivets (1) holding the front wheel arch extension to the edge of the wheel arch. Use a Ø6 mm (1/4”) diameter drill bit.
- Remove the remains of the rivets.
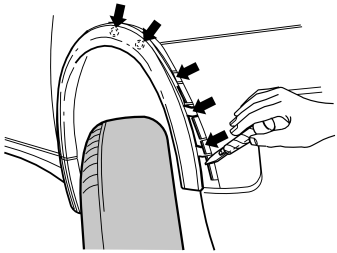
- Carefully pry off the front lower edge of the wheel arch extension. Use a plastic weatherstrip tool.
Примечание: Do not damage the paint work.
- Fold out the front lower edge of the wheel arch extension to expose the first mounting clip.
- Insert the weatherstrip tool at the side of the clip, between the panel and the wheel arch extension. Twist the weatherstrip tool to pull the clip away from the edge of the wheel arch or so that it breaks.
- Then continue in the same way until all five clips have released.
- Remove the wing extension. Place the wing extension to one side. This will not be reused.
Removing the rear wheel arch extensions
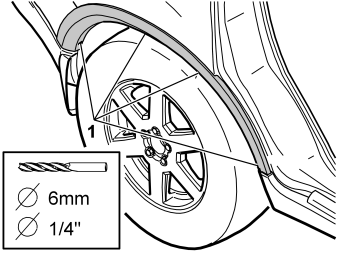
- The rear wheel arch extensions are secured with two catches in the rear lower edge, tape in the top edge, six clips and four pop rivets.Drill out the four pop rivets (1) holding the wheel arch extension to the edge of the wheel arch. Use a Ø6 mm (1/4”) diameter drill bit.
- Remove the remains of the rivets.
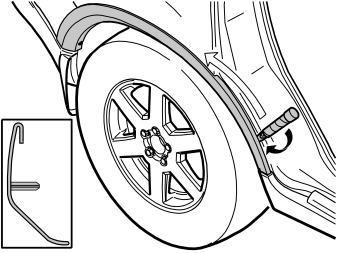
- Carefully pry off the front lower edge of the wheel arch extension. Use a plastic weatherstrip tool.
Примечание: Do not damage the paint work.
- Fold out the front lower edge of the wheel arch extension to expose the first mounting clip.
- Insert the weatherstrip tool at the side of the clip, between the panel and the wheel arch extension. Twist the weatherstrip tool to pull the clip away from the edge of the wheel arch or so that it breaks.
- Then continue in the same way until all six clips have released.
- Pull the two mounting hooks at the rear edge of the wheel arch extension off from their mountings.
- Remove the wing extension. Place the wing extension to one side. This will not be reused.
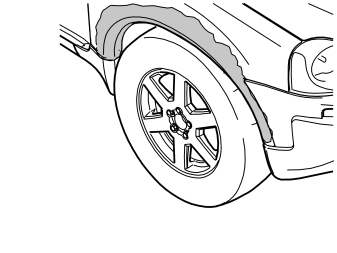
- Clean the marked surface around the edge of the wheel arch where the tape shall be affixed using isopropanol P/N 1161721. Wipe dry.
- Clean the corresponding surface on the edge of the wheel arch for the rear wheel.
- Repeat steps 1-5 for the other side.
Installation
Applying the primer to the body
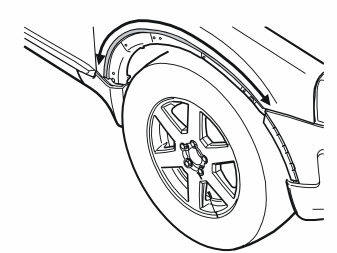
Осторожно: The wheel arch extensions can be installed at the earliest 15 minutes or at the latest 3 hours after application.
- Take the primer (P/N 1161727) and cotton buds from the kit.
Примечание: The primer must be applied to the car in one operation, and any spillage must be wiped up immediately.
- Apply primer to the surfaces where the tape shall adhere. Make sure that there is no primer outside of the surfaces to which the tape shall adhere.
- Allow the primer to harden for 15 minutes.
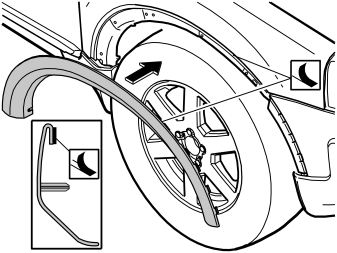
- Detach the backing from the mounting tape at the ends of the new wheel arch extension to the front wing in order to facilitate removal when the wheel arch extension is installed.
- Insert the wheel arch extension guide pins in the corresponding holes around the edge of the wheel arch.
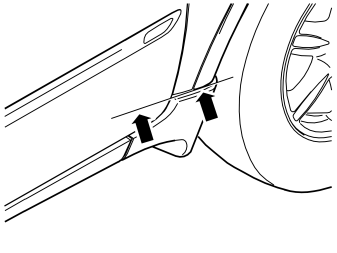
- Check that the lower edge of the front wing's rear edge is level with the corresponding edge of the wheel arch extension.
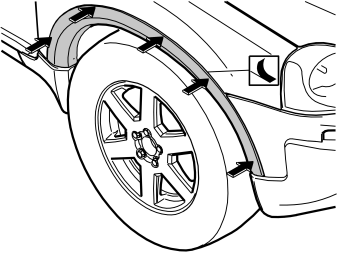
- Press in the ends of the wheel arch extension where the tape was detached.
- Remove the remainder of the backing and press in the wheel arch extension so that the tape is firmly applied. At the same time make sure that the upper edge of the wheel arch extension follows the edge of the wing.
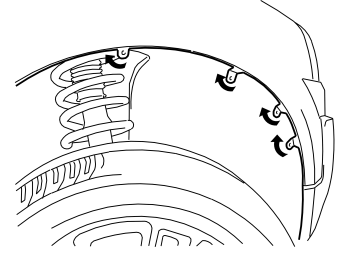
- Fold in the mounting lugs on the front wing's wheel arch extension so that the holes in the mounting lugs align with the holes in the wing liner.
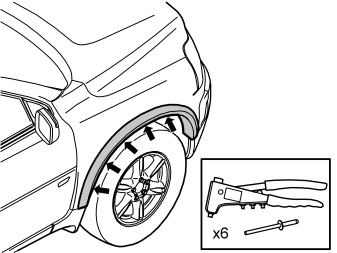
- Take five pop rivets from the kit and securely rivet the wheel arch extension with the wing liner to the edge of the wheel arch.
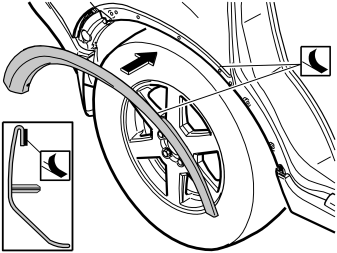
- Detach the backing from the mounting tape at the ends of the wheel arch extension to the rear wing in order to facilitate removal when the wheel arch extension is installed.
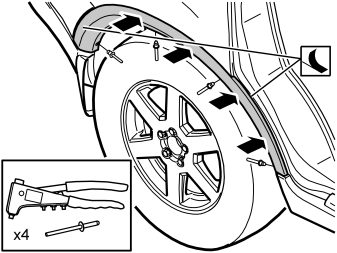
- Press in the ends of the wheel arch extension where the tape was detached.
- Remove the remainder of the backing and press in the wheel arch extension so that the tape is firmly applied. At the same time make sure that the upper edge of the wheel arch extension follows the edge of the wing.
- Take four pop rivets from the kit and securely rivet the wheel arch extension to the edge of the wheel arch.
- Repeat steps 6-13 for the other side.
Примечание: Keep the car indoors for 2 hours after the work has been completed and do not wash the car for 48 hours.
Обсуждение и оценка
0Пока нет комментариев. Будьте первым.