Применимость
| Модель | Двигатель | Год |
|---|---|---|
| S60 (-09) | — | 2001, 2002 |
Примечание: Applies only to Europe: A new rear windscreen must be installed if the present windscreen does not have an integrated aerial.
Примечание: This accessory requires software unique to the car.
Interior preparations

- Turn the ignition key to position O. Remove the ignition key from the ignition switch.
Примечание: Wait at least five minutes before disassembling the connectors or removing other electrical equipment.
- Disconnect the battery negative lead.
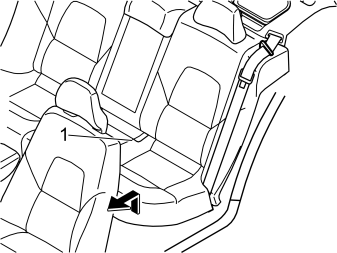
- Remove the seat cushion (1). First pull the front edge of the seat cushion up. Pull the cushion forwards. Then lift the seat cushion out.
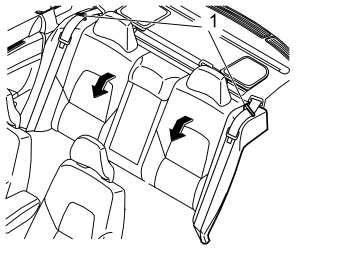
- Fold both the rear backrests forward
- Remove the seat belts from the guides (1).
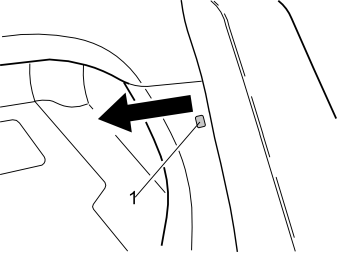
- Remove the clip (1) at the side of the left-hand side cushion
- Pull the top edge of the left-hand front cargo compartment panel out to access the upper lock for the side cushion
- Repeat the operation on the right-hand side.
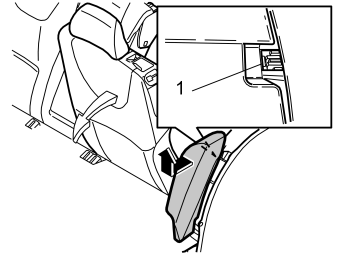
- Remove the left-hand side cushion. First press in the catches (1) at the top edge of the reverse of the side cushion. Pull the cushion out slightly
- Grasp the cushion using both hands. Twist anti-clockwise until the catches on the inside release
- Remove the side cushion. First pull out the upper edge of the side cushion. Then pull upwards
- Repeat the operation on the other side.
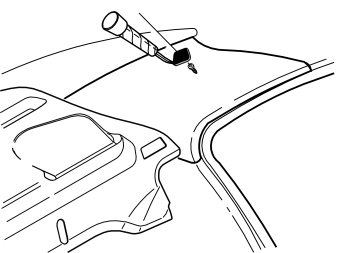
- Remove the cover and the screw for the left-hand C-post panel
- Repeat the operation on the other side.
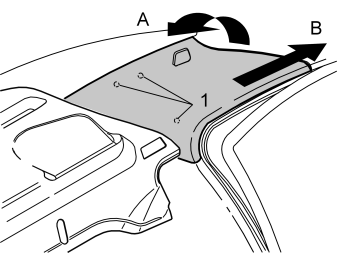
- Remove the rubber strip at the rear edge on the left-hand rear door frame
- Grasp the top edge of the C post panel. Pull (A) the panel inwards until the three clips (1) release
- Then pull (B) the panel straight up. Place the panel to one side
- Repeat the operation on the other side.
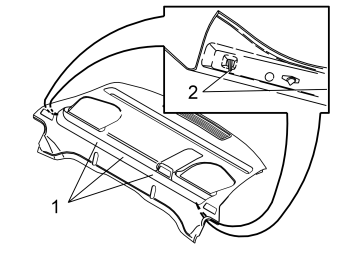
- Carefully lift the front edge of the parcel shelf panel until the clips (1) release
- Lift up the panel further until the locating pins (2) release from their holes
- Pull out the parcel shelf. Lay the parcel shelf on the folded backrests.
Cargo compartment preparations
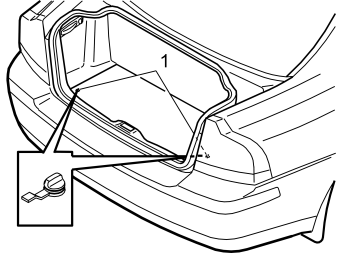
- Remove the cargo compartment carpet at the rear edge. First turn the two handles (1) 90°.
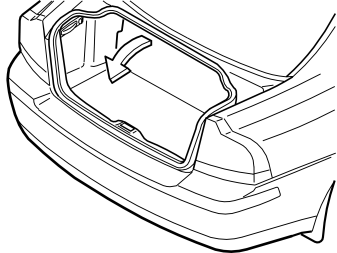
- Pull up the front of the cargo compartment carpet. Fold the front half back over the rear half of the cargo compartment carpet.
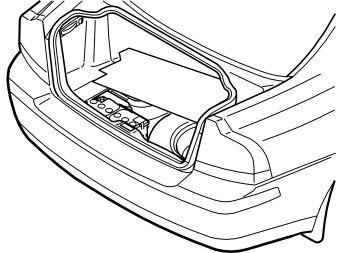
- Slide the entire cargo compartment carpet forward slightly. Twist slightly to remove the carpet through the tailgate opening
- Remove the cargo compartment carpet.
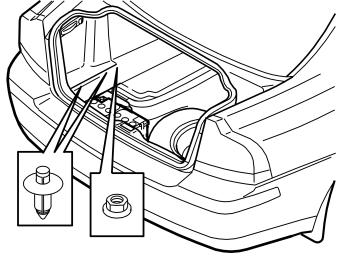
- Press the centre of the clips at the lower edge of the foldable side panel on the left-hand side until they click
- Remove the two clips
- Remove the plastic nut at the front lower edge of the side panel.
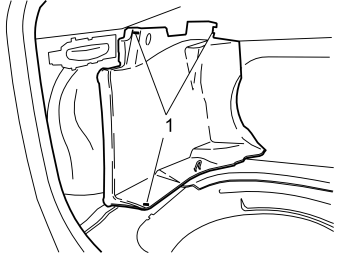
Remove:
- the clips (1) in the left front side panel in the cargo compartment
- the panel. Place the panel to one side.
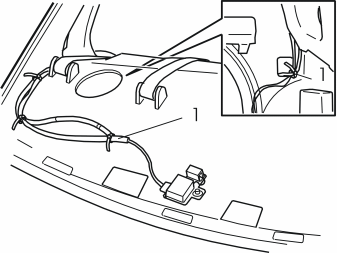
- Remove the cable (1) between the GPS aerial on the parcel shelf and the DVD reader (the black single cable in the rear edge of the DVD reader)
- Place the cable to one side. The amplifier will not be reused. There is a new cable harness in the kit.
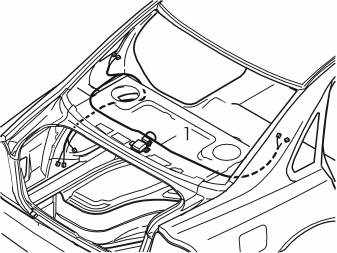
- Route the new cable harness (1) in the same way as the old harness
- Position the connectors for the cable harness at the C-posts and at the rear edge of the wheel house. See the illustration
- Press the cable harness into place in the parcel shelf with the existing clips
- Connect the connector to the GPS aerial.
Applies to Japan
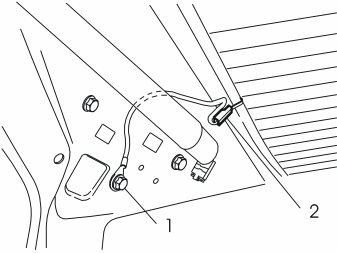
- Remove the ground lead for the rear windscreen. First remove the screw (1). Remove the connector (2) from the rear windscreen at the right-hand C-post
- Place the ground lead and the screw to one side. They will not be reused.
Applies to Europe
- Remove the screw (1). Remove the ground lead from the C-post. A new screw is included in the kit.
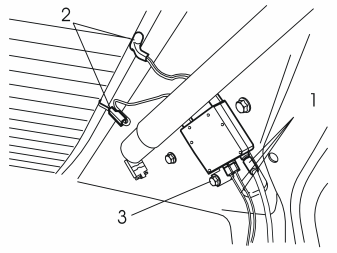
- Remove the cables (1, 2) for the existing aerial amplifier on the left C-post
- Remove the screw (3). Remove the aerial amplifier
- Place the aerial amplifier to one side. The amplifier will not be reused.
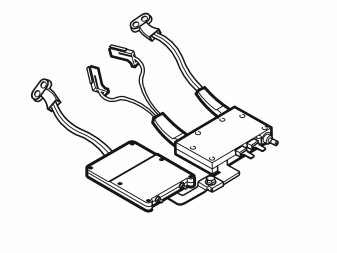
- Connect the new TV aerial amplifier (blue) to the new AM/FM aerial amplifier (blue) from the kit.
Applies to Japan
- Carry out the same operation with the new green aerial amplifiers.
Applies to Europe
- For the EU only use the small green TV aerial amplifier.
Applies to Japan
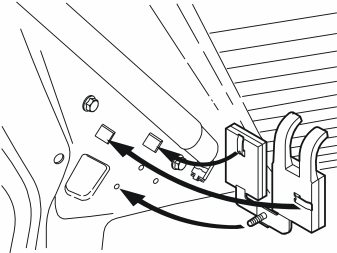
- Install the new AM/MPX and TV aerial amplifiers (green) on the right C-post. Ensure that the aerial amplifier guide lugs engage in the two rectangular holes and in the small round holes
- Tighten the amplifiers
- Repeat the operation for the left-hand AM/FM and TV aerial amplifier (blue).
Applies to Europe
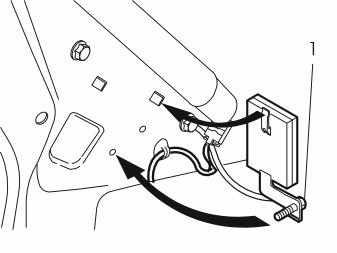
- Install the small green TV aerial amplifier for the right hand C post in the rear position with the ground lead cable terminal on top. Tighten the aerial amplifier
- Ensure that the guide lugs for the amplifier are in their holes
- Repeat the operation for the left-hand AM/FM and TV aerial amplifier (blue).
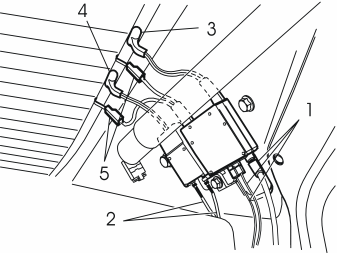
- Reinstall the cables (1) (that were removed earlier) in the front aerial amplifier on the left C-post
- Connect the two single cables (2) (previously routed) to the rear aerial amplifier on the left C-post
- Connect the cables (3, 4, 5) to the connectors on the rear windscreen as illustrated.
Applies to Japan
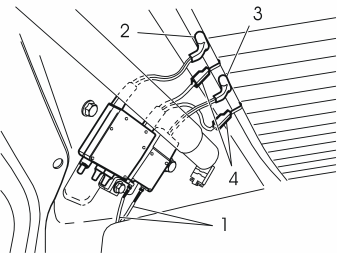
- Connect the two single cables (1) (previously routed) to the rearmost of the two amplifiers on the right C-post
- Connect the cables (2, 3, 4) to the connectors on the rear windscreen as illustrated.
Applies to Europe
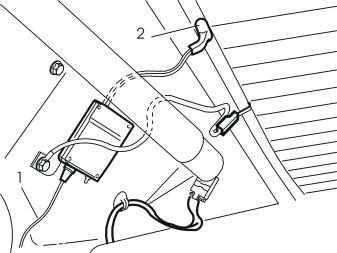
- Connect the single cable (1) (previously routed) to the front terminal in the TV aerial amplifier on the right C-post as illustrated
- Connect the cables (2) to the connectors on the rear windscreen as illustrated.
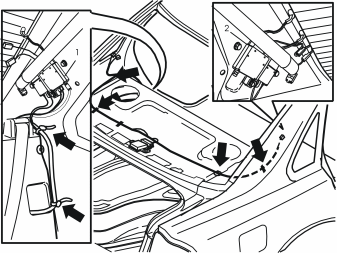
- Clamp the cables on the parcel shelf, at the C-post and at the lead-in to the cargo compartment. See the arrows in the illustration.
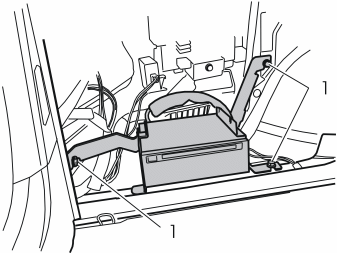
- Remove the three screws (1) holding the DVD reader and the bracket at the body
- Carefully pull the unit outwards slightly. Position the unit in front of the battery.
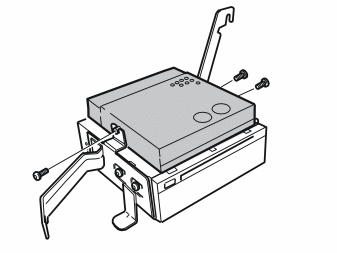
- Tighten the TV tuner on the bracket using the three screws from the kit.
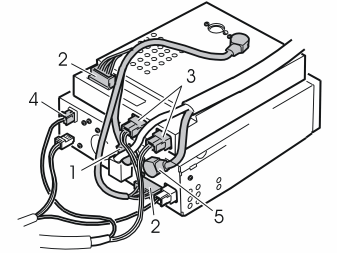
- Connect the DIN cable (1) and the cable with the green connectors (2) from the kit between the DVD reader and the TV tuner
- Connect the two connectors (3) from the aerial amplifiers at the C-posts to the TV tuner
- Connect the new cable (4) from the GPS aerial.
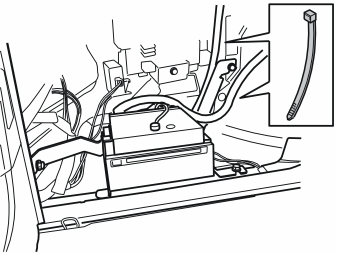
- Reinstall the DVD reader with the TV tuner. Tighten using the three screws. Tighten to 10 Nm (7.5 lbf.ft.)
- Secure the wiring at the DVD reader / TV tuner using a tie strap from the kit.
Reinstall:
- the parcel shelf panel
- the C-post panels
- the side cushions
- the backrests
- the seat cushion
- the panels in the cargo compartment.
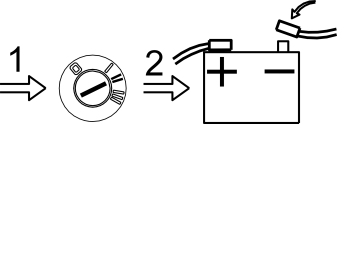
- Turn the ignition key to position II
- Reconnect the battery negative lead
- Reinstall the cargo compartment carpet
- Program the software according to the service information in VIDA.