Применимость
| Модель | Двигатель | Год |
|---|---|---|
| V70 (08-) | — | 2008–2011 |
| XC70 (08-) | — | 2008–2011 |
Примечание: When installing Digital TV-receiver on car with existing RSE-system.
Start by changing the cable harness for the tunnel console. See installation instructions Multimedia monitor with DVD, Dual screen.
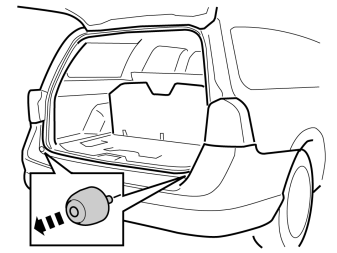
- Unscrew the two rubber stops.
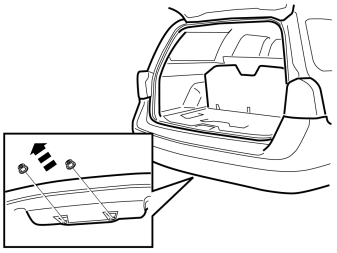
- Remove the two nuts.
Steps 3–5 apply to the V70
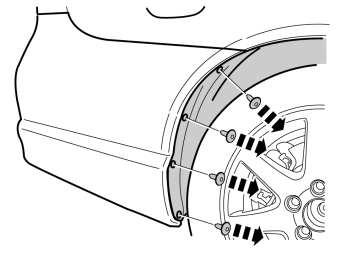
- Remove the four screws on both sides.
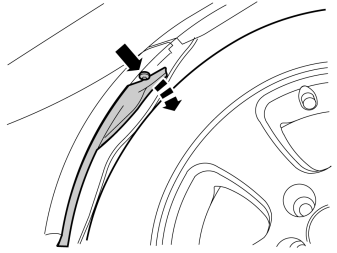
- Place the fender liner to one side and remove the screw at the upper edge of the cover on both sides.
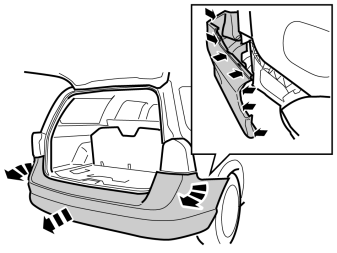
- Carefully pull of the ends of the bumper cover from the body on both sides. They are attached with hooks at the upper edge of the ends and at the lower edge of the tail lights.
- Pull the bumper cover away from the body, it is secured by seven guides at the upper edge of the longer side.
Примечание: It is recommended that two people carry out this step to prevent damaging the bumper cover.
- Place the bumper cover on a suitable surface.
Steps 6—7 apply to the XC70
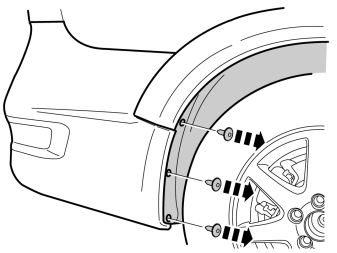
- Remove the three screws on both sides.
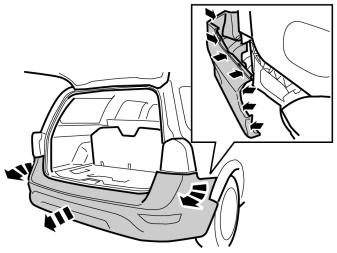
- Carefully pull off the ends of the bumper cover on both sides. They are secured by hooks at the top edge of the ends and at the lower edge of the rear lights.
- Pull the bumper cover away from the body, it is secured by seven guides at the upper edge of the longer side.
Примечание: It is recommended that two people carry out this step to prevent damaging the bumper cover.
- Place the bumper cover on a suitable surface.
Applies to all models
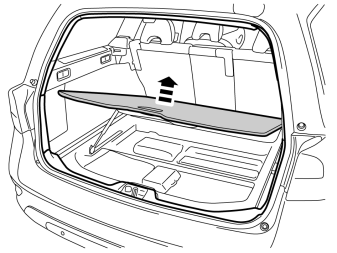
- Fold up the floor hatch.
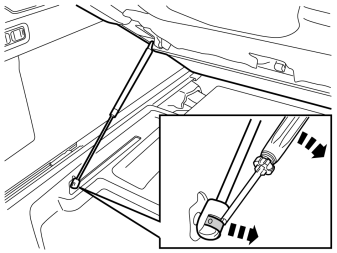
- Detach the clip on the gas damper using a small screwdriver. Unhook the damper.
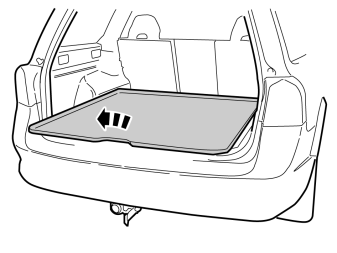
- Lift out the floor hatch.
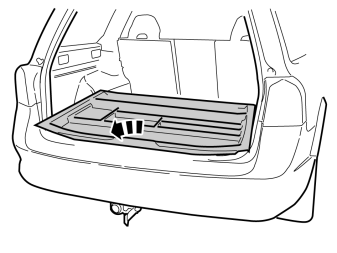
- Lift out the storage box.
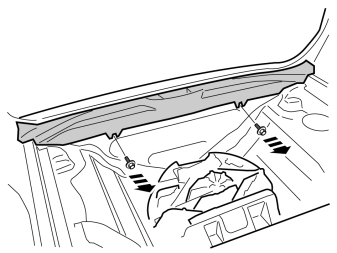
- Remove the two screws on the tailgate sill trim panel.
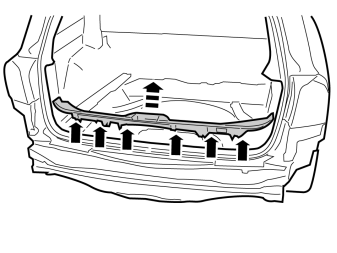
- Carefully pull off the panel, it is fastened by six clips.
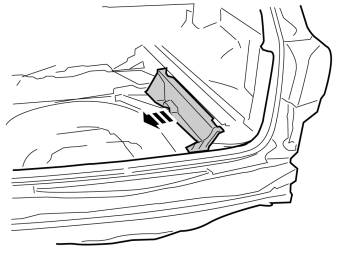
- Remove the panel.
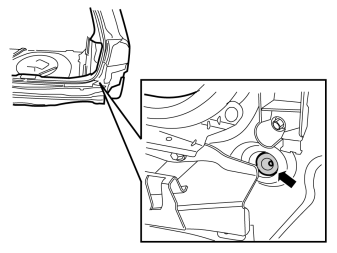
- Remove the rubber plug.
Steps 16-19 apply to car with parking assistance
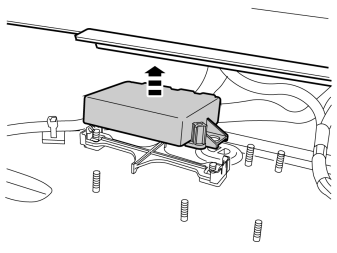
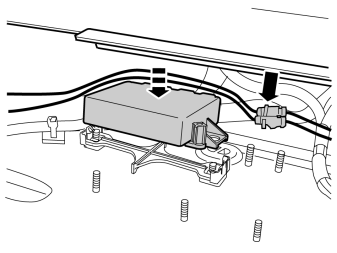
- Remove the control module from its holder.
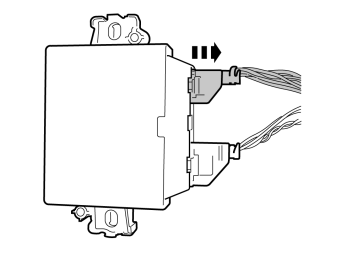
- Unplug the connector.
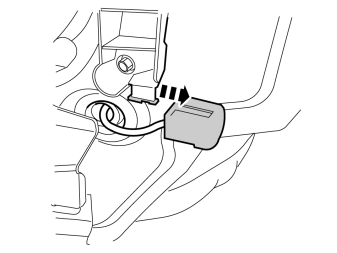
- Unhook the connector.
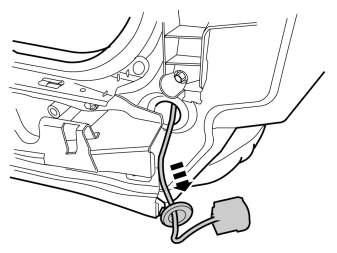
- Remove the rubber bushing with cable harness.
Applies to all models
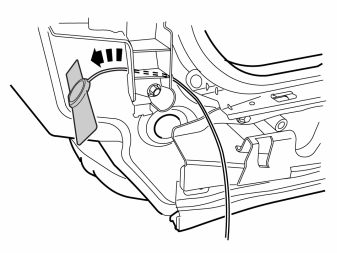
- Get antenna for left side (long cable) and unplug the grey connector. Route antenna inside plastic console under light.
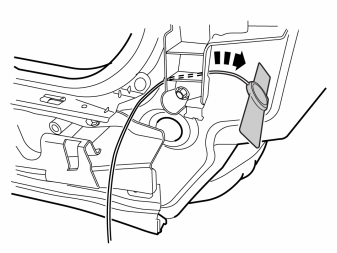
- Get antenna for right side (short cable) and unplug the grey connector. Route antenna inside plastic console under light.
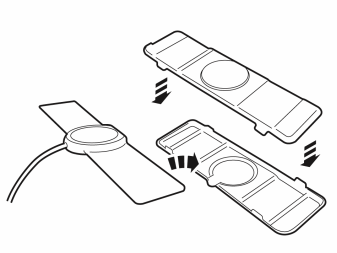
- Place antenna in casing and cable in slot.
- Snap together the casing's top and bottom part.
- Carried out twice.
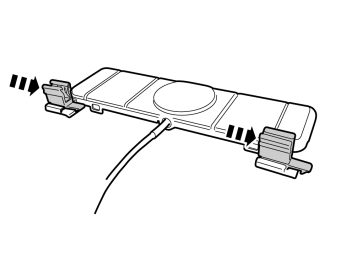
- Install holder on casing. Carried out twice.
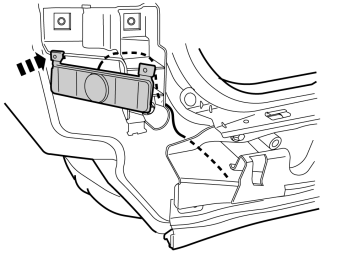
- Press on the casing's holder in the console under the tail light. Carried out twice.
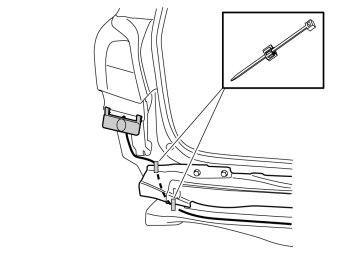
- Place antenna cable between body and bumper rail, out through the hole and along the bumper rail's outside and in through the hole on the right side.
- Fasten cable tie with clips on the bumper rail.
- Clamp down the cable.
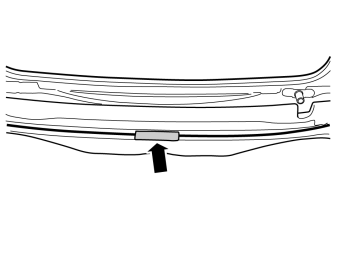
- Install felt tape over the cable.
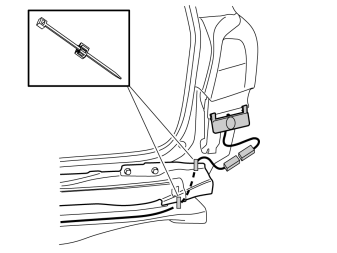
- Fasten cable tie with clips on the bumper rail.
- Clamp down the cable.
Applies to car with parking assistance
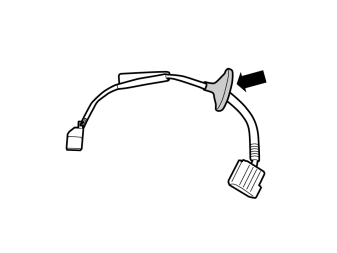
- Cut away the rubber bushing on the cable harness.
Applies to all models
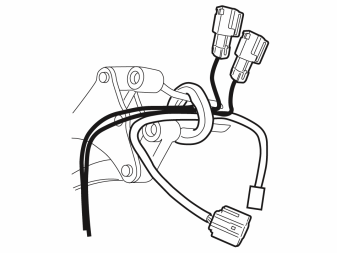
- Get new rubber bushing from the kit and open up the rubber bushing with expander pliers.
- Insert antenna cables through opened hole in rubber bushing so much that they are not stretched when the rubber bushing is to be installed.
Applies to car with parking assistance
- Insert the cable harness. Check that it ends up in its original place.
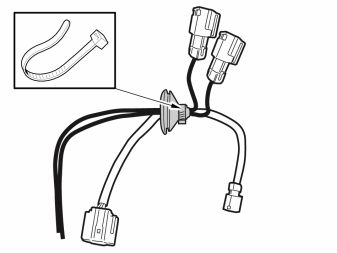
- Install cable tie around the collar on the rubber bushing so that it closes tightly around the cables.
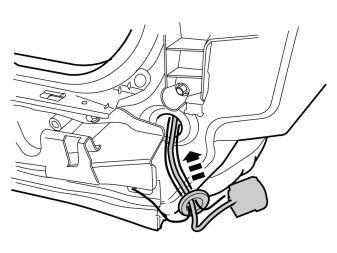
- Insert antenna cables through hole in body and into luggage compartment.
- Fasten rubber bushing.
- Check that the rubber bushing's flanges close tight against the body hole.
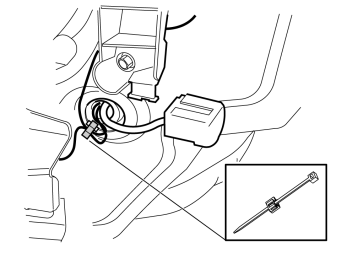
- Install cable tie with clips on sheet metal flange.
- Clamp down antenna cables.
Steps 33-34 apply to cars with parking assistance
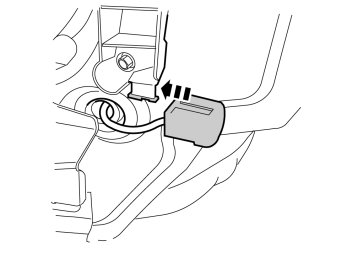
- Hook the connector onto the rail.
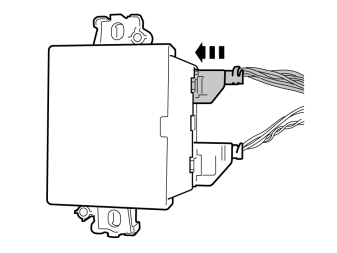
- Plug in the connector.
Applies to all models
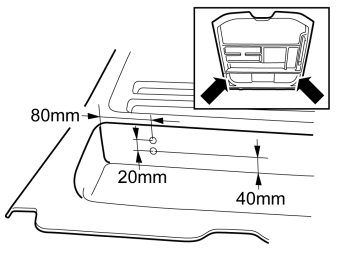
- Get storage box and mark in front storage box on both sides, as shown.
- Drill 5 mm hole acc. to markings.
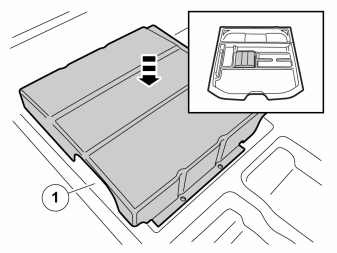
- Place protective cover on the storage box.
- The slot (1) on the casing shall face backwards.
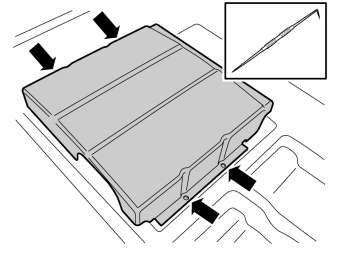
- Mark with a scribe.
- Remove the cover.
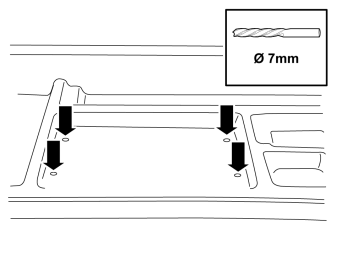
- Drill in the markings using a 7 mm drill bit.
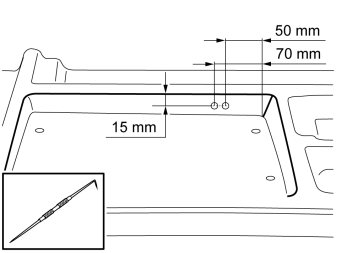
- Mark with a scribe as shown.
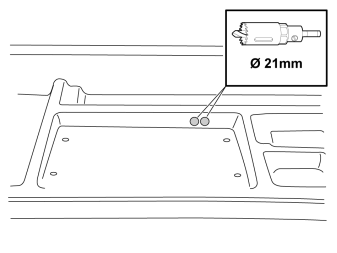
- Drill in the markings using a 3 mm drill bit.
- Drill in the markings using a 21 mm hole-cutting saw.
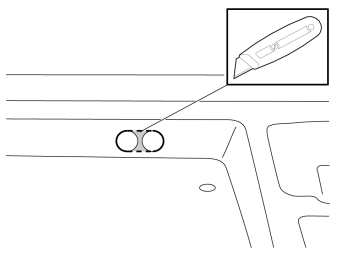
- Cut out between the drilled holed.
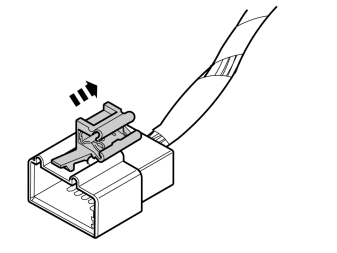
- Get the cable harness from the kit.
- Unhook the clip on the connector.
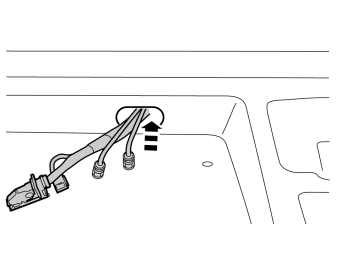
- Route the cable harness through the hole.
- Route the two antenna cables through the hole.
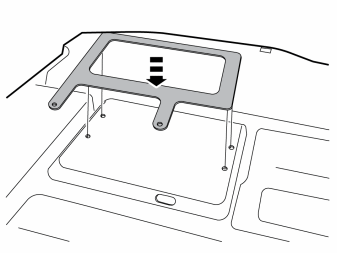
- Install the bottom console so that its studs pass through the hole in the box.
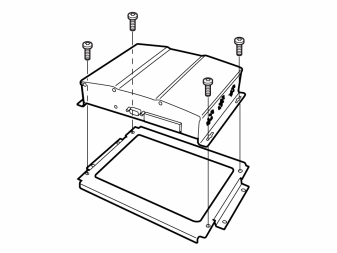
- Get TV-tuner, console, and four M5x8 screws from the kit.
- Tighten down tuner on the console.
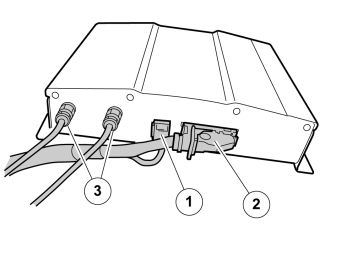
- Plug in connectors in order, as shown.
Примечание: Tighten the nuts on the antenna cables' contacts as much as possible with your fingers while the black part of the contact is held down. Then tighten the nuts approx. 1 complete turn with a wrench.
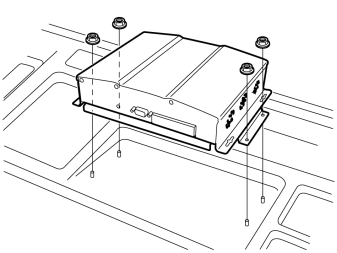
- Place tuner with console on the bottom console's studs.
- Tighten down with four nuts.
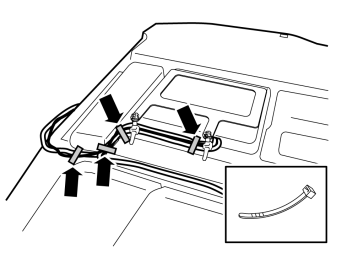
- Fasten the antenna cables in the cable harness with three cable ties.
- Fasten cable harnesses with a cable tie in the drilled holes.
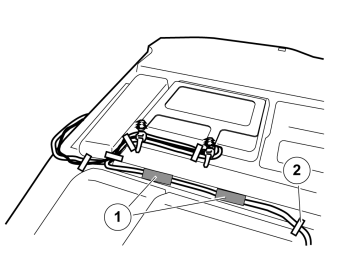
- Fasten the antenna cables with two pieces of tape (1) and a cable tie (2) in the drilled holes.
Steps 50-51 apply to car with integrated child seat
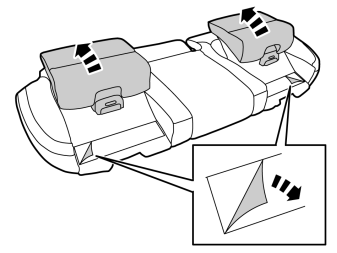
- Fold up the seats.
- Fold up the corners of the instruction.
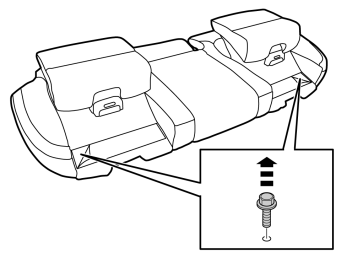
- Remove the two screws.
Applies to all models
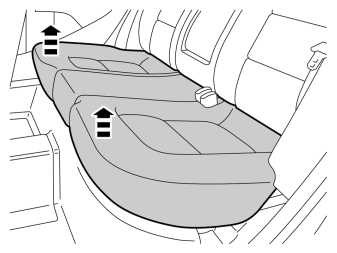
- Remove the seat cushion by pulling it up at the front edge on both sides, it is fastened by two holders on the underside.
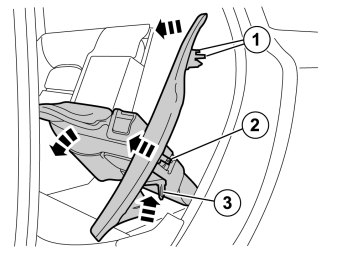
- Fold the left-hand backrest forward.
- Remove the side cushion on the left by first pulling it backwards at the upper edge until the hooks (1) release. Then pull it inwards slightly until the hook (2) releases, and upwards until the locating pin (3) disengages from the mounting at the rear edge.
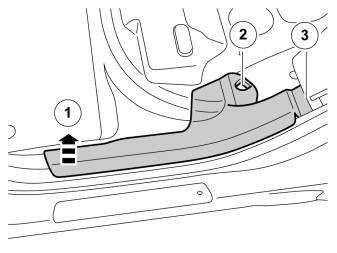
- Remove the rear sill trim panel by pulling it up at the front edge (1) and then unhooking it from the clip (2).
- Pull in the panel so that the pawl (3) comes loose.
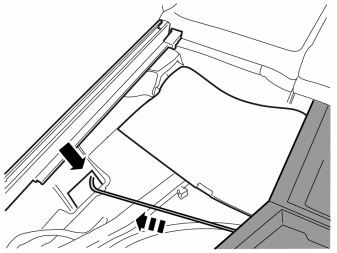
- Get the storage box and route the cable harness through the reinforcement plate and continue forwards.
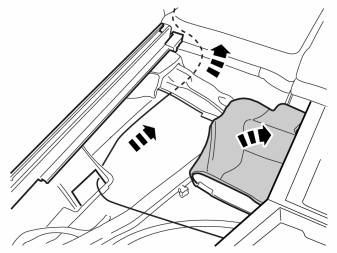
- Fold aside the insulation.
- Route the cable harness under the reinforcement plate and forward in the car.
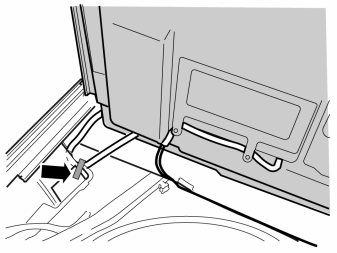
- Place the storage box in its correct position.
- Fold up the rear part.
- Fasten the cable harness' clips on the reinforcement plate.
Illustration A
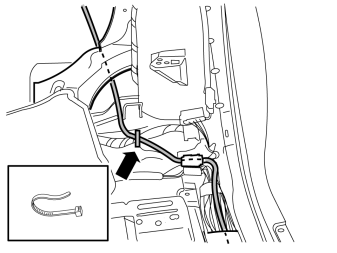
- Route the cable harness as illustrated.
- Secure the cable harness with a tie strap..
Illustration B
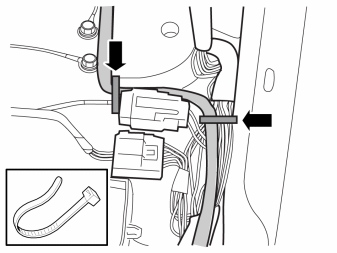
- Fasten cable harness, as shown, with two cable ties.
Illustration C
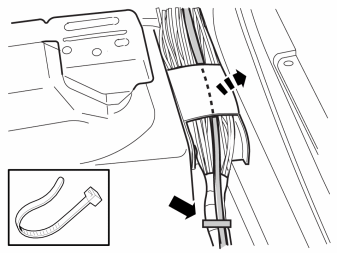
- Fold up the cover.
- Route the cable harness as illustrated.
- Fasten with a cable tie.
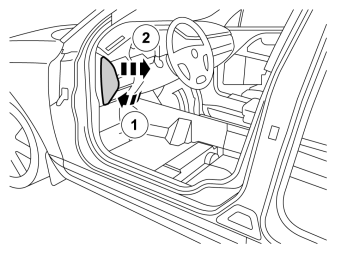
- Remove the left end of the dashboard by first prying it (1) with a weatherstrip tool until the two pawls release, then pull it off backwards (2)
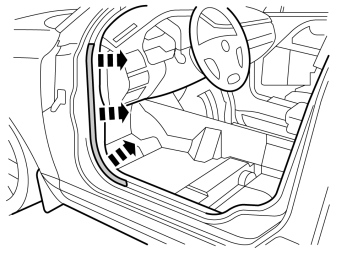
- Remove the sealing strip.
Illustration A
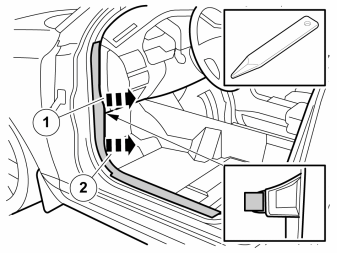
- Pull the sill panel backwards with a weatherstrip tool so that the two clips release.
Примечание: The front and upper sill panel shall be removed and installed as a unit.
Illustration B
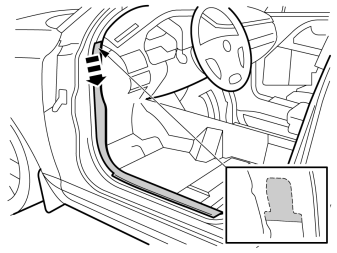
- Unhook the panel at the top.
Illustration C
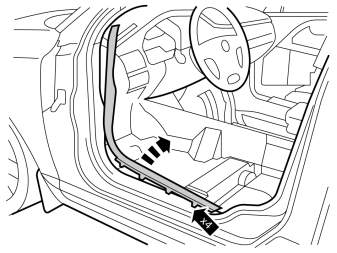
- Pull up so that the four clips release.
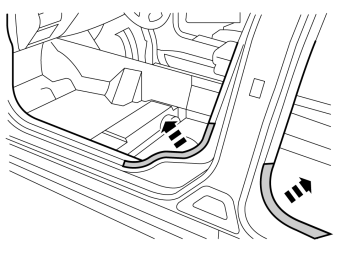
- Remove the sealing strips.
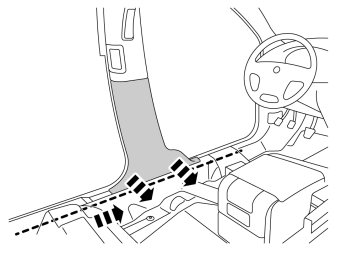
- Pull out the B post panel at the lower edge until the two clips release.
- Continue to route the cable harness inside the floor mat and forward in the car.
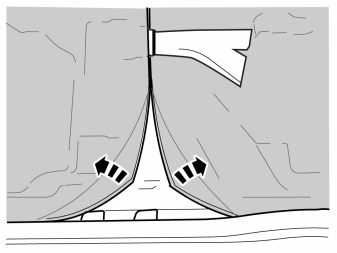
- Tilt the seat back.
- Fold up the floor mat.
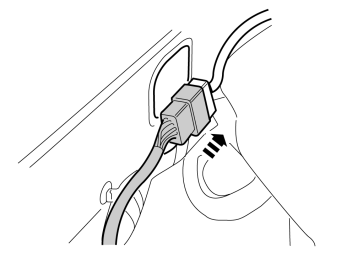
- Plug in the connector to the cable harness from the RSE-system and press on the connector's clips on the sheet metal edge.
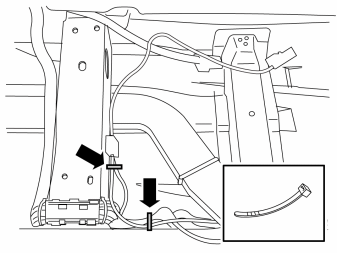
- Fasten the cable harness with two cable ties.
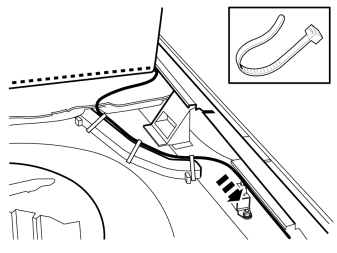
- Fold up the storage box in the trunk.
- Route the antenna cables along cable duct.
- Fasten with three small cable ties.
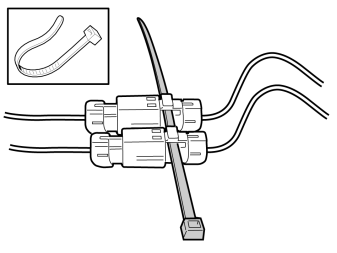
- Plug in the two connectors for antenna cable.
- Insert a cable tie through the eyes on the connectors.
- Fasten the cable tie in the car's cable harness.
Обсуждение и оценка
0Пока нет комментариев. Будьте первым.