Применимость
| Модель | Двигатель | Год |
|---|---|---|
| V70 (08-) | — | 2008–2011 |
| XC70 (08-) | — | 2008–2011 |
Примечание: Some steps in these installation instructions are presented with illustration only.
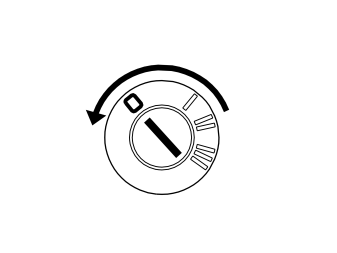
Installing the right-hand trim panel
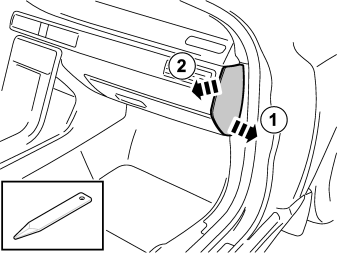
- Prize away the holder for the switch at the side at the lower edge.
- Then prize at the upper edge while coaxing and pulling it out.
Примечание: It is firmly held in place, so take care not to damage the switch with bracket.
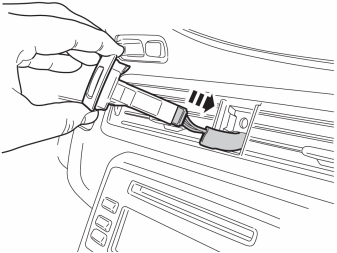
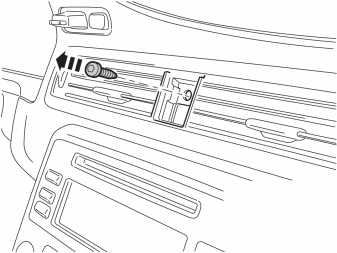
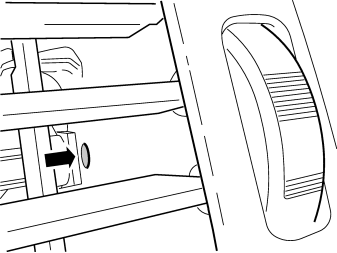
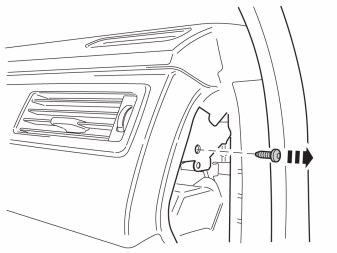
- Locate the holes. Pull the panel with air vents straight out.
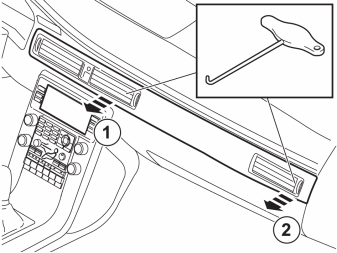
- Use special tool P/N 9512943.
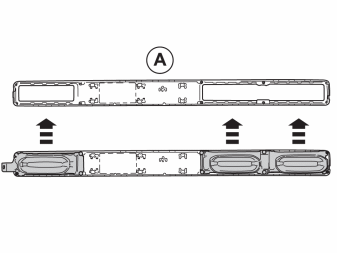
- Transfer the air vents and screws over to the new trim panel.
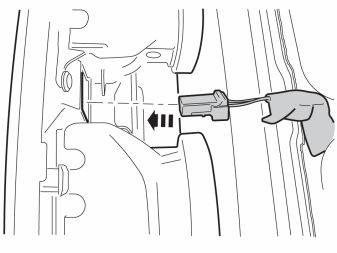
- Thread the connector through the trim panel.
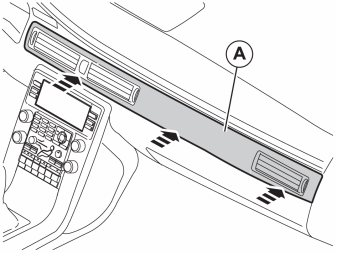
- Press in the trim panel.
Install:
- the screws
- the end face panel
- the switch with holder.
Installing the left-hand trim panel
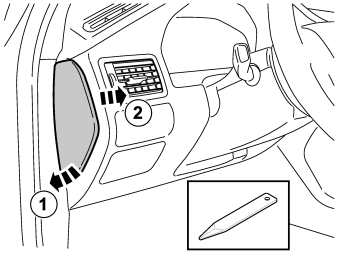
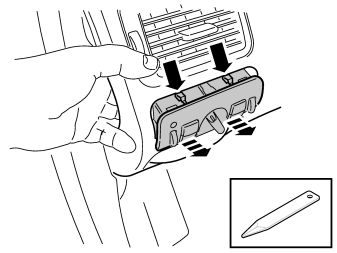
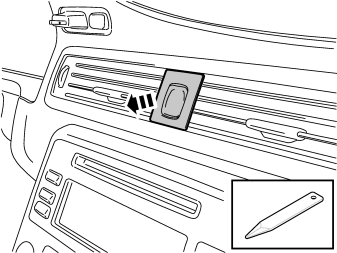
- Press the lighting keypad out of the dashboard. It is held in place with two locking tabs on the top side and two on the underside. Use a headlining tool as necessary.
Примечание: Be careful with the dashboard as it may be difficult to remove the keypad.
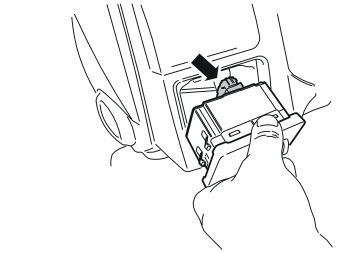
- Disconnect the connector from the keypad and place to one side.
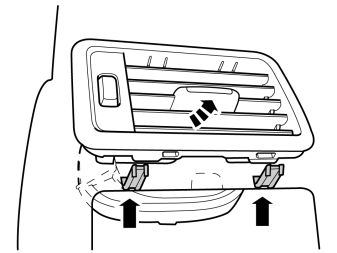
- Press the two hooks up on the underneath of the left-hand air vent, turn out the lower part and disconnect the vent from the air duct on the inside.
Примечание: The vent is also secured by hooks on the top, so carefully work the vent out.
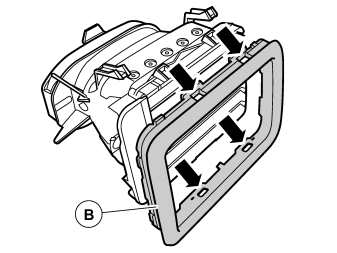
- Carefully pry off the panel from the vent and place it to one side. It is secured by four hooks.
- Take a new panel from the kit and press into the vent.
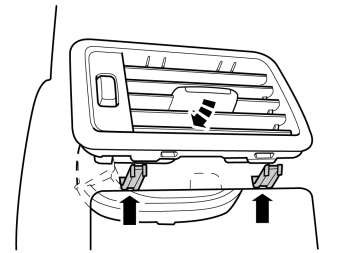
- Press the vent securely into the dashboard and ensure that it fits in the air duct and that the hooks engage (4 pcs).
Installing the gear lever panel.
Steps 18-22 apply to cars with manual transmissions
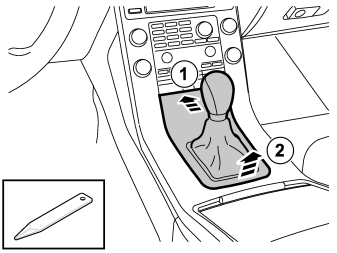
- Press in the front edge of the panel to increase the space at the rear edge.
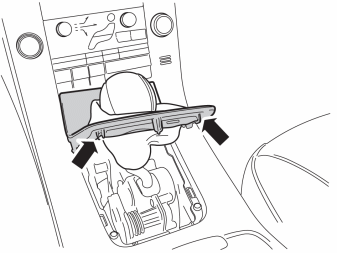
- Using a weatherstrip tool, prize so that the catches loosen from the gaiter and press the gaiter's inner frame at the same time. Remove the panel.
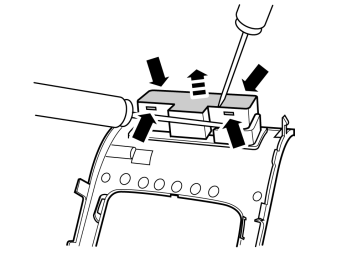
Applies to cars with switches at the front edge of the gear lever selector panel
- Carefully pry up the sides of the switch's holder so that the four lugs release.
- Remove the switch.
- Press the switch onto the new gear selector lever panel.
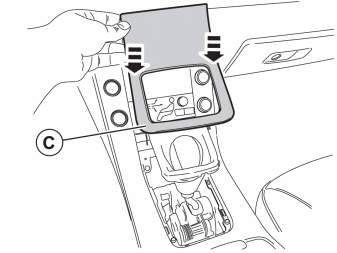
- Take the panel, ensure that the four hooks engage the inner frame of the boot.
Illustration A
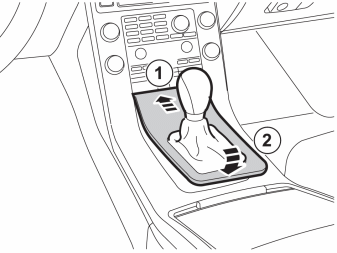
- Install the new gear selector panel.
Примечание: All panels except the aluminium panel have two hooks in the upper edge by the sides; therefore, take care not to damage surrounding components when installing.
Illustration B
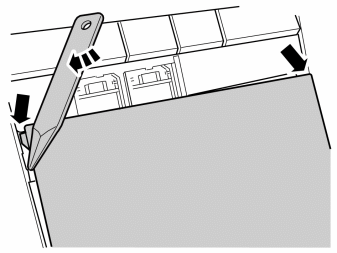
- Position one hook on one side.
- Carefully pry using a weatherstrip tool between the panel and centre stack on the other side. Push the panel down so that the last hook can be positioned.
Steps 23-26 apply to cars with automatic transmission
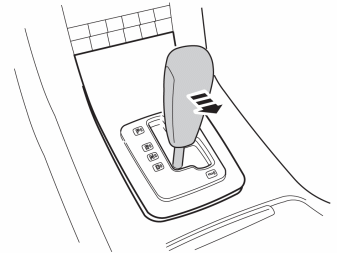
- Move the gear selector to position D.
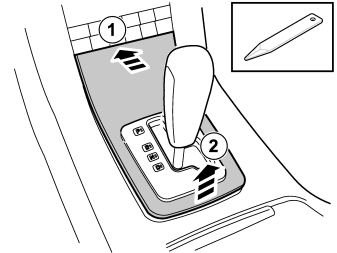
- Press in the front edge of the panel to increase the space at the rear edge. Remove the panel.
Applies to cars with switches at the front edge of the gear lever selector panel
- Carefully pry up the sides of the switch's holder so that the four lugs release.
- Pull off the switch.
- Press the switch onto the new gear selector lever panel.
Illustration A
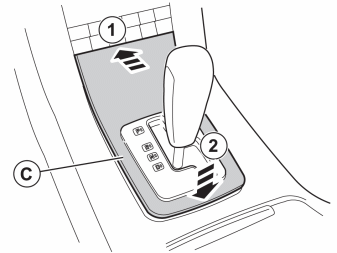
- Install the new gear selector panel.
Примечание: All panels except the aluminium panel have two hooks in the upper edge by the sides; therefore, take care not to damage surrounding components when installing.
Illustration B
- Position one hook on one side.
- Carefully pry using a weatherstrip tool between the panel and centre stack on the other side. Push the panel down so that the last hook can be positioned.