Применимость
| Модель | Двигатель | Год |
|---|---|---|
| C70 (06-) | — | 2006–2013 |
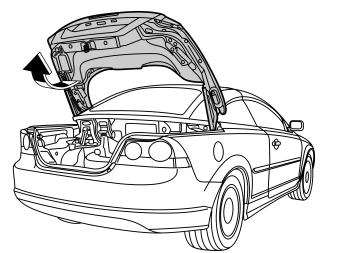
- Open the boot lid.
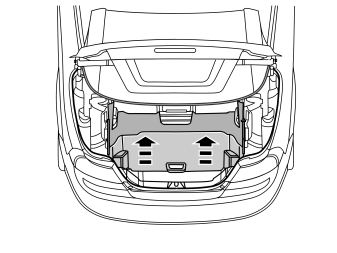
- Lift up the cargo compartment's divider.
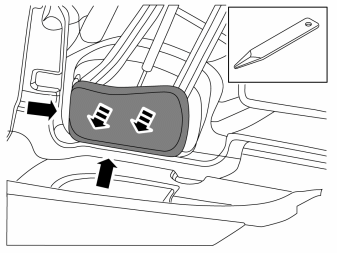
- Remove the covers on each side of the divider.
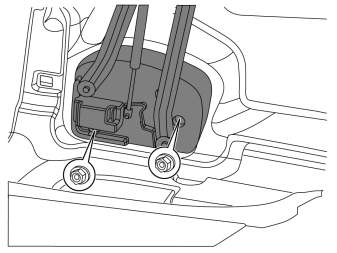
- Screw out the two nuts 4 revolutions, on each side of the divider.
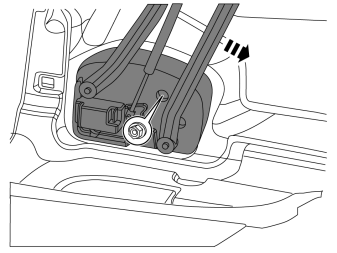
- Lower the divider slightly.
- Unscrew the third nut on each side of the divider four turns.
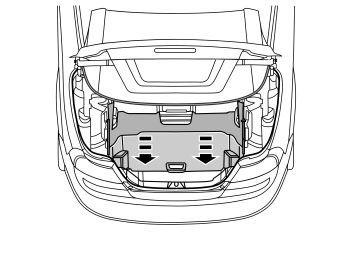
- Lower the divider completely.
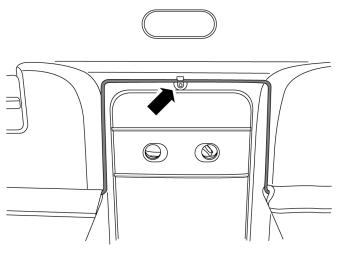
- Detach the wire frame from the clip.
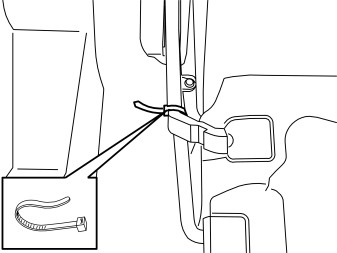
- Use a cable tie or the like to lock the divider's two arms on the right and left side.
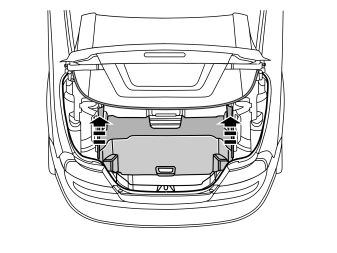
- Remove the divider by gripping the arms and lifting up.
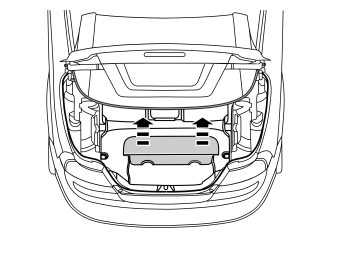
Remove:
- the toolbox cover.
- the spare wheel, if present.
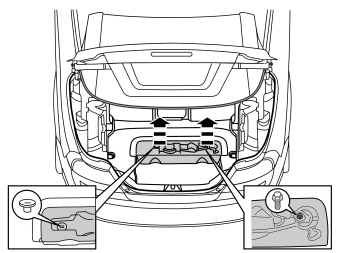
- Take the tools out from the toolbox.
Remove:
- the clip.
- the screw.
- the toolbox.
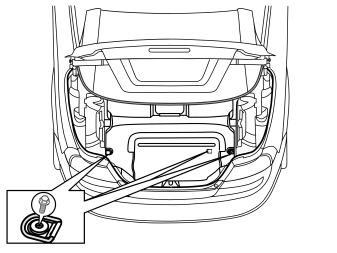
- Remove the three screws and the load retaining eyelets from the floor.
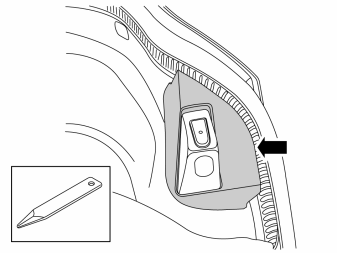
- Remove the cover from the trunk lid stop. Use a weatherstrip tool to pry between the cover and the stop to release the catches.
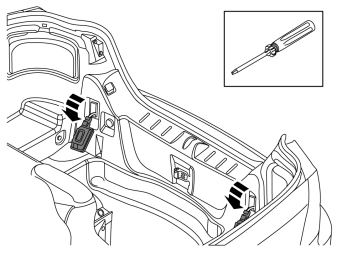
- Remove the two lamps by pressing in the two catches in the top edge using a screwdriver.
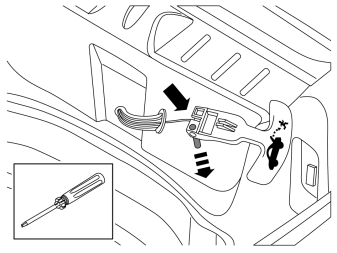
Applies to cars with emergency opening handle in the cargo compartment
- Remove the boot lid's emergency opening handle by pressing out the pin at the eye and then unhooking the wire.
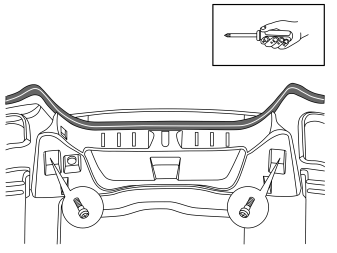
- Remove the two screws in the sill moulding.
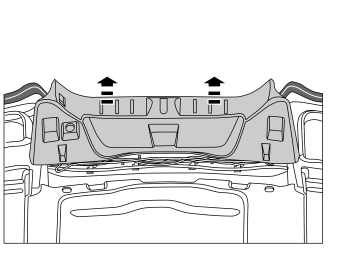
- Remove the sill moulding by pulling it up until the clips release. Move the sill moulding to one side.
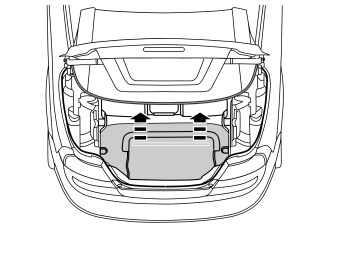
- Remove the carpet in the cargo compartment.
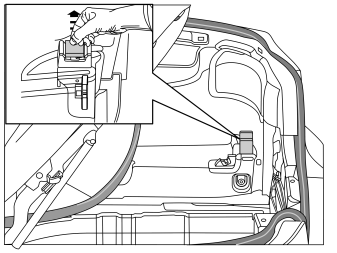
- Remove the rubber stop on the roof's stop bracket.
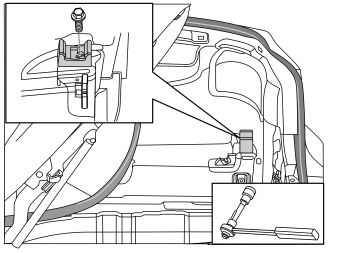
- Mark out the stop bracket for the roof in relation to the screw.
- Remove the screw and the roof's stop bracket.
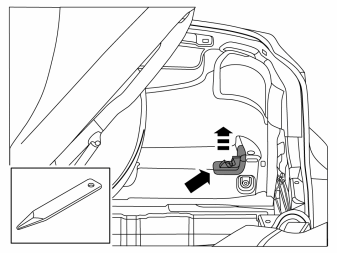
- Remove the load divider lock by using a weatherstrip tool to pry between the carpet and lock.
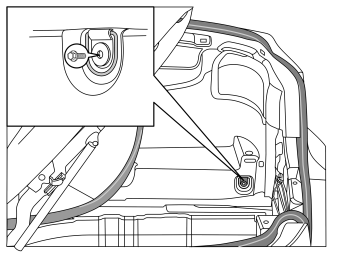
- Remove the screw and the load retaining eyelet on the right-hand side.
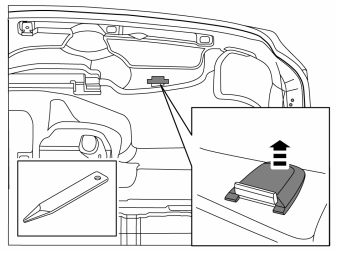
- Remove the stop brace cover.
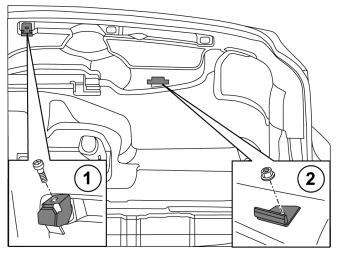
- Mark out the stop braces for the roof in relation to the screws and nuts on the right side.
- Remove the screw, nut and the roof's stop braces.
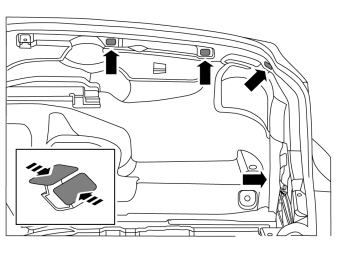
- Undo the four clips on the side panel.
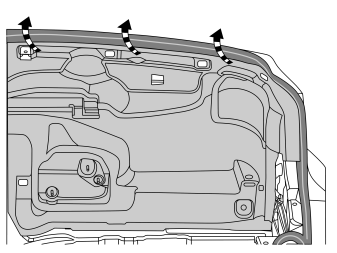
- Remove the side panel by unhooking it from the stop lug at the front edge and the pulling outward and upward so that it releases from the sealing strip.
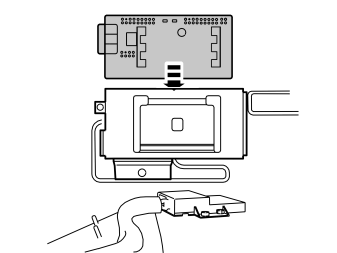
- Install the control module by fitting it onto the bracket's rail
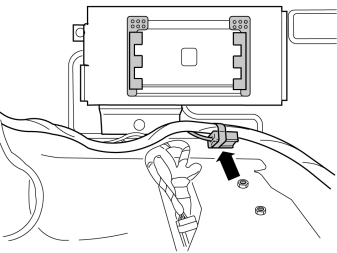
- Locate the 2-pin gray connector that is taped to the vehicle's standard cable harness.
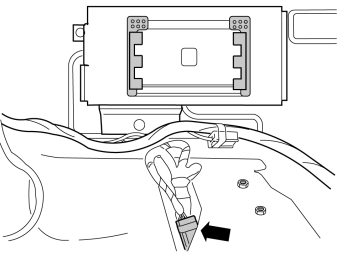
Applies to cars with parking assistance
- Locate the 4-pin green connector that is taped to the parking assistance cable harness. Connect this to the adapter wiring.
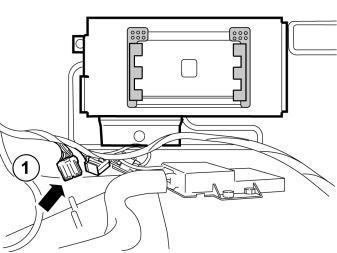
Applies to cars with accessory electronic modules (AEM)
- Locate the 4-pin green connector from the accessory electronic module (AEM) taped to the vehicle's standard cable harness.
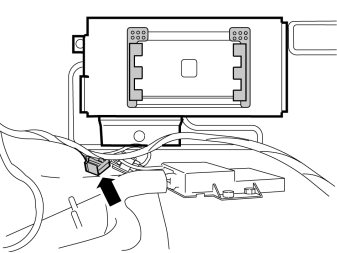
Applies to others
- Locate the 4-pin green connector that is taped to the vehicle's standard cable harness.
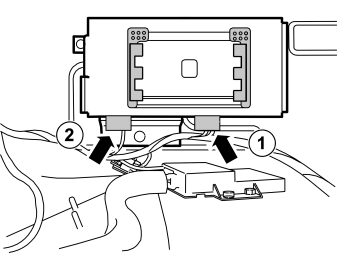
- Connect the connectors to the control module.
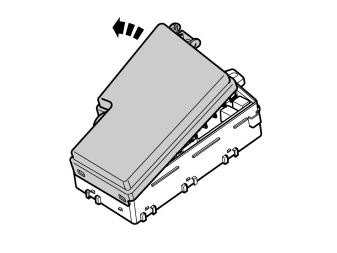
Applies to C70s manufactured after w0720
- Pull up the catch on the cover on the fuse box in the engine compartment. Pull up the cover and remove it.
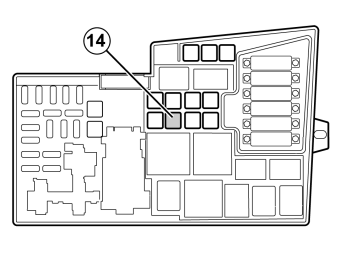
Applies to C70s manufactured after w0720
- Take a 40A fuse from the kit and install it in position 14 in fuse box.
- Reinstall the cover.
Reinstall:
- the side panel.
- stops and attaching braces.
- the cargo compartment carpeting.
- the sill panel with lighting.
- any emergency release.
- the stop for the boot lid.
- the load retaining eyelets, torque tighten the screws to 24 Nm (17 lbf.ft.).
- the toolbox.
- the divider.
- Download the software for the accessory's function following the service information in VIDA.
Обсуждение и оценка
0Пока нет комментариев. Будьте первым.