Осторожно: This accessory is only possible to install when the car is factory ordered with ultrasonic sensors in the headlining.
Preparations
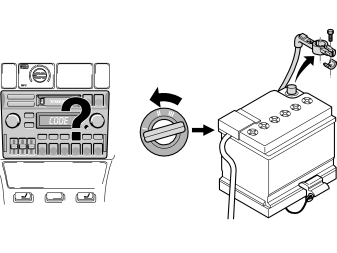
- Make a note of the radio code if an anti-theft coded radio is installed.
- Turn the ignition key to position 0.
- Disconnect the battery negative lead.
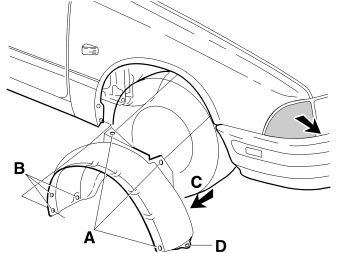
- Remove the right indicator.
- Jack up the car at the front right side.
- Remove the right wheel arch completely: 3 plugs (A), 3 screws (B), screw (C) and screw (D).
Installing the siren
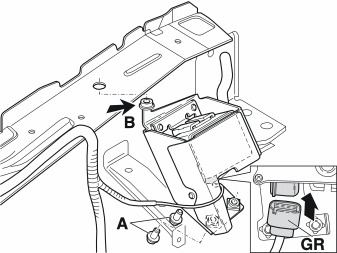
- There is a 6-pin grey (GR) connector under the right front wing taped on the cable harness. Remove the tape and clean the contacts of the connector if necessary.
Примечание: Use grease in the connector (p/n 1161427).
- Connect the connector and position the siren in the body (B) with the rubber plug.
- Install the bolts (A) and tighten to 10 Nm (8 lbf ft).
- Install the wheel arch and the right indicator.
Replacing the bonnet lock
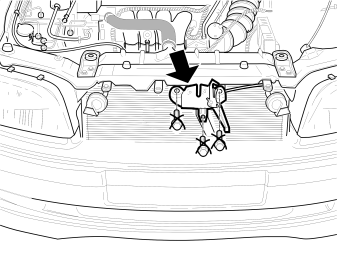
- Remove the three bonnet lock bolts. (They will no longer be used).
- Unlock the cable from the bonnet lock.
- Remove the bonnet lock.
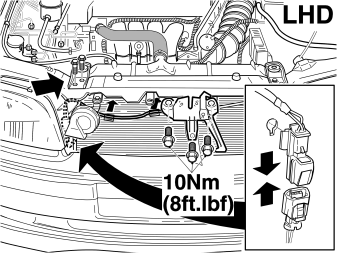
Cars without A/C
- Hook the cable in the new bonnet lock.
- Position the new bonnet lock and install three new bolts, tighten to 10 Nm (8 lbf ft). (Use the new bolts from the set.)
- Remove the radiator bracket on the right side. (In order to facilitate the passage of the bonnet switch connector.)
- Locate the black (SB) 2-pin connector of the bonnet switch on the inside of the front section.
- Connect the connector and fit it to the front section.
- Press the cable harness with the clips into the front section.
- Install the radiator bracket and bolts, tighten to 25 Nm (18 lbf ft).
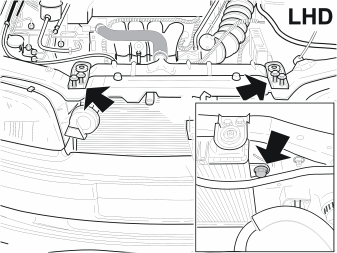
Cars with A/C
- Remove the radiator brackets on the left and right sides.
- Remove the left and right condenser bolts on the inside of the front section.
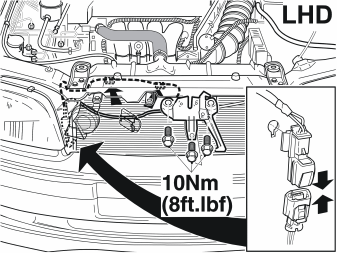
Cars with A/C
- Hook the cable in the new bonnet lock.
- Position the new bonnet lock and install three new bolts, tighten to 10 Nm (8 lbf ft). (Use the new bolts from the set.)
- Locate the black (SB) 2-pin connector of the bonnet switch on the inside of the front section.
- Carefully push the radiator and condenser towards the engine and press the cable harness with the clips into the front section.
- Install the two condenser bolts, tighten to 10 Nm (8 lbf ft).
- Install the radiator brackets and bolts, tighten to 25 Nm (18 lbf ft).
Installing the ultrasonic unit
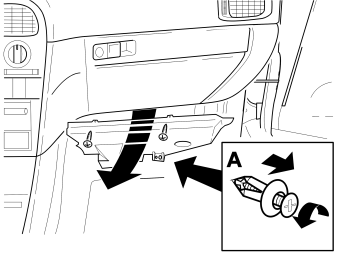
- Remove the screws and clip (A).
- Remove the lower panel on the passenger side.
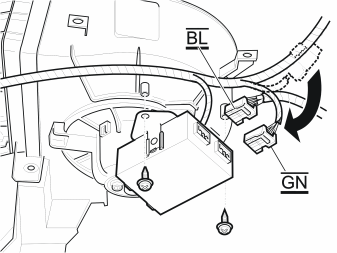
- Connect the blue (BL) connector of the ultrasonic sensor wiring harness to the ultrasonic unit. (The blue (BL) connector is taped back on the blower unit).
- Connect the green (GN) connector of the alarm cable harness to the ultrasonic unit. (The green (GN) connector is taped back on the cable harness dashboard).
- Position the ultrasonic unit on the blower unit and install the two screws.
- Install the lower panel on the passenger side.
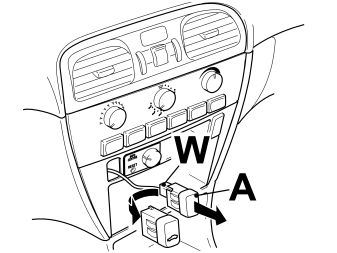
- Remove the radio. (If applicable: Remove the centre console storage compartment).
- Push the cover (A) out from the rear side of the centre console. Remove the white (W) 4-pin connector.
- Connect the connector to the reduced alarm switch and push the switch into the centre console.
Finishing work
- Check the function of the bonnet lock.
- If applicable: Install the centre console compartment and radio.
- Turn the ignition key to position II.
- Ensure that nobody is in the car.
- Connect the battery negative lead.
- Re-enter the radio code if applicable.
- Set the correct time on the clock.
- Program the software, using VIDA service information.
- Check the proper functioning according to the service manual.
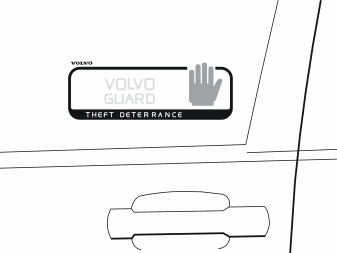
- If permitted, affix the stickers to the glass window panes of the front doors.
Обсуждение и оценка
0Пока нет комментариев. Будьте первым.