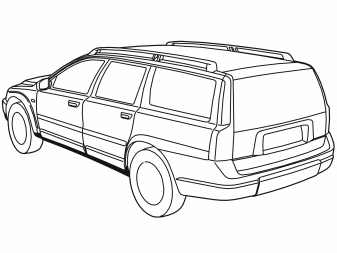
- Clean the door sill panel on the right and left-hand sides where the new panel shall be secured.
- Open the doors and clean the rubber moulding on the door sill panels.
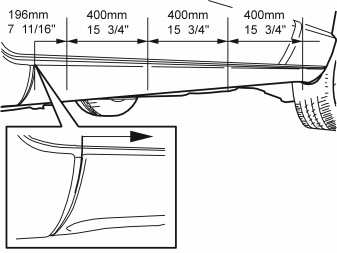
- Measure out from the front edge of the door sill panel (See small illustration) and backward, for drilling the holes for the mounting brackets for the new panel. Mark out the measurements with white chalk.
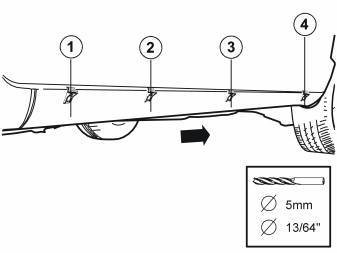
- Take a bag with four mounting brackets from the kit numbered 1 to 4. The brackets must be fitted with the bracket marked 1 furthest forward and then in numerical order backward.Hook them on around the upper edge of the door sill panel and centre them so that the chalk line is in the centre of the holes in the mounting brackets.
- Hold each bracket in turn and drill through the bracket's holes and through the door sill panel with a Ø5 mm (13/64") bit. Remove the bracket and clean the hole edges.
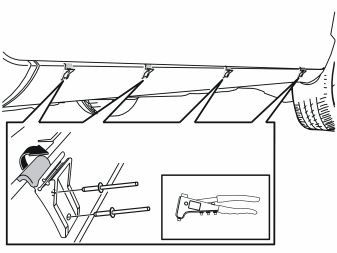
- Take eight pop rivets from the kit and rivet the mounting brackets into the door sill panel.
- Bend off and discard the upper section of the brackets used for guiding them vertically.
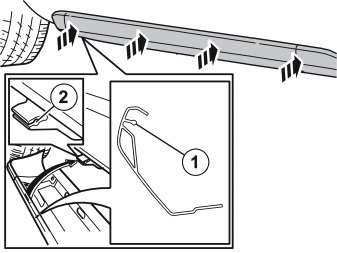
- Take one panel from the kit (the end face embossed with XC must be to the back), press it into the four mounting brackets in the door sill panel. The edge (1) on the inside of the new panel must be pressed into the corresponding openings (2) in the mounting brackets.
Illustration A
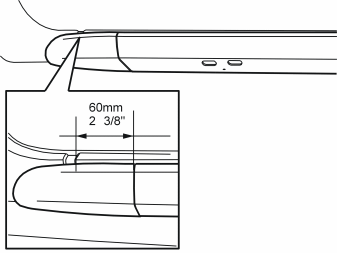
- Make sure that the distance between the joint in the new panel and the rear edge of the existing wide joint (from which the measurement for the hole was made) is 60 mm (2 3/8").
Illustration B
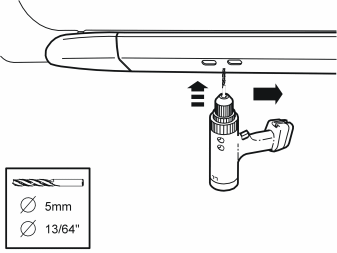
- Press in the new panel against the existing door sill panel directly in front of the first hole to be drilled. Drill out the hole through the panel using a Ø5 mm (13/64") bit.
Illustration C
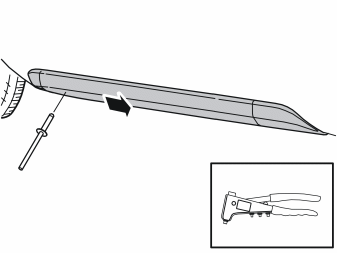
- Take a pop rivet from the kit and rivet in the lower edge of the new panel to the door sill in the first hole.
- Following which, drill and rivet the next hole in the panel in the same way. Repeat for the remaining holes.
- Repeat steps 2 - 6 for the other side.
Обсуждение и оценка
0Пока нет комментариев. Будьте первым.