Применимость
| Модель | Двигатель | Год |
|---|---|---|
| S40 (04-) | — | 2007–2012 |
Примечание: Do not do the work at a temperature below 20°C (68° F).
Leave the vehicle indoors for 2 hours after finishing the work.
Do not wash the car for 72 hours.
There may be components in the accessories kit that are not used for this installation.
Applies to the S40
Installation, antenna
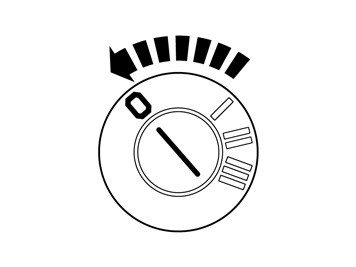
- Set the ignition key to position 0.
Примечание: Wait at least one minute before unplugging the connectors or removing other electrical equipment.
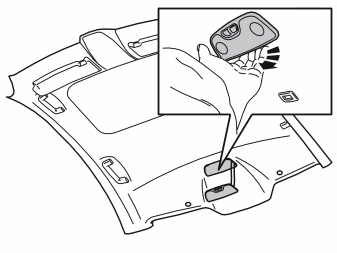
- Remove the rear interior lighting and pull it down starting at the rear edge and then allow it to hang.
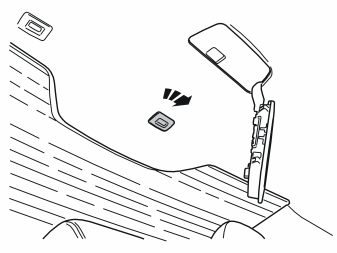
- Turn the clip 90° and remove it from the headlining.
- Carefully bend the middle section of the rear end of the headlining down so that any connectors can be disconnected.
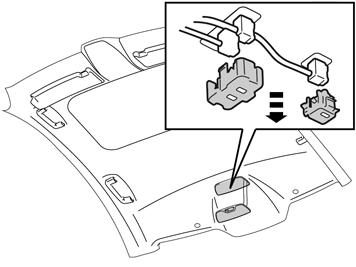
- Remove any cradles for the connectors. They will not be reused.
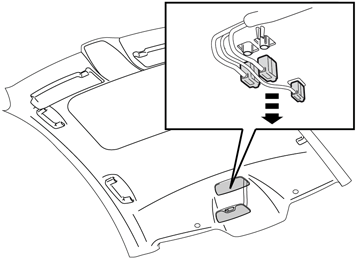
- Press in the catches at the front edge/lower edge on the connectors and disconnect them from the antenna.
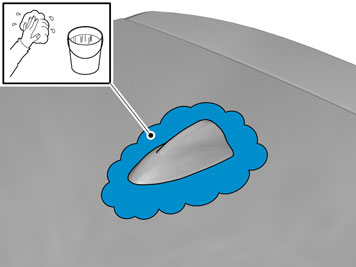
- Clean the roof around the antenna cover
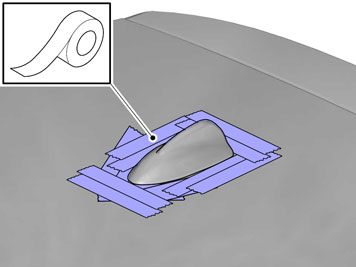
- Apply tape to the roof, around the antenna cover, to avoid paint damage when it is cut off.
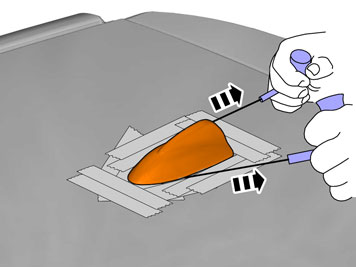
- Remove the antenna by cutting it all the way around.
- Use special tool: 9512333 Handle
- Use special tool: 1159785 Cutting wire 0.5 mm
Осторожно: Pull evenly to prevent paint damage.
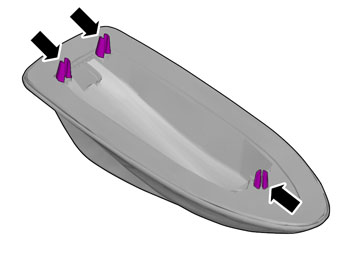
Осторожно: There are three locating pins on the cover, ensure that these are not cut off.
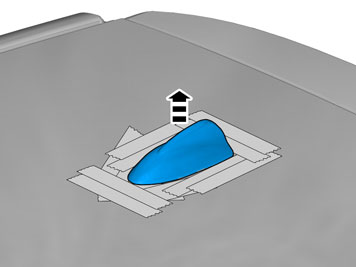
- Remove the cover.
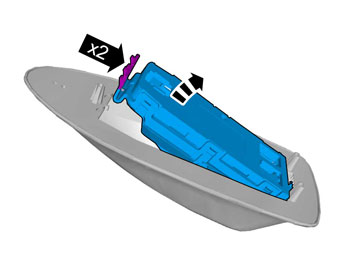
- Remove the antenna
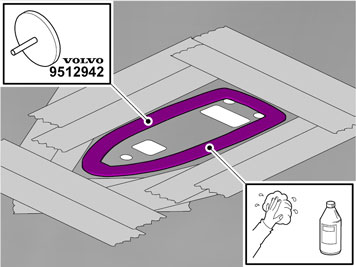
- Remove the tape residue from the roof.
- Use special tool: 9512942 Circular cutting tool
- Clean the surface of the roof where the cover is to be located.
- Use: Isopropanol
- Wipe dry
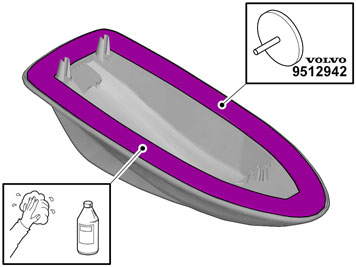
- Remove the tape residue from the cover.
- Use special tool: 9512942 Circular cutting tool
- Clean the surface of the cover where the tape is to be located.
- Use: Isopropanol
- Wipe dry
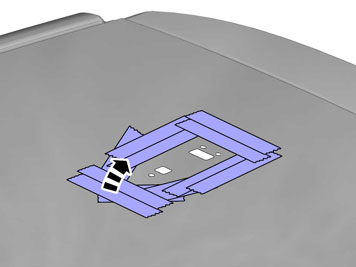
- Remove the tape
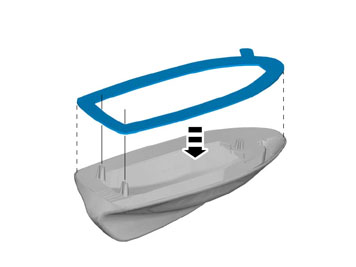
- Apply tape to the cover
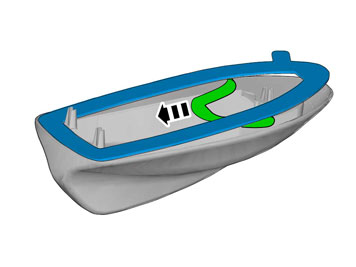
- Hold the tape in position while removing the protective tape.
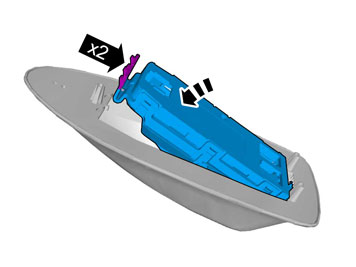
- Take the antenna from the kit. Secure the antenna in the cover. Ensure that the antenna engages properly.
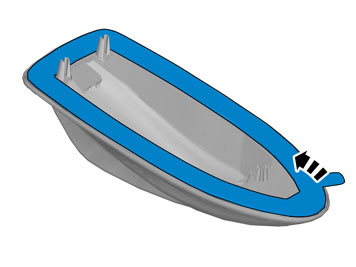
- Remove the tape's protective tape.
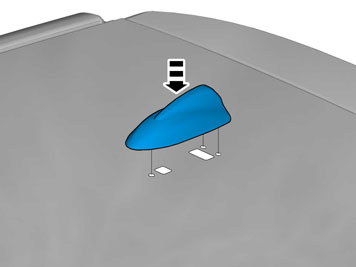
- Align the antenna's locating pins in the corresponding holes in the roof and press the antenna into place.
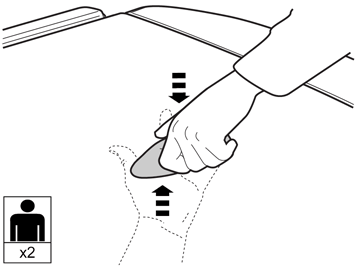
Примечание: To achieve a good result, two people are needed to press the antenna into place. One of the two must press against the inside of the roof to prevent buckling when the antenna is pressed into place.
Осторожно: Maintain pressure on the antenna for at least 30 seconds so that the tape adheres properly.
Примечание: The tape must be compressed to half its original thickness for 2-3 seconds to activate the bonding agent in the tape and achieve maximum wetting of the surface that the tape is to adhere to.
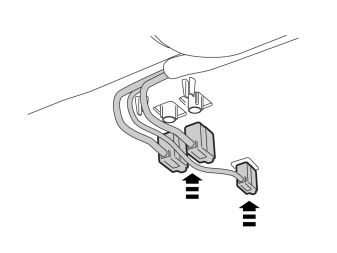
- Connect all connectors color to color in the antenna. Check that the connector catches engage.
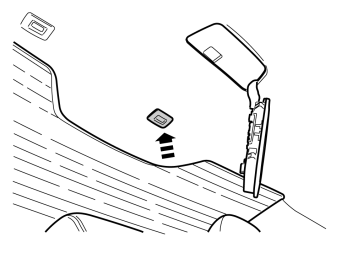
- Reinstall the headlining with the clips.
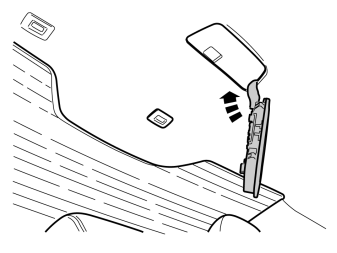
- Reinstall the lighting.
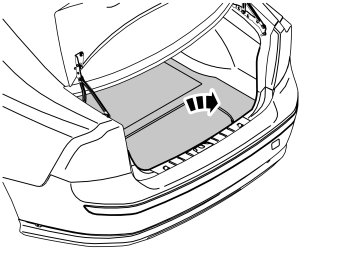
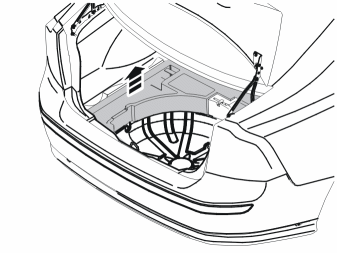
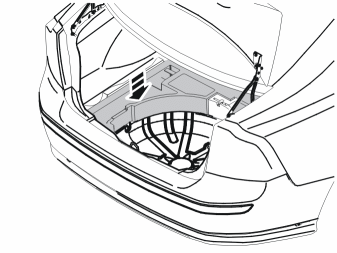
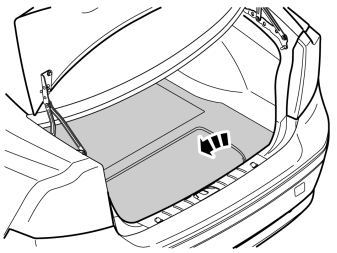
- Remove the upper floor support on the left-hand side of the car if applicable.
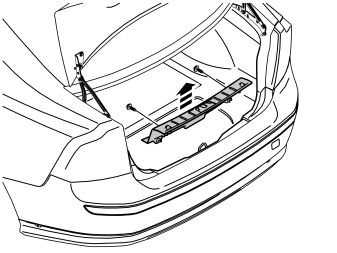
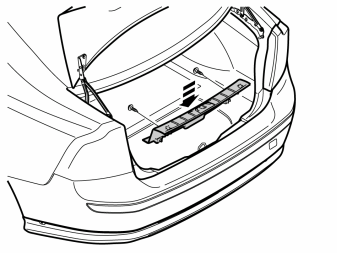
- Unscrew the two external clips at the front edge/bottom edge of the sill trim panel on the tailgate.
- Use a weatherstrip tool and pry up one corner of the sill trim panel so that the two clips in that end release.
- Pull up the sill trim panel at the other end so that the remaining two clips release. Remove the sill trim panel.
- Detach the rubber strip where it covers the left-hand side panel in the tailgate opening.
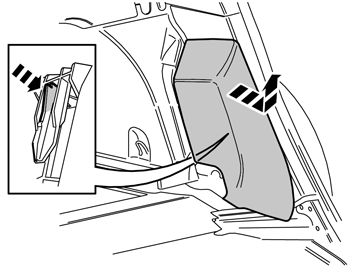
- Fold the left-hand rear seat backrest forward.
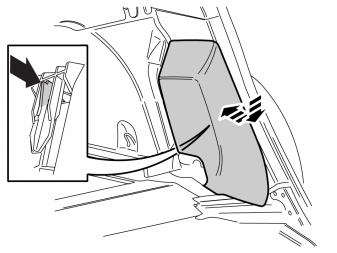
- Remove the side cushion by pulling it forwards at the upper edge until the clip on the rear releases, and then by pulling it straight up.
A
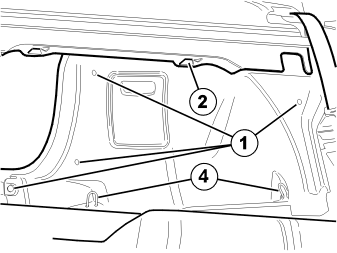
Illustrations A and B
- Remove the four clips (1) securing the side panel in the bodywork.
- Unhook the front edge of the parcel shelf panel at the mounting (2) Pull the side panel away from the parcel shelf panel and the panel on the C-post.
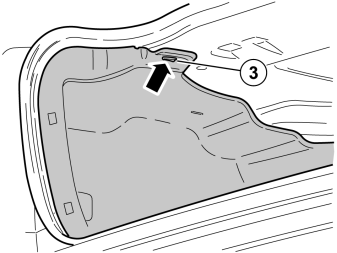
- Unhook the side panel from the mounting (3) on the underside of the parcel shelf.
- Unhook the side panel from the load securing eyelets (4). Remove the side panel.
B
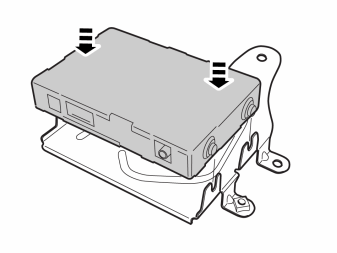
- Take the receiver, bracket and screws from the kit. Install and tighten it in the bracket.
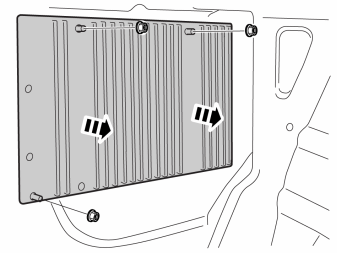
- Remove the three nuts in the amplifier and pull it out.
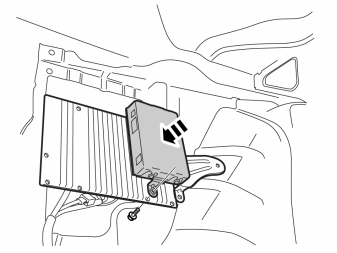
- Take two screws from the kit and install the receiver in the existing holes on the amplifier.
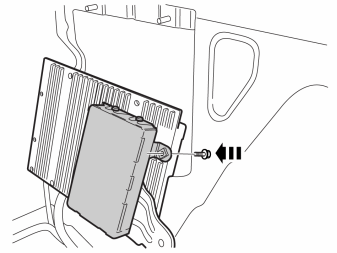
- Tighten the screws to 10 Nm (7.5 lbf.ft.).
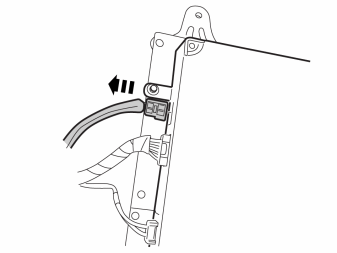
- Remove the connector for the fiber-optic cable from the amplifier.
Примечание: The fiber-optic cables must not be bent to a radius less than 30 mm (1 3/16 ").
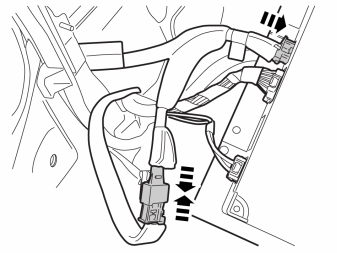
- Take the adapter cable from the kit. Connect the shorter of the fiber-optic cables marked AUD to the amplifier.
- Connect the male connector on the fiber-optic cable that was disconnected from the amplifier to the adapter cable's female connector.
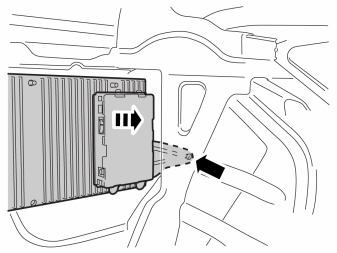
- Reinstall the amplifier with the receiver unit.
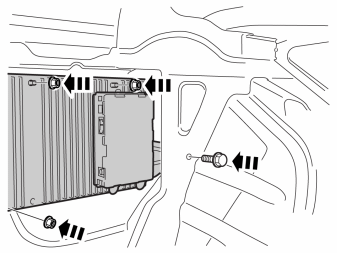
- Install the nuts in the amplifier.
- Take the remaining screw and washer and install the unit's mounting in the hole in the body.
- Tighten and torque tighten the nuts and screw to 10 Nm (7.5 lbf.ft.).
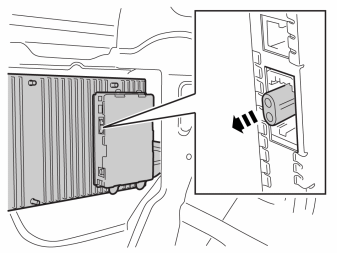
- Remove the transportation protection in the fiber-optic terminal on the receiver.
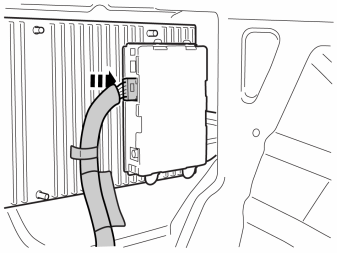
- Connect the remaining fiber-optic cable's male connector to the receiver.
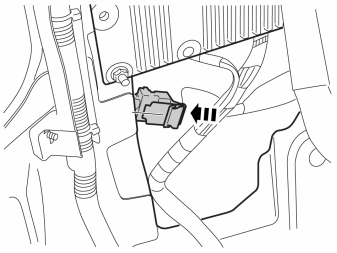
- Press the joint connectors with their clips at the panel edge at the rear edge/lower edge of the amplifier.
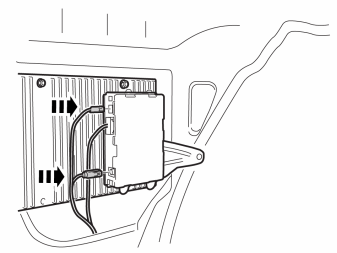
- Connect the routed connectors to the receiver, black for 12 V and gray for the antenna. They are located at the thick cable harness at the rear edge of the wheel housing.
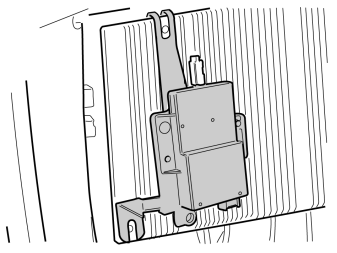
If the car is equipped with GPS receiver, connect the fiber-optic adapter cable in the same way as before, directly to the amplifier.
- Clamp the cable joint at the panel edge as in image 39.
Примечание: Do not damage the fiber-optic wiring.
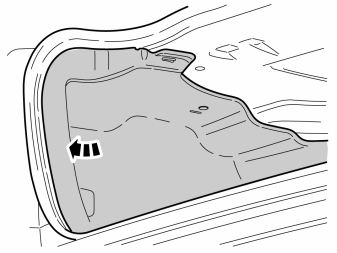
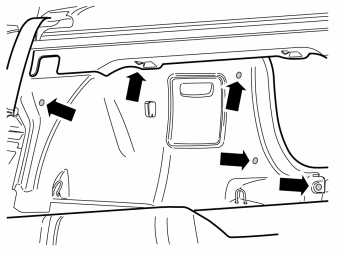
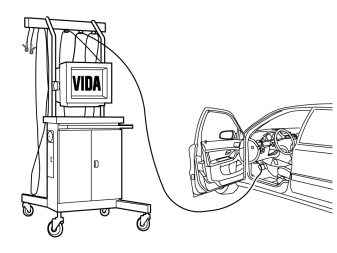
- Download software (application Sirius sat radio) for the accessory's function according to service information in VIDA. See VIDA or accessories catalogue for article number on software.
Обсуждение и оценка
0Пока нет комментариев. Будьте первым.