Применимость
| Модель | Двигатель | Год |
|---|---|---|
| S80 (-06) | — | 2004–2006 |
| XC90 | — | 2004–2008 |
Примечание: - Steps 1–11 apply to the S80
- Steps 12—25 apply to the XC90
Applies to the S80
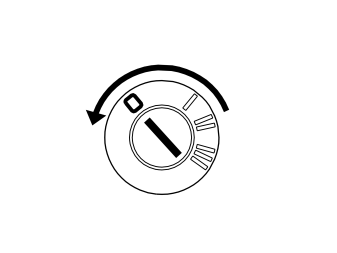
- Turn the ignition key to position 0.
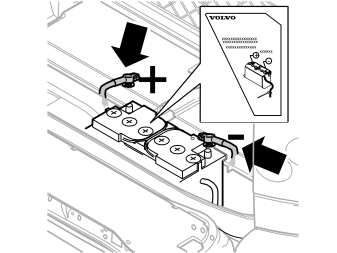
Примечание: Wait at least five minutes before disassembling the connectors or removing other electrical equipment.
- Remove the carpet from the cargo compartment.
- Disconnect the battery negative lead and then the positive lead.
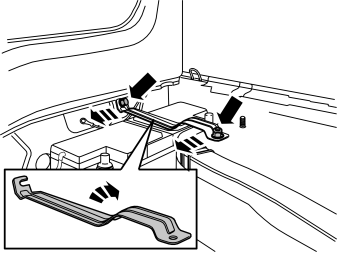
- Remove the mounting bracket over the battery's protective cover, it is fitted with a nut and a screw.
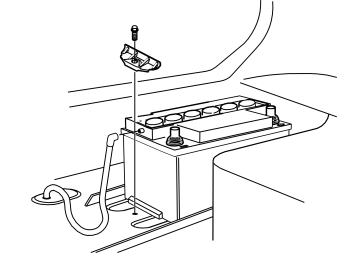
- Remove the screw and detach the holder on the right-hand side of the battery.
- Lift out the battery to make space for the power supply unit.
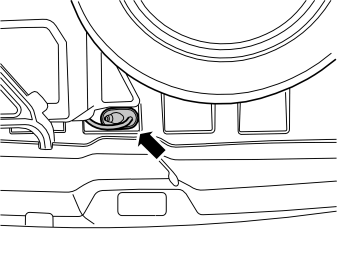
- Remove the rubber grommet for the drainage line to the battery.
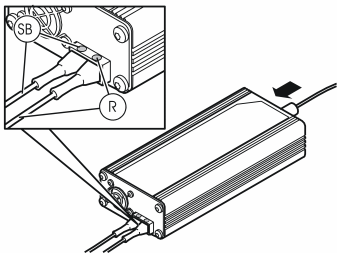
- Connect the 12V cable harness to the power supply unit, colour to colour.
- Connect the power cable to the power supply unit.
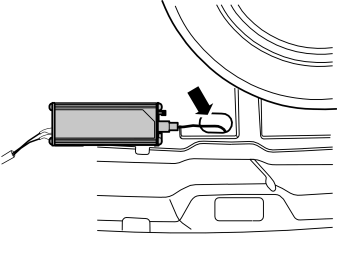
- Position the power supply unit at the rear edge of the spare wheel and pull the power cable out through the hole in the floor.
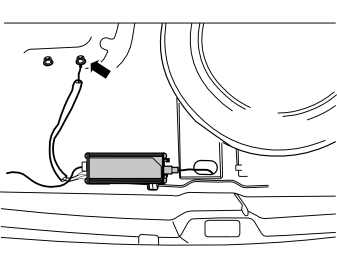
- Connect the black (SB) ground cable to the left-hand stud in the mounting bracket for the battery's protective cover.
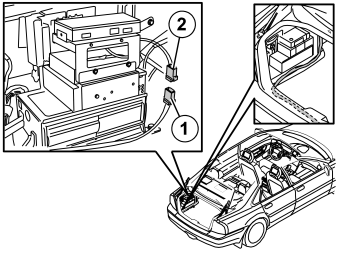
- Fold out the left-hand side panel.
- Route the cable at the rear of the side panel and then forwards to the left-hand rear wheel arch.
- Plug the connector (1) for the routed cable harness into connector (2) on the existing cable from the fuse holder at the rear of the left-hand rear wheel arch.
- Connect the power cable to the wall socket.
Примечание: The power supply unit automatically adjusts itself to the prevailing voltage in the wall socket.
- Test the system.
After completed demonstration:
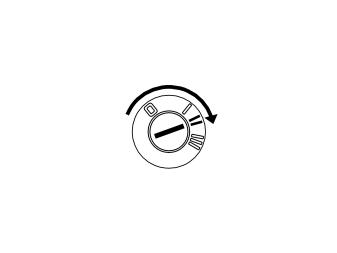
- Disconnect the cable harness from the small fuse box and reconnect the disconnected cables.
- Detach the ground cable from the stud for the battery's mounting bracket.
- Remove the power supply unit and its cables from the cargo compartment.
- Reinstall the battery. Reinstall the holder on the right-hand side and torque tighten the screw to 24 Nm (18 lbf.ft.).
- Reinstall the rubber grommet in the cargo compartment floor.
- Turn the ignition key to position II.
- Reconnect the battery leads, positive lead first, then the negative lead.
- Reinstall the mounting bracket over the battery. Torque tighten the nut and the screw to 24 Nm (18 lbf.ft).
- Fold the side panel back into position.
- Reinstall the cargo compartment carpet.
Applies to the XC90
- Turn the ignition key to position 0.
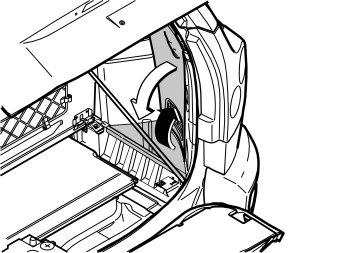
- Fold up and remove the floor hatch.
- Remove the side floor hatch.
- Remove the rear side panel.
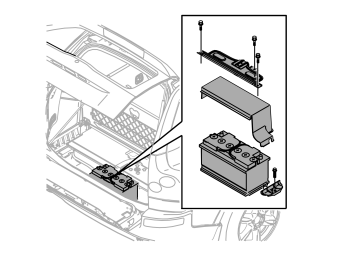
- Remove the bracket over the protective cover for the battery. The bracket is secured with three screws.
- Remove the protective cover for the battery.
- Remove the screw and detach the holder on the right-hand side of the battery.
- Disconnect the battery negative lead and then the positive lead.
- Lift out the battery to make space for the power supply unit.
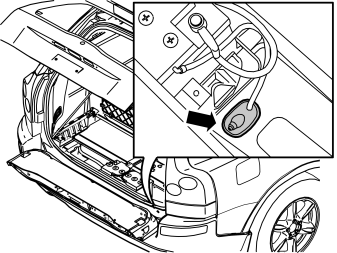
- Remove the rubber grommet for the drainage hose for the battery.
- Connect the 12V cable harness to the power supply unit, colour to colour.
- Connect the power cable to the power supply unit.
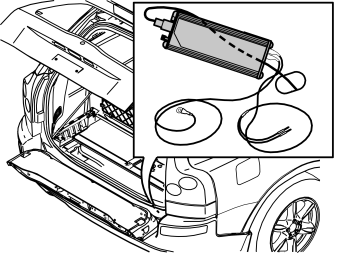
- Position the power supply unit in the battery location as illustrated.
- Route the power cable out through the hole in the cargo compartment floor.
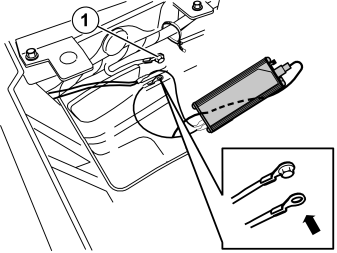
- Unscrew the existing ground screw (1) on the right-hand side of the rear crossmember.
- Install the routed black (SB) ground cable and tighten the ground screw firmly
Illustration A
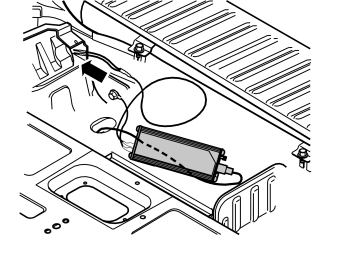
- Route the remaining cable ends to the hole at the rear of the floor support on the right-hand side.
Illustration B
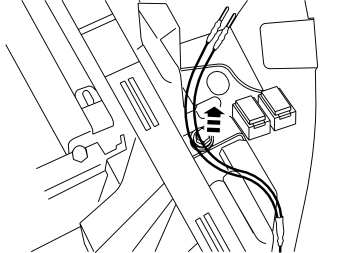
- Insert the cable ends into the small fuse holder on the right-hand side of the floor support.
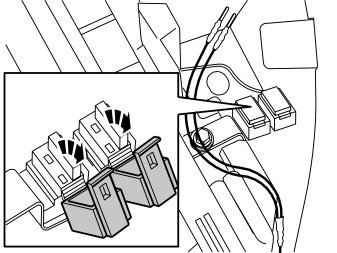
- Remove the cover for the RSE's fuse holder.
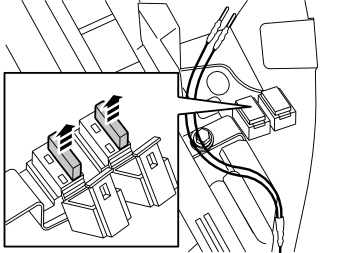
- Remove the fuses in the fuse holder, 10A in the left-hand holder, 5A in the right-hand holder.
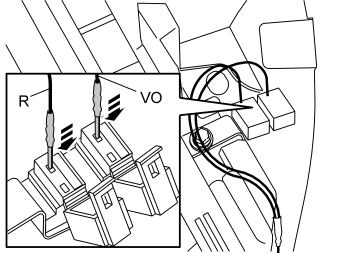
- Install the red (R) cable in the front of the left-hand fuse holder and the violet (VO) in the right-hand fuse holder.
Примечание: The cables must only be installed in the front of the fuse holder, otherwise there is a risk that the power supply unit will be irreparably damaged.
Both cables are connected to thinner cables under the fuse holder.
- Connect the power cable to the wall socket.
Примечание: The power supply unit automatically adjusts itself to the prevailing voltage in the wall socket.
- Test the system.
After completed demonstration:
- Disconnect the cables from the small fuse box.
- Reinstall the fuses in the holders, see step 22 for positions.
- Reinstall the cover over the fuse holders.
- Detach the black (SB) ground cable from the ground terminal and tighten the screw firmly.
- Remove the power supply unit and its cables from the cargo compartment.
- Reinstall the battery.
- Reinstall the rubber grommet in the cargo compartment floor.
- Tighten the battery with the mounting to the floor. Torque tighten the screw to 24 Nm (18 lbf.ft.).
- Turn the ignition key to position II.
- Reconnect the battery leads, positive lead first, then the negative lead.
- Reinstall the protective cover over the battery. Reinstall the mounting bracket over the protective cover and torque tighten the screws to 24 Nm (18 lbf.ft.).
- Reinstall the rear side panel and the side floor hatch.
- Reinstall the rear floor hatch.
Обсуждение и оценка
0Пока нет комментариев. Будьте первым.