Применимость
| Модель | Двигатель | Год |
|---|---|---|
| XC90 | B6294T | 2003 |
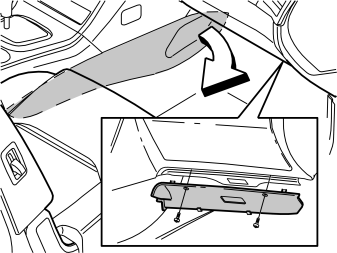
- Remove the right-hand side panel from the centre console. Pull off the panel starting at the front edge. Then pull backwards until all the clips release
- Remove the right-hand side soundproofing panel. First remove the two screws. Then pry off the panel at the top edge.
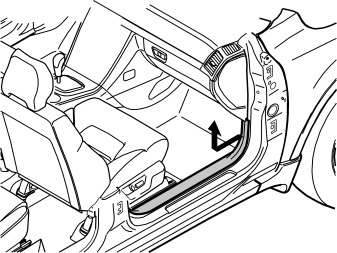
- Detach the sill trim panel for the right-hand front door. Pull off the panel starting at the front edge until the clip releases. Continue backwards until the remaining clips have released
- Pull away the front edge to the right to access the edge of the carpet.
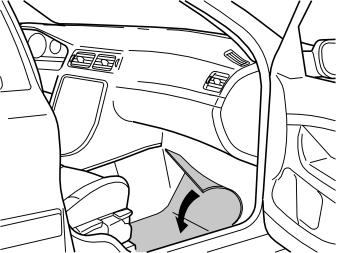
- Fold the carpet to one side by the right-hand front seat.
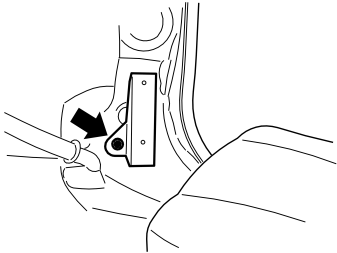
- Take the bracket and screw from the kit. Install the bracket in the existing weld nut (under the tape) in the bodywork. The bracket must be vertical. Position the bracket for the passenger compartment socket over the mounting kit for child seats, if applicable. Then tighten the bracket using the M6 screw. Tighten to 10 Nm (7 lbf.ft).
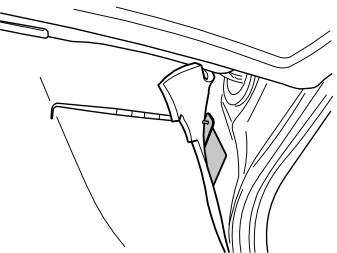
- Fold the carpet back over the bracket
- Make a hole in the carpet opposite the upper mounting hole in the bracket using a double ended scriber.
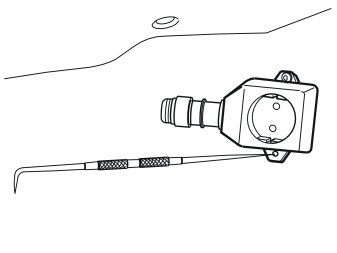
- Take a screw and the passenger compartment socket from the kit. Tighten the passenger compartment socket to the bracket in the upper mounting
- Insert the double ended scriber into the lower mounting for the passenger compartment socket. Make a hole in the carpet opposite the lower hole on the bracket
- Tighten the lower mounting for the passenger compartment connector socket using a screw from the kit.
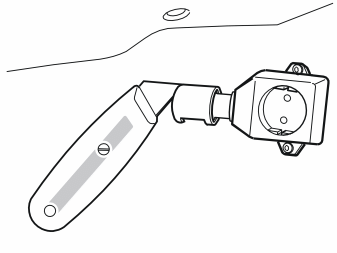
- Press a locking sleeve (from the kit) onto the passenger compartment socket. Slide the locking sleeve as far along the terminal for the passenger compartment socket as possible
- Take a carpet knife and cut a slit in the carpet just in front of the locking sleeve. Make the cut as long as the diameter of the locking sleeve.
Примечание: Do not damage wiring or hoses under the carpet.
- Remove the passenger compartment socket from the bracket.
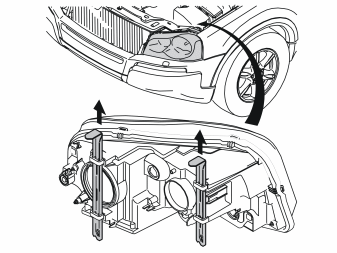
- Remove the left-hand headlamp by pulling up the two cotter pins and then carefully pulling the headlamp forwards.
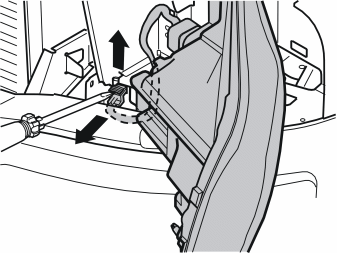
- Carefully pry up the catch on the headlamp connector using a screwdriver
- Pull up the catch completely. Disconnect the connector. Place the headlamp to one side.
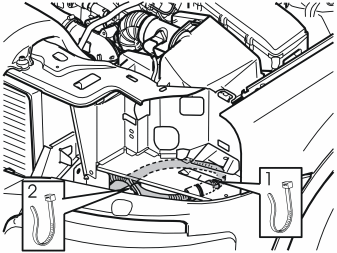
Applies to cars with an engine block heater
- Remove the two tie straps that hold the cable to the front engine block heater socket. Route the cable.
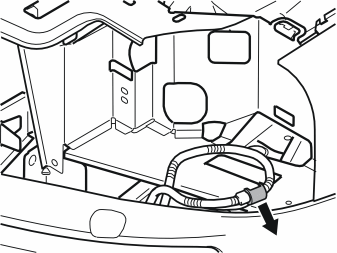
Applies to cars with an engine block heater
- Remove the locking sleeve over the joint on the wiring for the engine block heater. Disconnect the wiring from each other.
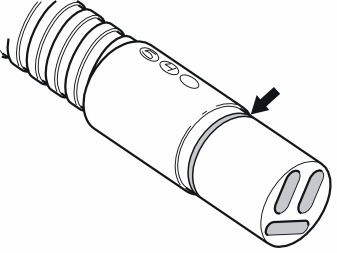
- Take a junction connector from the kit. Grease the O-ring using low temperature grease (P/N 1161417-9). Grease the O-ring on the connector for the front engine block heater socket.
Примечание: Do not get any grease on the contact surfaces of the connector.
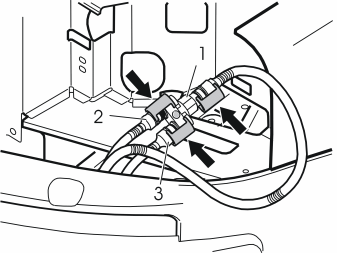
- Take the long cable to the passenger compartment socket. Route it down the left-hand side of the left side member
- Connect the front engine block heater socket cable to socket (1) on the junction connector
- Connect the wiring for the engine block heater and passenger compartment connector socket to either socket (2) or (3) on the junction cable
- Press the three locking sleeves (from the kit) over the cable splices.
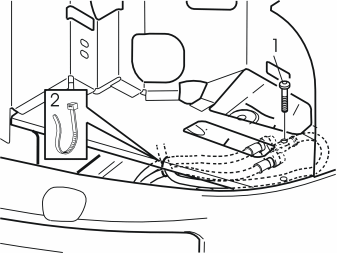
- Position the junction connector with the wiring on the underneath of the plate under the headlamp, with the two sockets pointing forward and the cable from the front engine block heater socket pointing backward
- Take the screw and the nut from the kit. Tighten the junction connector in the hole in the plate (1)
- Take a tie strap from the kit and secure the wiring at point (2)
- Connect the connector to the headlamp and reinstall it.
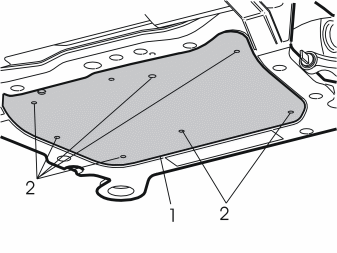
- Remove the engine splash guard (1) by removing the screws (2).
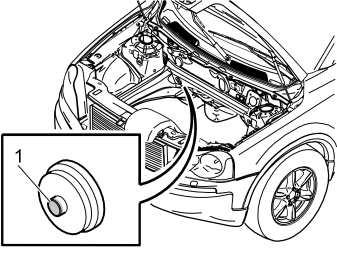
- Press out the pre-punched engine compartment insulation
- Remove the rubber grommet (1) from the cowl panel and cut off the top.
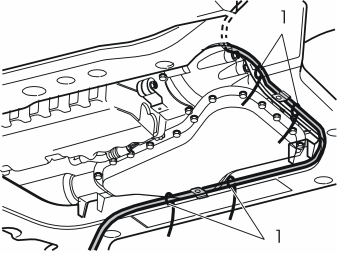
- Route the cable for the passenger compartment socket over the left front corner of the sub-frame, where the cable to the engine block heater runs
- Press four tie straps (1) from the kit onto the holes in the sub-frame. Position the cable in the clamps but do not tighten them yet.
Illustration A
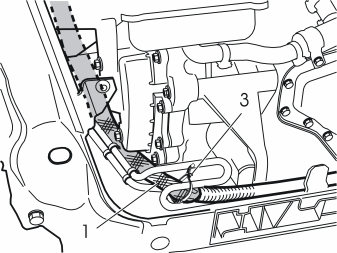
- Take the insulation (1) from the kit. Thread it onto the cable
- Take the rubber grommet from the kit. Thread the cable through it
- Route the cable into the passenger compartment as illustrated
- Adjust the length of the cable to the rubber grommet.
Illustration B
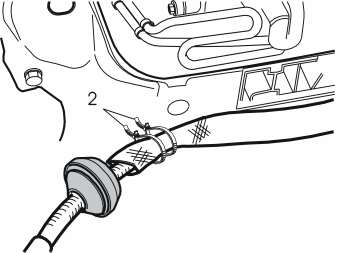
- Pull back the cable leaving the insulation in position. Secure the upper end of the insulation. Use the two tie straps (2) from the kit
- Grease the side of the rubber grommet facing inwards into the passenger compartment. Use low-temperature grease
- Route the cable into the passenger compartment. Carefully pull the rubber grommet into position from inside the passenger compartment by pulling the cable for the passenger compartment connector socket.
Illustration A
- Clamp the cable at the servo pipe using a tie strap (3) from the kit
- Adjust the cable in the four tie straps in point en-GB0900c8af810004e2#KC01351252 and tighten them.
- Reinstall the engine splash guard. Tighten the screws. Tighten to 25 Nm (17 lbf. ft).
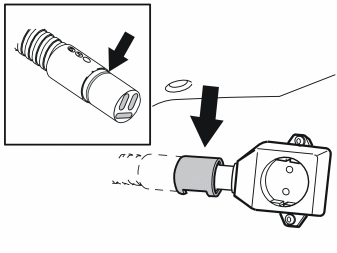
- Insert the cable from the engine compartment through the hole in the carpet
- Grease the O-ring using low temperature grease, (P/N 1161417-9).
Примечание: Ensure that no grease gets onto the connector surfaces.
- Connect the cable to the passenger compartment connector socket. Press a locking sleeve (from the kit) over the joint
- Fold the carpet back into position and install the passenger compartment socket using both the screws.
Reinstall:
- the soundproofing panel
- the sill trim panel
- the right side panel for the centre console.
Обсуждение и оценка
0Пока нет комментариев. Будьте первым.