Применимость
| Модель | Двигатель | Год |
|---|---|---|
| XC90 | B5254T2 | 2003–2008 |
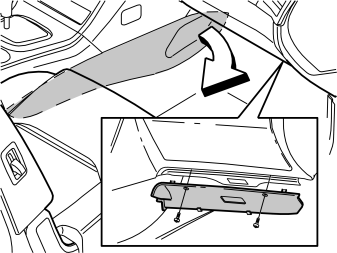
- Remove the right-hand side panel from the centre console. Pull off the panel at the front edge. Then continue backwards until all the clips release
- Remove the right-hand side soundproofing panel. First remove the two screws. Then pry off the panel at the top edge.
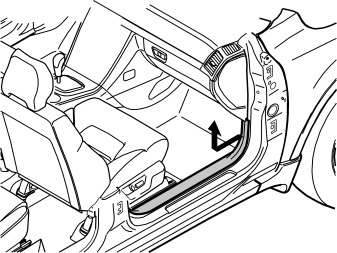
- Remove the sill trim panel for the right-hand front door. Pull the front edge until the clip releases. Then continue backwards until the remaining clips have released
- Unhook the sill trim panel from the B-post panel and from the panel at the lower edge of the B-post panel.
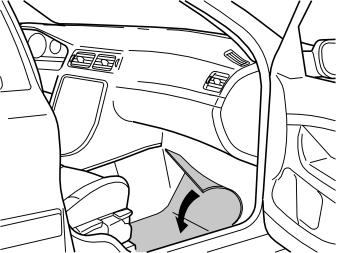
- Fold the carpet to one side by the right-hand front seat.
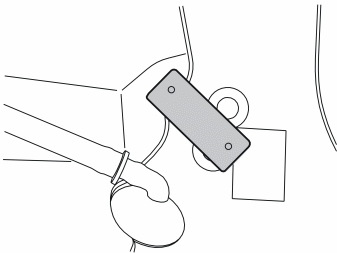
- Remove the lower piece of tape. The tape is situated where the bracket is to be screwed into place
- Take the bracket and screw from the kit. Install the bracket in the existing weld nut under the recently removed piece of tape
- Turn the bracket so that it is positioned as illustrated
- Loosely install the connector. Check that the connector is straight, with the power connector at the front
- Tighten the bracket. Tighten to 10 Nm (7 lbf. ft.)
- If the car has a child seat mounting bracket, the passenger compartment socket bracket must be positioned above this. Secure using the M6 screw. Tighten to 10 Nm (7 lbf. ft.).
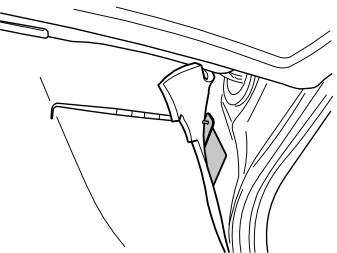
- Fold the carpet back over the bracket
- Make a hole in the carpet opposite the upper mounting hole in the bracket using a double ended scriber.
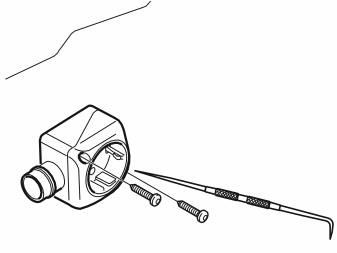
- Take the passenger compartment socket and a screw from the kit. Tighten the passenger compartment socket to the bracket in the upper mounting
- Insert the double ended scriber into the lower mounting for the passenger compartment socket. Make a hole in the carpet opposite the lower hole on the bracket
- Tighten the lower mounting for the passenger compartment connector socket using a screw from the kit.
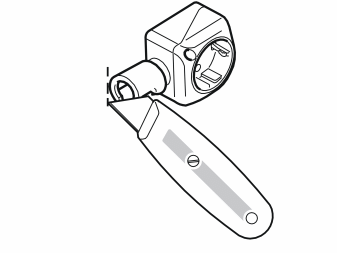
- Press a locking sleeve (from the kit) onto the passenger compartment socket. Slide the locking sleeve as far along the terminal for the passenger compartment socket as possible
- Take a carpet knife and cut a slit in the carpet just in front of the locking sleeve. The cut must be as long as the diameter of the locking sleeve.
Примечание: Do not damage wiring or hoses under the carpet.
- Remove the passenger compartment socket from the bracket.
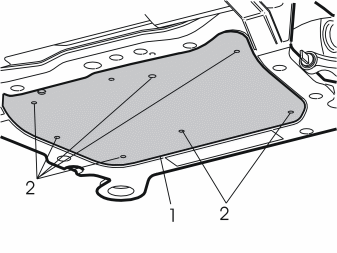
- Remove the engine splash guard (1) by removing the screws (2).
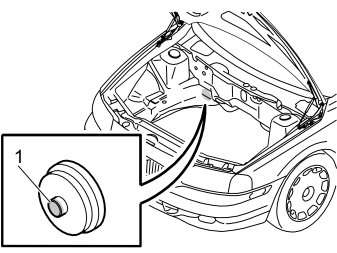
- Press out the pre-punched engine compartment insulation
- Remove the rubber grommet (1) from the cowl panel and cut off the top
- Take the cable from the kit. Insert the cable through the rubber grommet and into the passenger compartment.
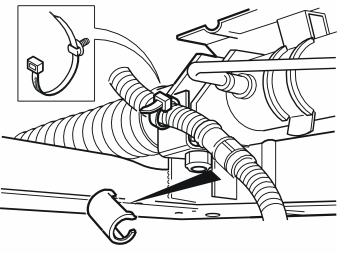
If an engine block heater is installed:
- Remove the connectors for the engine block heater and the front engine block heater socket from the bracket on the steering gear.
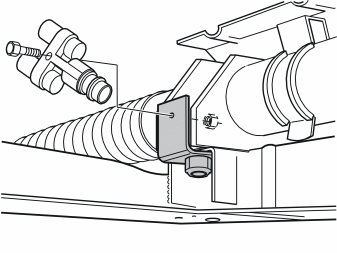
If an engine block heater is not installed:
- Remove the nut from the right-hand side of the steering gear
- Install the bracket and a new nut from the kit
- Tighten the nut. Tighten to 50 Nm (35 lbf. ft.)
- Install the junction connector on the bracket using the screw and nut from the kit.
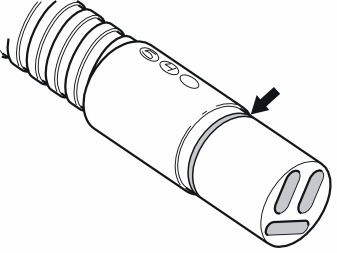
- Grease the O-rings on the junction connector and cable from the front engine block heater socket. Use low temperature grease, (P/N 1161417-9).
Примечание: Ensure that no grease gets onto the connector surfaces.
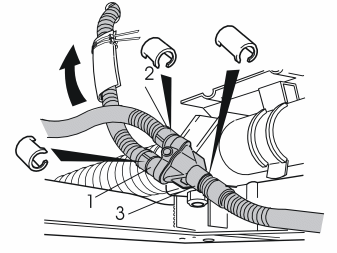
- Take the heat shield sleeve and the two tie straps from the kit. Thread the heat shield sleeve onto the cable routed to the passenger compartment connector socket
- Pull the heat shield sleeve up to the rubber grommet for the passenger compartment. Tighten the two tie straps
- Connect the cable from the passenger compartment connector socket to the socket (1) on the junction connector
- Connect the cable from the engine block heater to the socket (2) on the junction connector
- Connect the cable from the front engine block heater socket to the socket (3) on the junction connector
- Press the locking sleeves (from the kit) over the cable splices. The larger locking sleeve must be on the socket (3).
Примечание: Ensure that the cable does not rub against any sharp edges etc. The cable must not be secured to the fuel lines, air conditioning (A/C) pipes or brake pipes.
- Reinstall the engine splash guard. Tighten the screws. Tighten to 25 Nm (17 lbf. ft.).
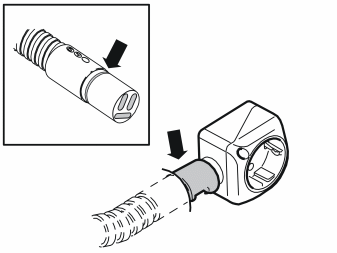
- Insert the cable from the engine compartment through the hole in the carpet
- Grease the O-ring using low temperature grease, (P/N 1161417-9).
Примечание: Ensure that no grease gets onto the connector surfaces.
- Connect the cable to the passenger compartment connector socket. Press a locking sleeve (from the kit) over the joint
- Fold the carpet back into position and install the passenger compartment socket using both the screws.
Reinstall:
- the soundproofing panel
- the sill trim panel
- the right side panel for the centre console.
Обсуждение и оценка
0Пока нет комментариев. Будьте первым.