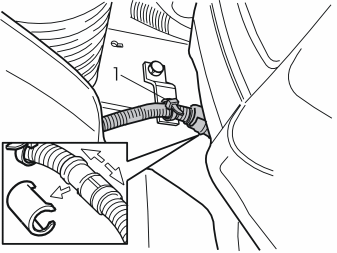
- Locate the cable splice in the engine block heater cable at the rear edge of the left-hand front member
- Remove the clip and clamp (1) from the bracket
- Remove the locking sleeve over the cable splice and separate the cable.
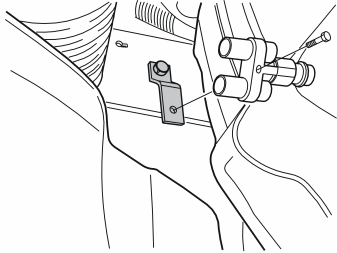
- Take the junction connector and screw from the kit. Tighten the junction connector on the bracket.
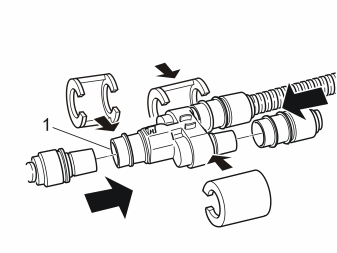
- Grease the O-rings on the junction connector using low temperature grease, P/N 1161427.
Примечание: Do not get any grease on the contact surfaces of the connector.
- Press the joint cable (from the kit) and the two other connectors on the cables into the junction connector. Lock the cable splices using the three locking sleeves from the kit. The larger locking sleeve must be on the socket (1).
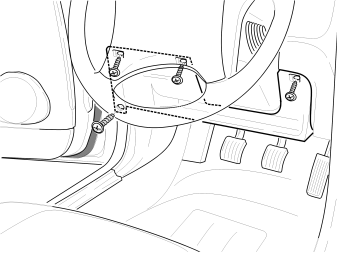
- Remove the panel under the dashboard on the driver's side
- Disconnect the connector for the courtesy lighting.
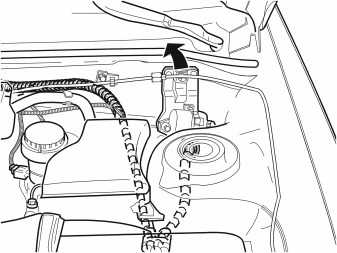
- Applies to cars with cruise control: Remove the two screws and move the vacuum pump to the side
- Detach the cover over the fuse/relay box. Lift out the cover. Detach the fuse/relay box
- Remove the grommet
- Route the extension cable through the grommet and the hole
- Reinstall the grommet in the hole. Ensure that it is properly sealed
- Reinstall the fuse/relay box and the cover
- Applies to cars with cruise control: Reinstall the vacuum pump and tighten the two screws
- Secure the extension cable using tie straps.
Примечание: Do not secure the extension cable to the A/C-pipe, brake pipe or fuel line.
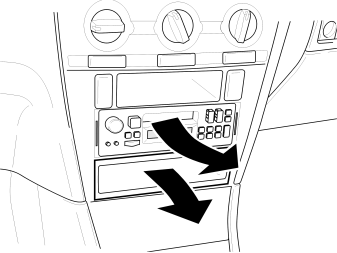
- Make a note of the anti-theft radio code
- Remove the radio
- Remove the connectors and the aerial cable
- Remove the centre console locker.
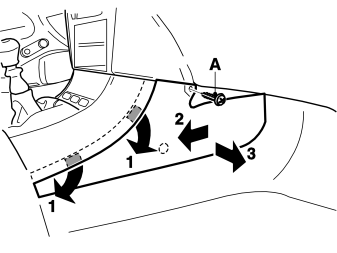
- Remove the screw (A)
- Remove the centre console side panel (note the clip).
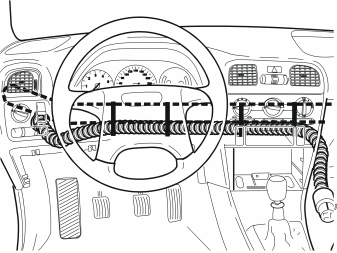
- Route the extension cable through the dashboard
- Secure the cable using tie straps.
Примечание: Ensure that the cable is clear of any moving components.
Illustration A
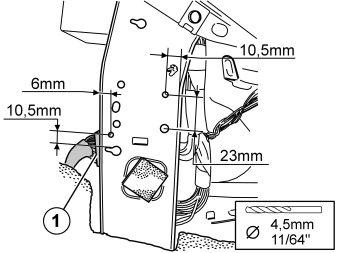
- Disconnect the connector (1) to prevent damage when drilling
- Mark out the positions of the two drill holes, as illustrated.
Примечание: Take great care when taking the measurement.
- Drill two 4.5 mm (11/64”) diameter holes.
Примечание: Do not damage any cable harnesses etc.
Illustration B
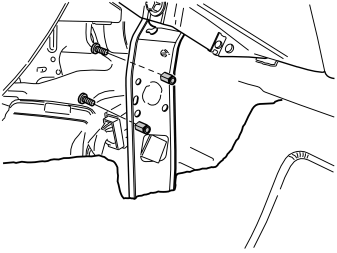
- Take the long hexagonal nuts and the associated short screws from the kit. Install the hexagonal nuts and the screws in the newly drilled holes. Do not tighten fully yet. It must be possible to turn the passenger compartment connector socket.
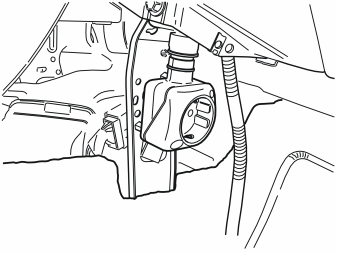
- Take the passenger compartment connector socket from the kit. Connect the extension cable that was routed into the passenger compartment to the passenger compartment connector socket
- Install the passenger compartment connector socket on the hexagonal nuts and screws from the kit
- Reconnect the connector that was disconnected in point en-GB0900c8af81336bdb#KC03021550.
Cutting the side panel
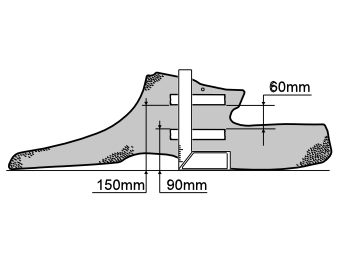
- Place the side panel on a flat surface. Use a set-square with a flat, stable base to ensure that the side panel is exactly vertical
- Measure out and mark at 90 mm and 150 mm as illustrated. Mark at both ends so that the line between them is horizontal
- Apply tape to the outside of the markings so that the distance between the pieces of tape is 60 mm.
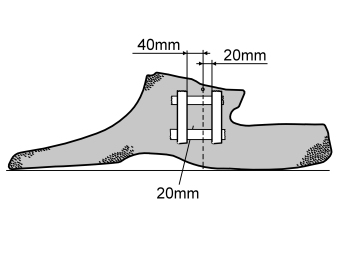
- Mark a vertical line on the pieces of tape exactly in the centre of the screw hole. Use a set-square
- Measure and mark out 20 mm to the right 40 mm from the line on both pieces of tape
- Apply pieces of tape at the marked lines to form a square between the pieces of tape. The square must measure 60x60 mm.
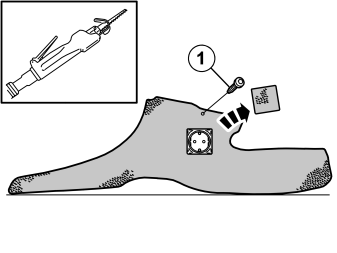
- Drill a hole in the square. Then cut out all the material inside the pieces of tape using a pneumatic compass saw
- File away loose swarf and edges
- Test install the side panel to see if it fits above the passenger compartment connector socket. Adjust the passenger compartment connector socket to obtain the best possible fit in the hole. Tighten the screws fully to the hexagonal nuts. If the hole is too small, file away material until the passenger compartment connector socket fits
- Reinstall the screw (1) for the side panel. Tighten the screw.
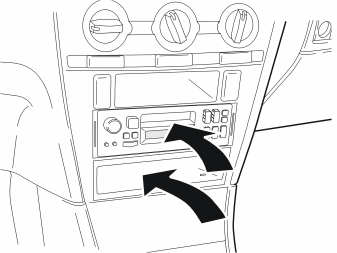
- Reinstall the centre console locker and the radio
- Enter the radio code
- Reinstall the panel under the dashboard
- Check the function.
Обсуждение и оценка
0Пока нет комментариев. Будьте первым.