Применимость
| Модель | Двигатель | Год |
|---|---|---|
| S80 (07-) | — | 2007–2015A |
| V70 (08-) | — | 2008–2014 |
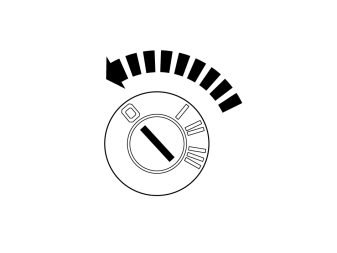
- Turn the ignition switch to position 0.
Примечание: Wait at least three minutes before unplugging the connectors or removing other electrical equipment.
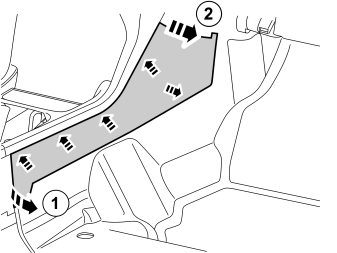
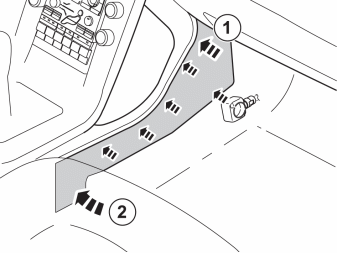
- Remove the tunnel console's right side panel by carefully pulling it away starting at the rear edge. It is secured with five clips on the inside.
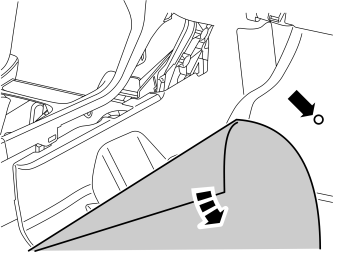
- Fold aside both the carpet and the insulation panel. Uncover the right side of the tunnel console's front section and the hole for the rubber bushing in the firewall.
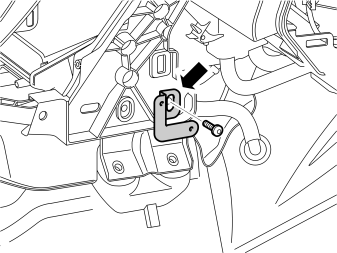
- Undo the front screw in the mounting for the centre console.
- Take the bracket for the passenger compartment socket from the kit. Tighten it with the previously removed screw.
- Position it so that it is straight and torque tighten the screw to 24 Nm (18 lbf.ft.).
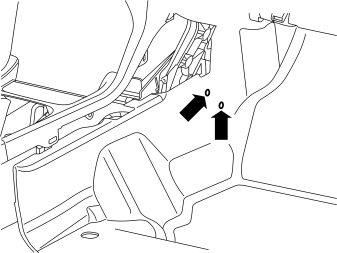
- Fold the carpet back toward the bracket.
- Take a scriber and pierce a hole in the carpet opposite the two holes in the bracket.
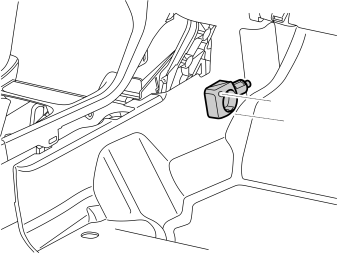
- Take the passenger compartment socket, a locking sleeve, and two screws from the kit. Install the passenger compartment socket on the bracket.
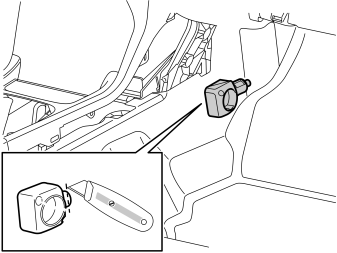
- Press in the locking sleeve on the passenger compartment socket. Slide the locking sleeve as far as possible on the connection for the passenger compartment socket.
- Take a carpet knife and cut a slit in the carpet just in front of the locking sleeve. Make the cut as long as the diameter of the locking sleeve.
- Remove the passenger compartment connector socket from the bracket and fold the carpet to one side.
Примечание: Do not damage any wiring and hoses under the carpet.
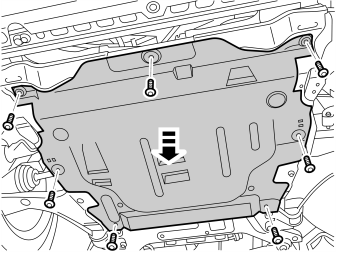
- Unscrew the screws and remove the engine splash guard.
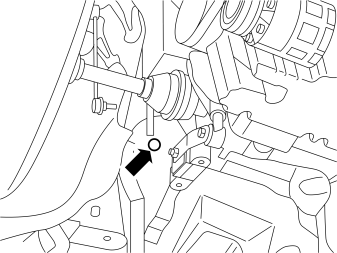
- Remove the rubber seal in the firewall. It is not going to be used again. The rubber seal is partially hidden behind the heat shield.
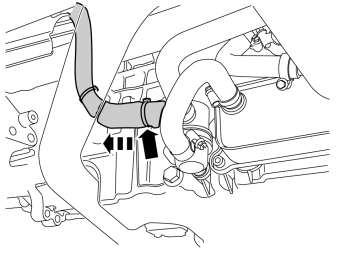
- Cut off the grey strip clamp on the heat shield by the heater.
- Pull back the heat shield to access the connectors' locking sleeve.
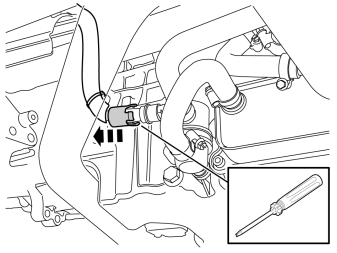
- Carefully pry up the four catches on the lock sleeve with a small screwdriver and pull it backwards.
- Unplug the connector from the heater's socket.
- Carefully cut loose the locking sleeve from the cable. New locking sleeve is found in the kit.
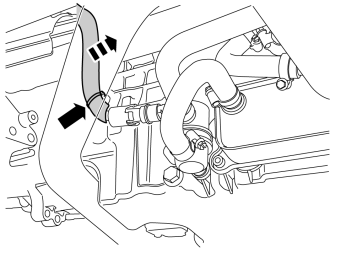
- Cut off the strip clamp and loosen the clip for the cable from the flange in the engine block.
- Remove the heat shield from the cable, it is going to be used again.
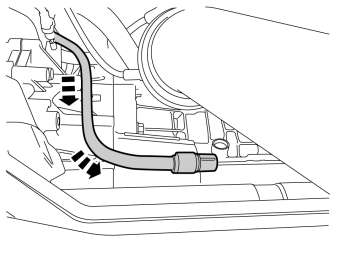
Illustrations A and B
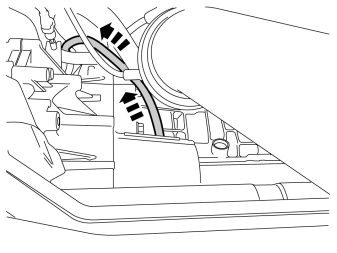
- Pull up the cable and route it on the back of the drive axle's heat shield.
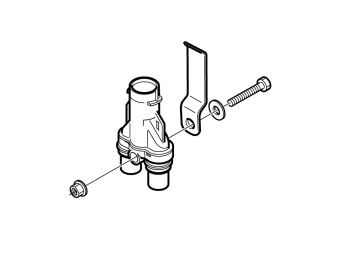
- Get the branching connector, holder, screw, washer, and nut from the kit. Assemble and tighten down.
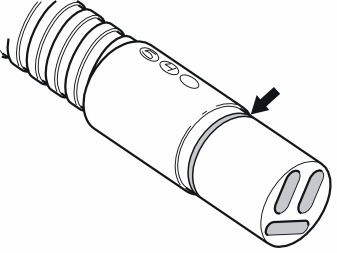
- Grease the O-ring on the connector for the front socket and both connectors on the branching connector using low temperature grease (part no. 1161427).
Примечание: Do not get any grease on the surfaces of the connector.
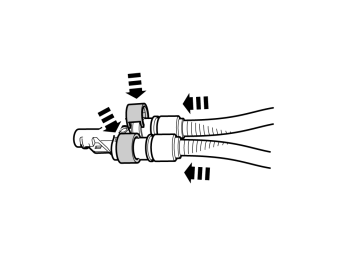
- Get the two splicing cables and the small locking sleeves from the kit.
- Press the cables into the branching connector.
- Press the locking sleeves over the joints.
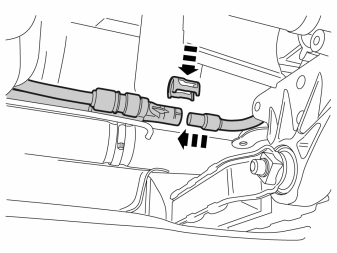
Примечание: Make sure that the branching connector faces so that the shorter cable is in the front position.
- Get a hose clamp from the kit and tighten down the branching connector on the steering gear in the position as shown.
- Press the cable from the front socket securely in the branching connector and press a locking sleeve from the kit over the joint.
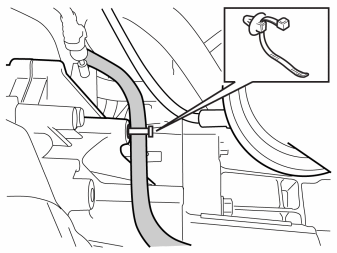
- Get strip clamp with clips from the kit, press into holes in transmission, and tighten down the cable with the strip clamp.
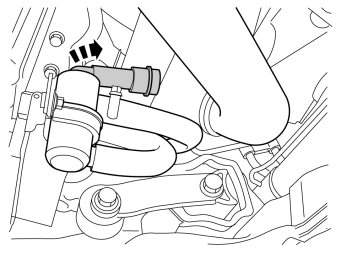
- Turn the heater's connector so that it faces the rear.
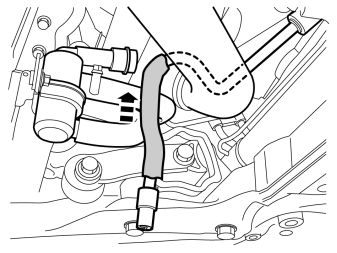
- Route the shorter cable to the heater on top of the turbo pipe.
- Get the old heat shield and fit the cable to the heater.
- Grease the O-ring on the connector for the splicing cable to the heater with low temperature grease (part no.1161427).
Примечание: Do not get any grease on the surfaces of the connector.
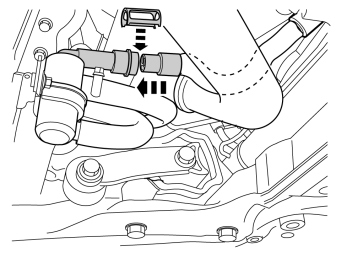
- Press the splicing cable's connector into the socket on the heater.
- Press a locking sleeve from the kit over the connector.
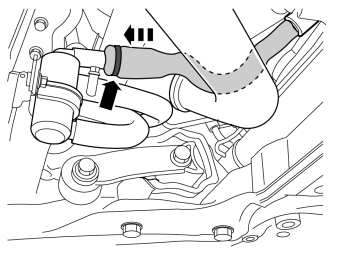
- Pull over the heat shield so that it fully covers the heater's connector.
- Get a grey strip clamp from the kit and tighten down the heat shield to the heater's connector.
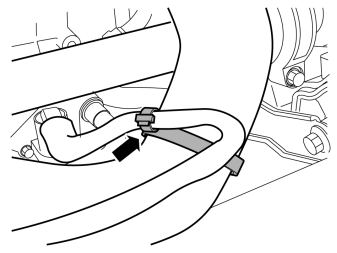
- Get a double strip clamp from the kit, and clamp down the cable with heat shield for the engine heater by the turbo pipe.
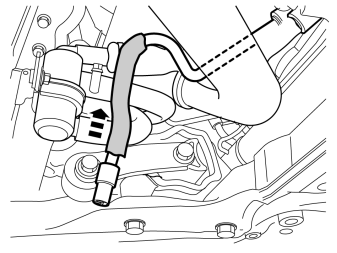
- Get the heat shield from the kit and fit the cable to the passenger compartment connector.
- Fit it on all the way to the branching connector.
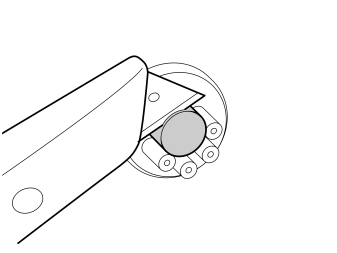
- Get the rubber bushing from the kit and cut the top of the big rubber piece.
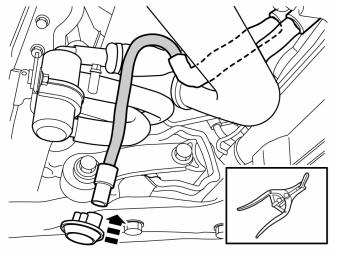
- Lubricate the rubber bushing with low temperature in order to make it easier to install the cable and rubber bushing in the hole in the firewall.
- Thread the rubber grommet onto the cable.
- Adjust the length of the cable to the rubber bushing's placement in the firewall's hole.
Примечание: Do not get any grease on the surfaces of the connector.
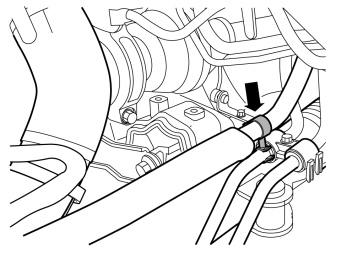
- Route the remaining cable (to the passenger compartment connector) from the branching connector to the right end of the power steering.
- Press on a double clamp from the kit on the front pipe and fasten the cable.
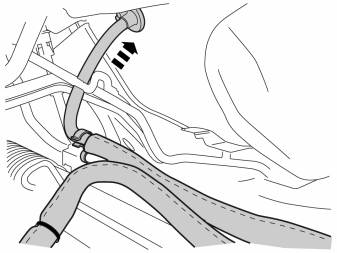
- Press the rubber bushing into place.
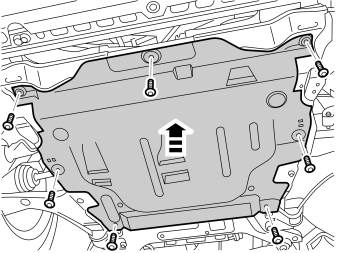
Illustration A
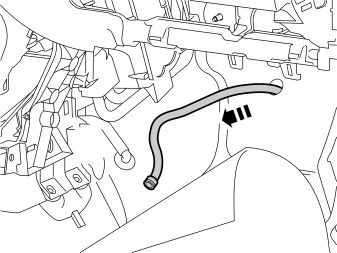
- Route the cable onto the bracket for the passenger compartment connector socket.
- Route the cable from the engine compartment through the hole in the carpet.
Illustration B
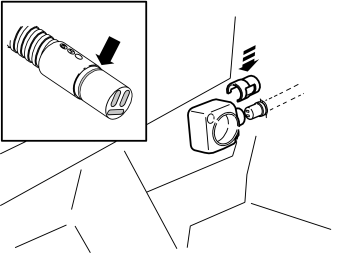
- Route the cable from the engine compartment through the hole in the carpet.
- Grease the O-ring with low temperature grease (part no. 1161427).
- Connect the cable to the passenger compartment connector socket. Press a locking sleeve (from the kit) over the joint.
- Fold the carpet back into position and install the passenger compartment connector using both the screws.
Примечание: Ensure that no grease gets onto the connector surfaces.
Обсуждение и оценка
0Пока нет комментариев. Будьте первым.