Preparations
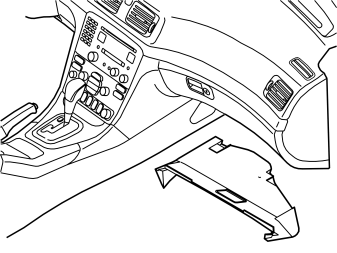
- Remove the soundproofing panel on the passenger side by pulling straight down and forwards.
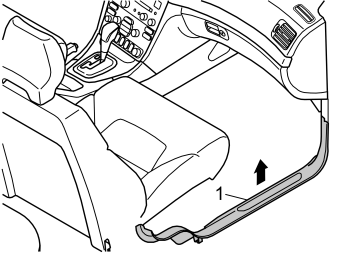
- Remove the sill moulding (1).
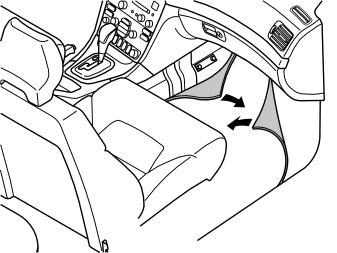
- Fold the carpet to one side.
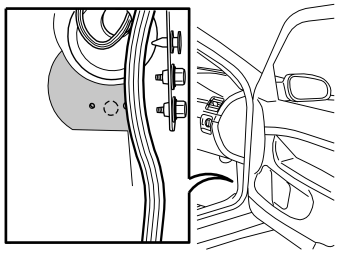
- Cut away a section of the soundproofing at the A-post (the shaded area in the illustration).
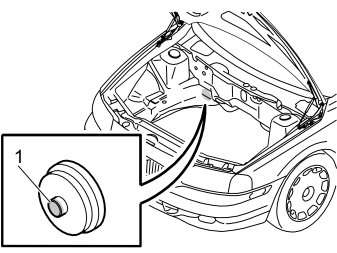
- Cut away the engine compartment insulation when punching through
- Cut off the top of the rubber grommet (1)
- Thread the cable from the passenger compartment through the rubber grommet to the engine compartment.
Installing the bracket
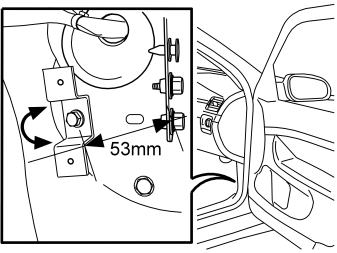
- Take the short flanged screw and the bracket from the kit
- Install the bracket using the screws in the existing weld nut as illustrated. Do not tighten fully yet
- Turn the bracket to maintain a distance of 53 mm between one corner of the bracket and the centre of the hole for the lower ground screw as illustrated
- Tighten the screw.
Installing the passenger compartment connector socket
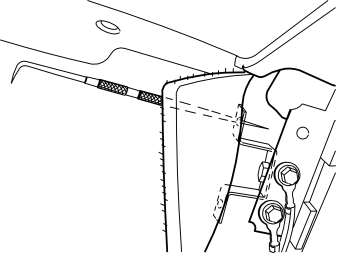
- Partially fold the carpet back over the bracket
- Make a hole in the carpet opposite the upper mounting hole in the bracket using a double ended scriber.
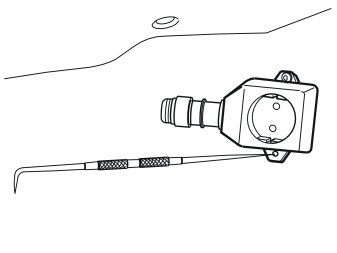
- Take a screw and the passenger compartment connector socket from the kit. Tighten the passenger compartment connector socket to the bracket in the upper mounting
- Insert the double ended scriber in the lower mounting for the passenger compartment connector socket. Make a hole in the carpet opposite the lower hole on the bracket
- Tighten the lower mounting for the passenger compartment connector socket using a screw from the kit.
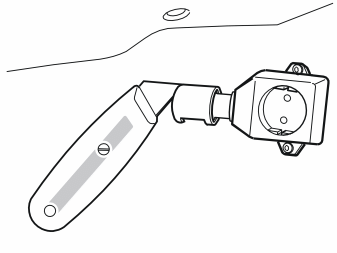
- Press a locking sleeve (from the kit) onto the passenger compartment connector socket. Slide the locking sleeve along the terminal for the passenger compartment connector socket
- Take a knife and cut the carpet just in front of the locking sleeve. Make a cut that is the same diameter as the locking sleeve.
Примечание: Do not damage any wiring and hoses under the carpet.
- Remove the passenger compartment connector socket from the bracket and fold the carpet to one side.
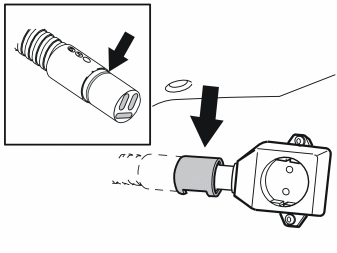
- Thread the cable through the hole in the carpet
- Grease the O-ring using low temperature grease, (P/N 1161417-9).
Примечание: Ensure that no grease gets onto the connector surfaces.
- Connect the cable to the passenger compartment connector socket. Press a locking sleeve (from the kit) over the joint
- Fold the carpet back into position and install the passenger compartment connector socket using both the screws.
- Reinstall the soundproofing panel and the sill moulding.
Installing the junction connector
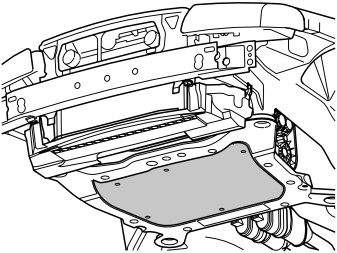
- Remove the cover plate.
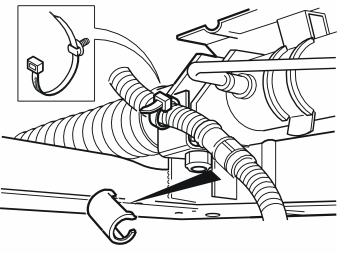
If an engine block heater is installed:
- Remove the connectors for the engine block heater and the front engine block heater socket from the bracket on the steering gear.
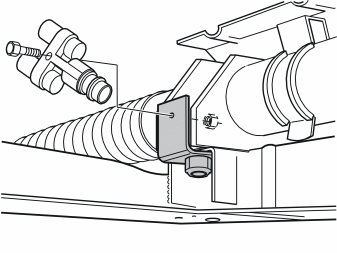
If an engine block heater is not installed:
- Remove the nut from the right-hand side of the steering gear
- Install the bracket and a new nut from the kit
- Tighten the nut. Tighten to 50 Nm (35 lbf. ft)
- Install the junction connector on the bracket using the screw and nut from the kit.
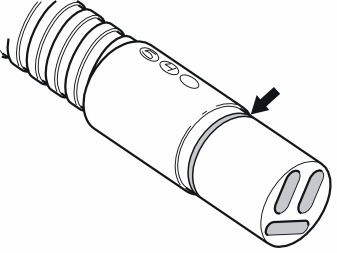
- Lubricate the O-rings using low temperature grease, (P/ N 1161417-9).
Примечание: Ensure that no grease gets onto the connector surfaces.
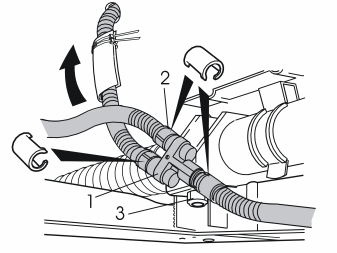
- Take the heat shield sleeve and the two tie straps from the kit. Thread the heat shield sleeve onto the cable routed to the passenger compartment connector socket
- Route the heat shield sleeve up to the rubber grommet for the passenger compartment. Tighten the two ties straps
- Install the cable from the passenger compartment connector socket to the socket (1) on the junction connector
- Install the cable from the engine block heater to the socket (2) on the junction connector
- Install the cable from the front engine block heater socket to the socket (3) on the junction connector
- Press three locking sleeves over the cable splices.
Примечание: Ensure that the cable does not rub against any sharp edges etc. The cable must not be secured to the fuel lines, air conditioning (A/C) pipes or brake pipes.
- Reinstall the splash guard. Tighten the screws. Tighten to 25 Nm (17 lbf. ft).
Обсуждение и оценка
0Пока нет комментариев. Будьте первым.