Применимость
| Модель | Двигатель | Год |
|---|---|---|
| S80 (07-) | — | 2007–2015A |
Примечание: During installation, the car and components must maintain a temperature of at least +20° C (68° F).
Preparations
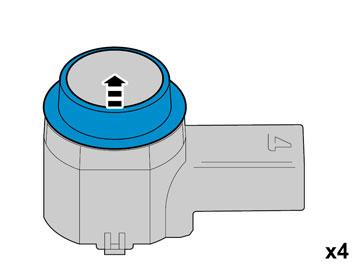
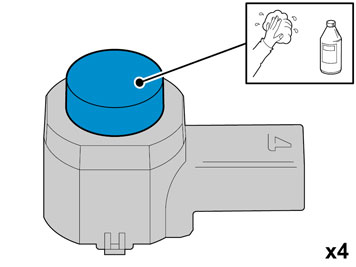
- Clean the sensors. Use: Isopropanol.
- Allow to dry.
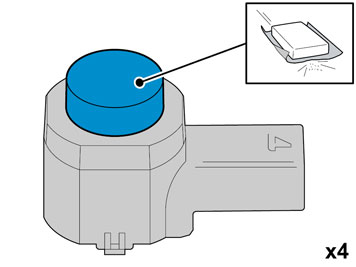
- Carefully mat down the surface. Use Glasspaper, grade P1000.
- Clean the sensors again. Use: Isopropanol
- Allow to dry
- Avoid contact with the cleaned surfaces.
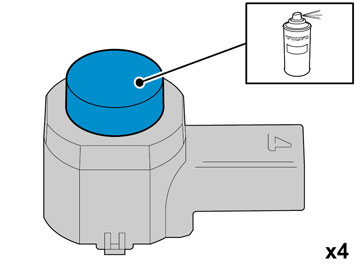
Осторожно: protect the connections' contact surface against paint.
- Paint the sensors in the same colour code as the vehicle.
- Use Volvo Touch-up paint. (Only use base coat.)
- Use: Volvo 2-K Varnish. P/N: 31335447
Примечание: Also read the instructions on the spray can.
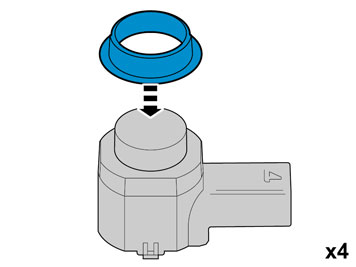
Осторожно: The paint must have dried after the first application.
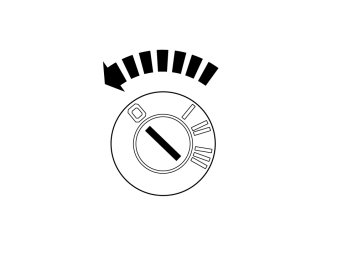
- Turn the ignition switch to position 0.
Примечание: Wait at least one minute before unplugging the connectors or removing other electrical equipment.
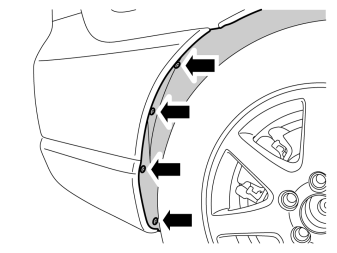
- Remove the four screws holding the end of the rear bumper.Repeat the operation on the other side.
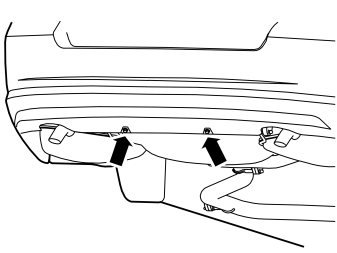
- Remove the two nuts at the lower edge of the bumper cover.
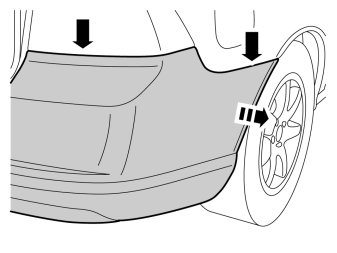
- Pull the corner straight out, continue to pull the bumper cover backwards until the five clips at the upper edge release.Repeat the operation on the other side.
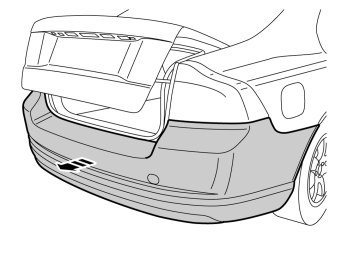
- Open the boot lid/tailgate.
- Remove the bumper cover by pulling it backwards until the three catches opposite the tailgate opening have released.
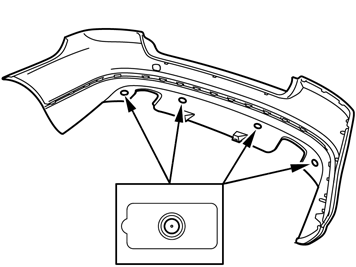
- Locate the 4 markings on the inside of the bumper cover.
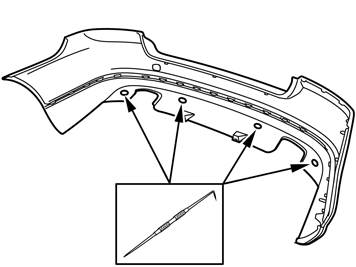
- Mark center with a scribe.
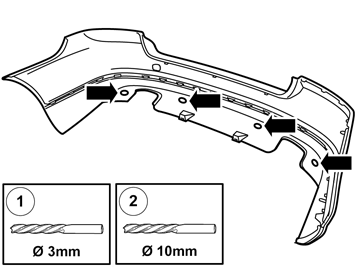
- Drill out the markings using a Ø 3 mm (1/8") diameter drill bit.
- Drill out the holes. Use a Ø10 mm (13/32") diameter drill bit.
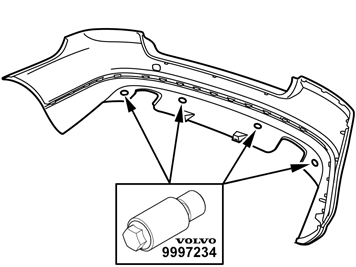
- Use special tool: 9997234 Hole tool.
Осторожно: The cutting part of the tool must be on the outside of the cover.
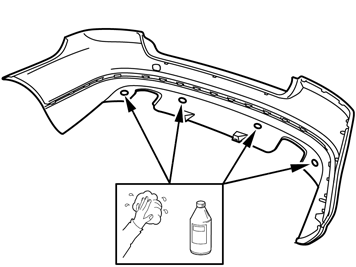
- Clean around the holes and the markings. Use: Isopropanol.
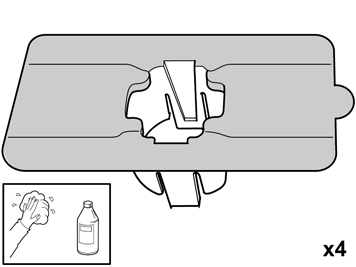
- Take four holders from the kit.
- Clean the cradles on the surface as illustrated. Use: Isopropanol.
- Allow to dry.
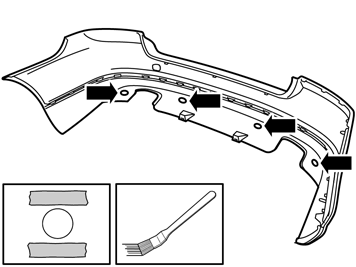
- Apply a thin and even layer of activator to the cleaned surfaces where the tape is to be attached. Use: 8637076 Activator.
- Allow to dry for at least 10 minutes.
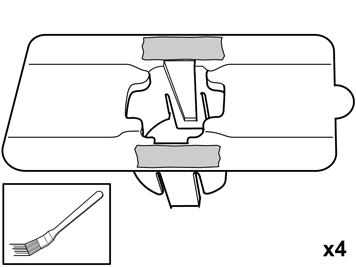
- Apply a thin and even layer of activator to the cleaned surfaces where the tape is to be attached. Use: 8637076 Activator
- Allow to dry for at least 10 minutes.
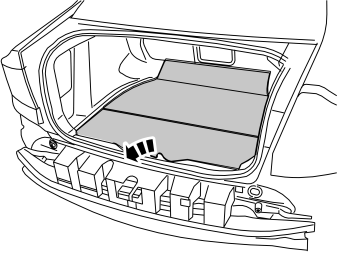
- Lift out the cargo compartment carpet.
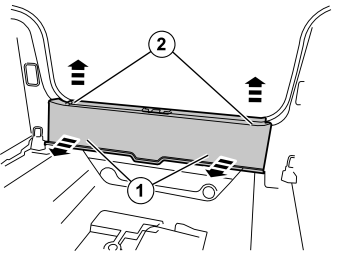
- Remove the sill trim panel by first pulling it forward until the clips in the front edge release. Then pull it upward until the clips in the top edge release.
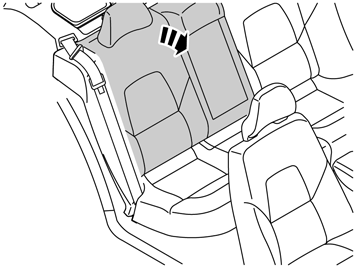
- Fold forward the right backrest in the backseat.
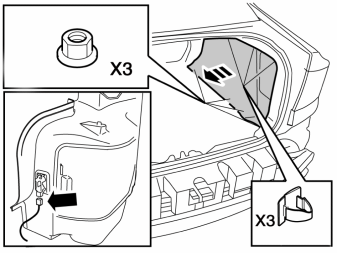
Remove:
- the clips
- the plastic nuts
- the connector to the cargo compartment lighting
- the side panel.
Unplug connector for 12V outlet, if installed.
Installation of the Parking Assistance Module (PAM)
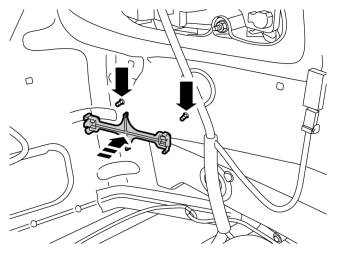
- Locate the two studs positioned on the right-hand side underneath the tail lamp in the cargo compartment. Press the control module's holder on the studs.
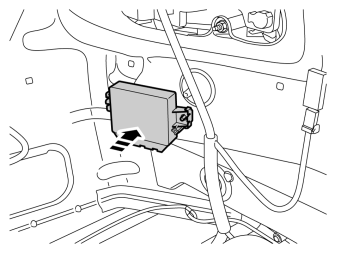
- Press the control module on the holder.
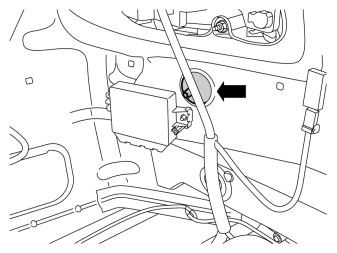
- Remove the rubber seal.
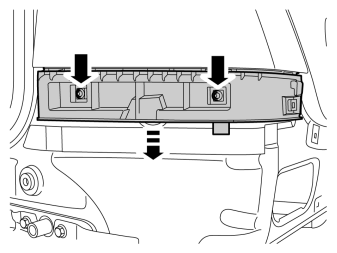
- Remove the support under the left-hand tail lamp by removing the two screws.
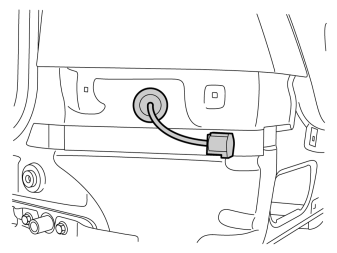
- Take the short cable harness and thread the end with the black connector through the hole in the body.
- Install the rubber grommet.
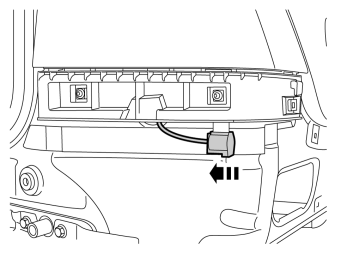
- Reinstall the support under the left-hand tail lamp.
- Hook the connector onto the rail.
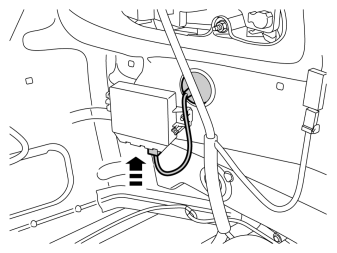
- Connect the newly routed cable harness to the control module.
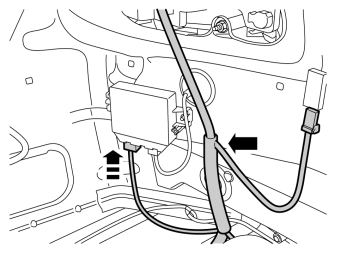
- Locate the light brown connector. It originates from the same cable harness as the connector for cargo compartment lighting.
- Connect the connector to the control module.
Reinstall:
- the side panels.
- the sill trim panel.
- the floor carpet.
- Fold up the backrest.
Installing sensors
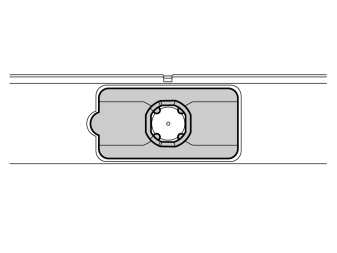
- Check which holder is to be positioned where before installing. The two middle holders are the same whilst the two outer holders are specific.
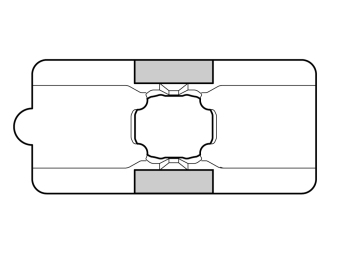
- Apply two pieces of tape to each holder.
- Remove the protective film from the tape.
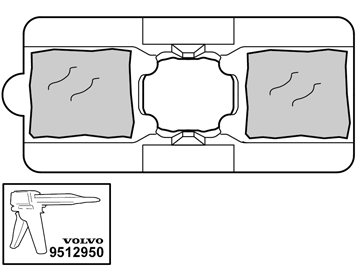
- Apply a thin layer and even layer of adhesive.
Примечание: The adhesive must be above the level for the tape.
Осторожно: The adhesive must not come into contact with the tape.
- Use special tool: 9512950 Adhesive gun
- Use: 1161730 Mixing pipe
- Use: 9511027 Adhesive.
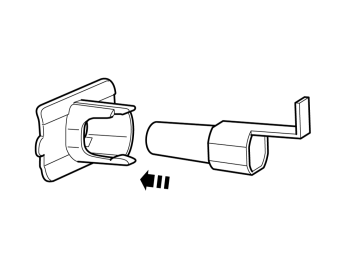
- Install the centering tool in one holder.
- Install the tool on the bumper cover.
- Hold the holder securely when removing the centering tool. The holder must be installed horizontally and in line with the bumper cover.
- Repeat the steps until all four holders are in place.
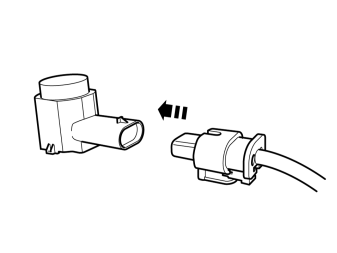
- Connect the cable harness connectors to the sensors.
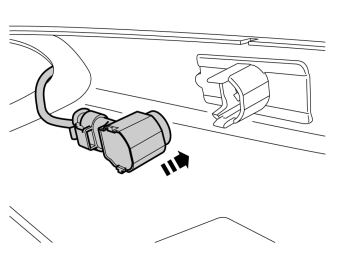
- Install the sensors in their holders. Take care not to release the holders from the tape when installing.
Примечание: The large gray connector must protrude from the right-hand side of the bumper cover (see image 31).
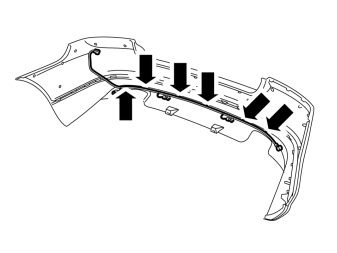
- Press the six cable holders on the longitudinal flange of the bumper casing.
Installing the bumper
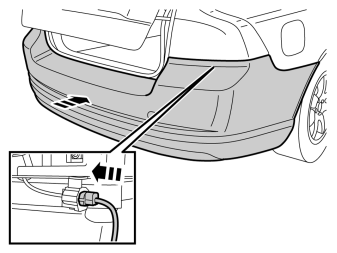
- Lift up the bumper and connect the connector.
- Press the bumper's hooks in at the rear edge. Press all the hooks for the ends into the body.
- Reinstall the screws on the front edges of the bumper casing.
- Reinstall the plastic nuts at the lower edge.
Installing the switch
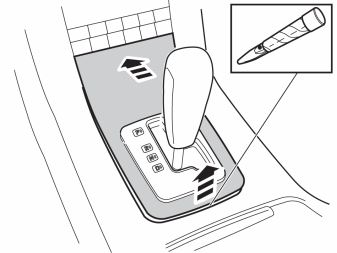
- Press the panel in at the front edge.
- Lift the panel at the rear edge and remove it.
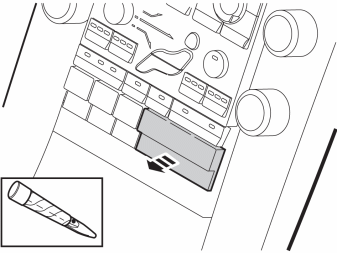
- Remove the cover.
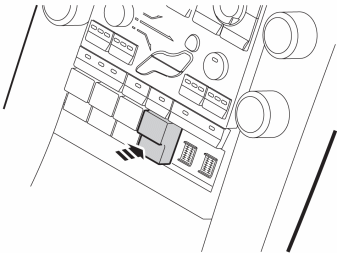
- Install the new switch. It must be fitted in the first available button location seen from the steering wheel.
Примечание: Cover plugs are purchased separately.
- Reinstall the gear selector panel.
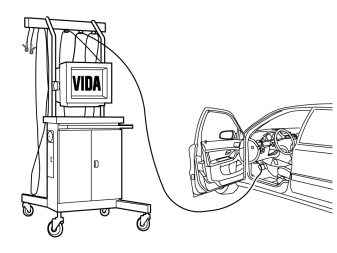
- Download software (application) for the accessory's function according to service information in VIDA. See VIDA or accessories catalogue for article number on software.