Применимость
| Модель | Двигатель | Год |
|---|---|---|
| C30 | — | 2008–2013 |
| C70 (06-) | — | 2008–2013 |
| S40 (04-) | — | 2008–2012 |
| V50 | — | 2008–2012 |
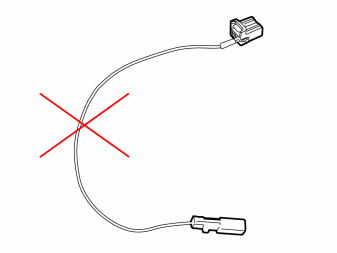
Примечание: On cars being installed with the portable Navigation system and TMC kit, the short cable harness in the Navigation system kit (see image) must not be used. It must be replaced with cable harness A in the TMC kit.
Applies to all models
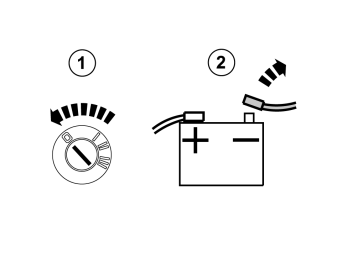
- Turn the ignition key to position 0.
- Disconnect the battery negative lead.
Примечание: Wait at least three minutes before unplugging the connectors or removing other electrical equipment.
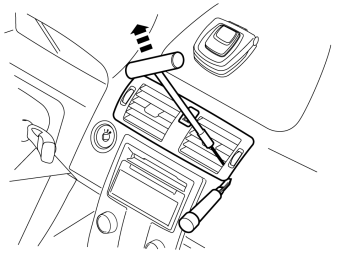
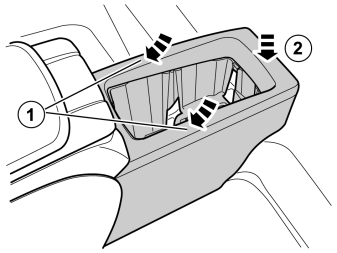
- Remove the ventilation outlet by carefully inserting special tool 9995919 between the ribs and carefully pulling up the four catches on the lower edge. Carefully pry using a weatherstrip tool.
Примечание: Pay particular care to the dashboard and the outlet ribs. These can easily be damaged as the outlet is mounted very firmly.
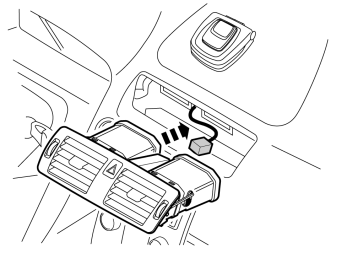
- Unplug the connector for the warning flashers and move the unit aside.
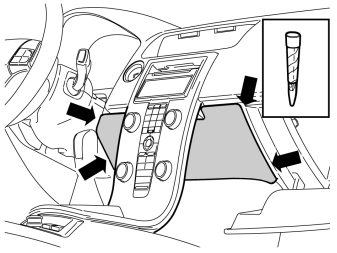
- Open the glovebox.
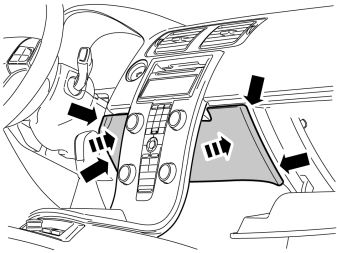
- Carefully pry off the panel inside the centre console. Use a plastic weatherstrip tool. The panel is secured by two clips on each of the short sides.
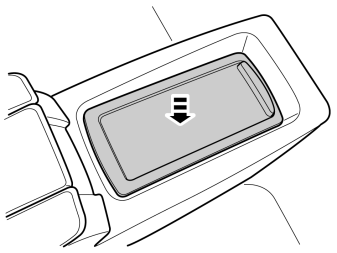
- Pull the panel away downwards.
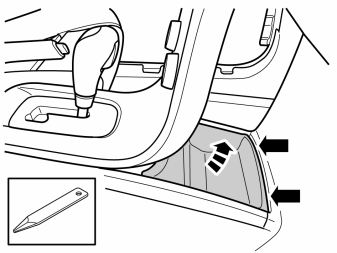
- Remove the rubber mat and storage compartment.
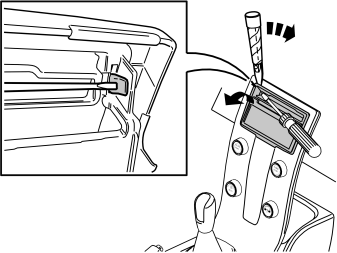
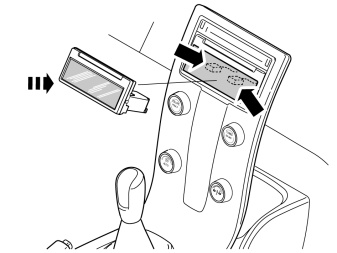
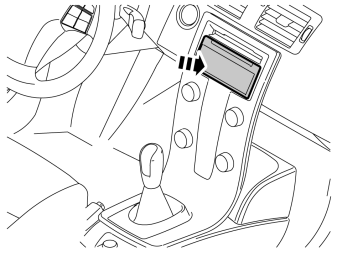
- Detach the surround around the display and the media player by pressing in the catch at the edge of the media player cover. Use a small screwdriver. Carefully pry off the surround at the corner. Use a plastic weatherstrip tool.
Примечание: Do not damage the panel and dashboard.
- Repeat the operation on the other side.
Подсказка: If the other side does not detach, press the detached side into position again and repeat the procedure, beginning from the other side.
- Fold the surround backwards. Remove by pulling upwards.
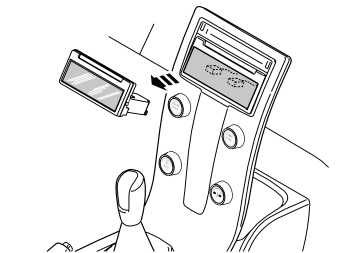
- Press out the display module from the reverse of the center console. Use both hands and press straight back.
- Disconnect the two connectors. Put the display to one side.
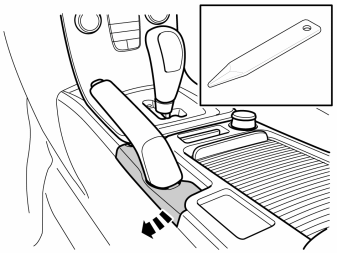
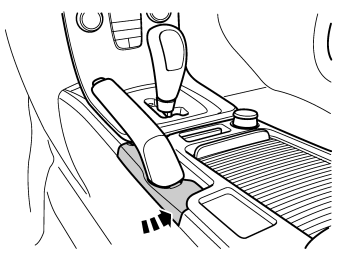
- Carefully pry loose and remove the hand brake lever's panel.
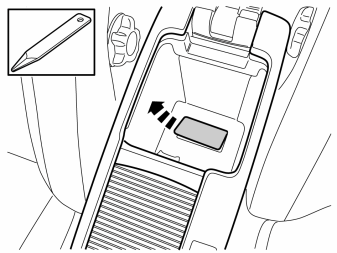
Applies to cars with manual gearbox
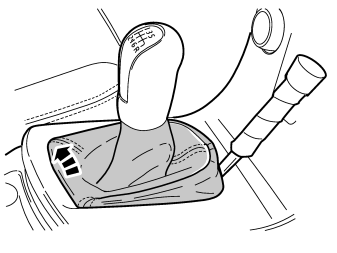
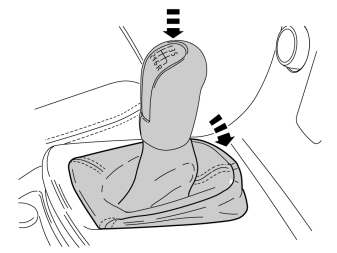
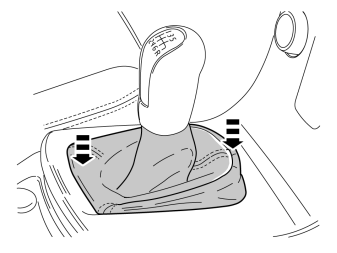
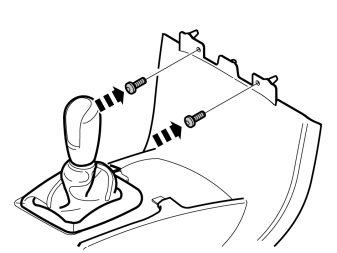
- Remove the gear selector lever boot from the center console. First pry it off at the front edge using a weatherstrip tool and then unhook it at the rear edge.
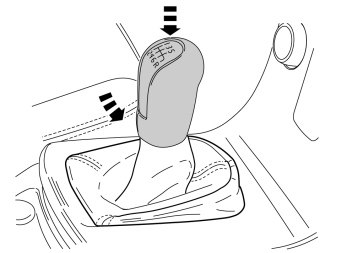
- Loosen the gearshift knob from the shift by pressing down the knob and turning it slight more than a 1/4 turn anticlockwise and pull it up.
Applies to all models
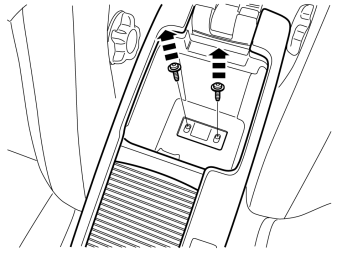
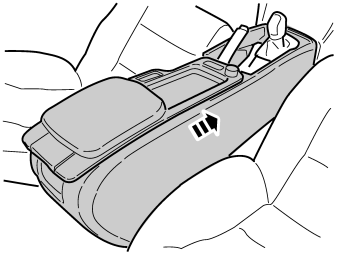
- Remove the two screws holding the centre console at the rear edge.
Applies to the C70
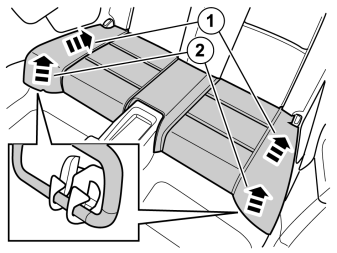
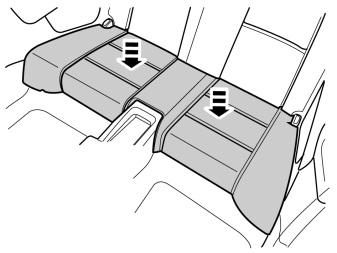
- Remove the rear seat cushion by first pressing the outer edges of the cushion backwards and then by pulling them upwards so that the outer hooks release.
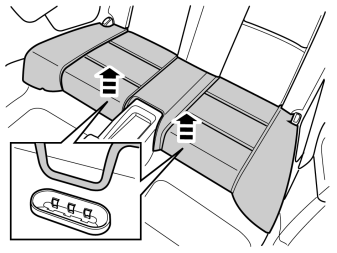
- Lift the cushion straight up in the middle so that the inner hooks release.
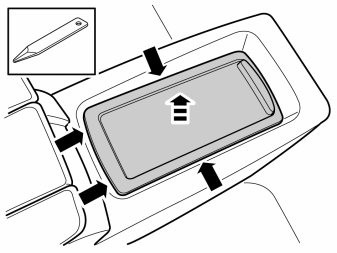
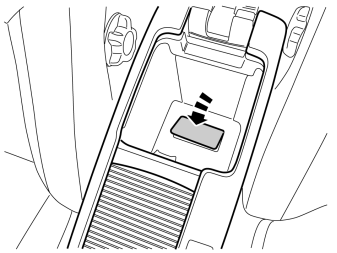
- Remove the rear cup holder from the rear tunnel compartment by prying at the leading edge and pressing in the catches, first at the leading edge and then on the sides.
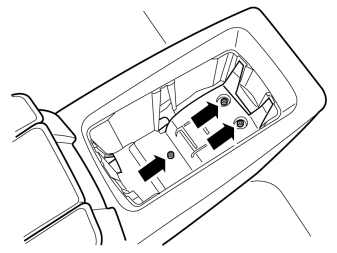
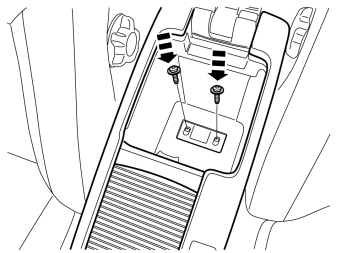
- Remove the screws.
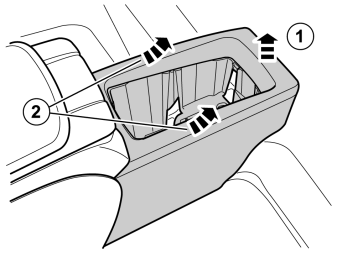
- Remove the rear tunnel compartment by pulling it upward (1) rearward (2) so that it releases from its catches.
Applies to all models
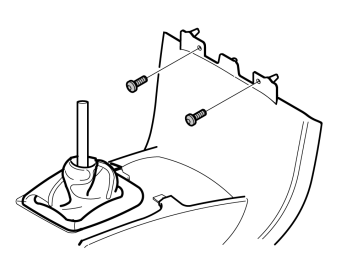
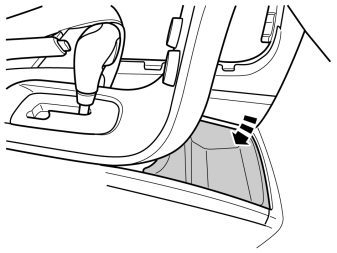
- Remove the two screws along the front edge of the tunnel console.
A and B
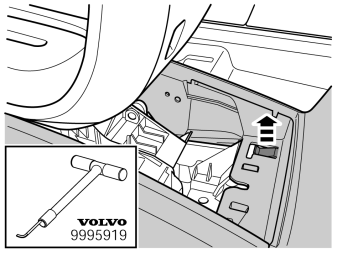
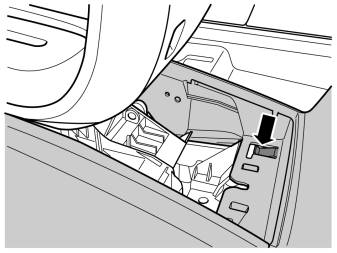
- Carefully pull up the lock catch with special tool 9995919. At the same time, slide the whole tunnel console backward so that the two rear screws in the centre console's panel can be accessed.
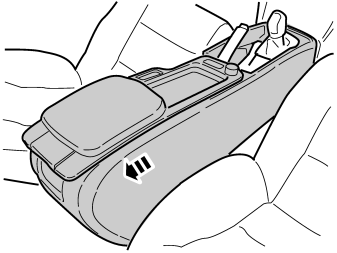
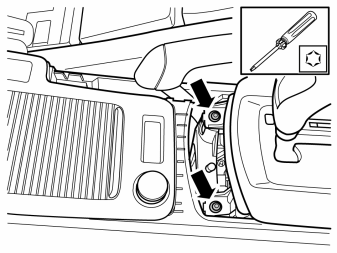
- Remove the two screws.
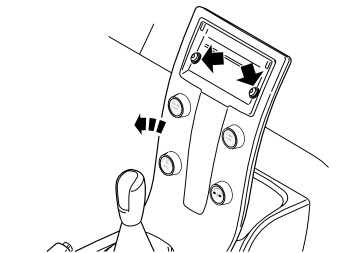
- Remove the two screws holding the centre console to the dashboard.
- Remove the connector on the reverse of the dashboard environment panel.
- Remove the centre console's panel from the dashboard and tunnel console.
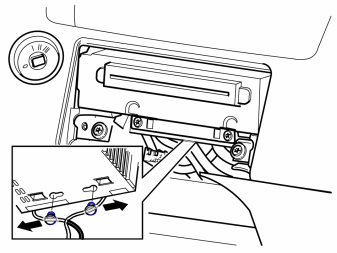
- Remove the two clips securing the cables to the media player by first pressing them to the sides and then pulling them away downwards.
Примечание: Make sure that the optic cables are not bent or stretched. They may not be bent with a radius less than 25 mm (1").
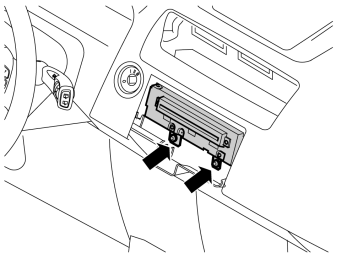
- Remove the two screws from the bottom of the media player.
- Pull out the media player and detach the connectors on the rear side.
Applies to cars with and without speaker grilles
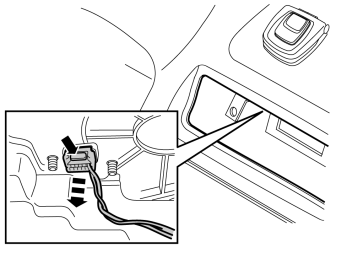
- Press in the catch and disconnect the connector on the underneath of the GPS cradle.
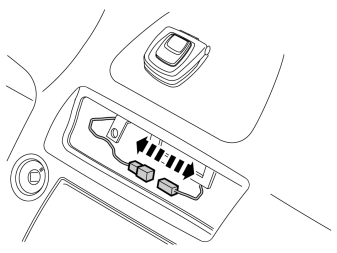
- Disconnect the two green connectors on the cable for the cradle from each other. Follow the disconnected cable from the cradle, the connectors are inside the dashboard.
- Place the short cable to one side. A new cable is in the kit.
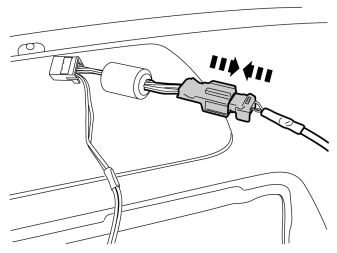
- Take cable harness A and TMC unit C from the kit and connect the larger green connectors to each other.
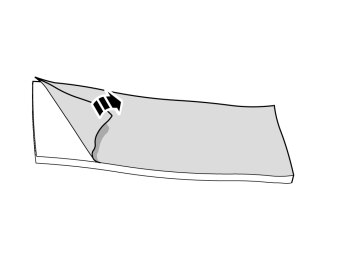
- Take the foam tape from the kit and remove the protective tape from it.
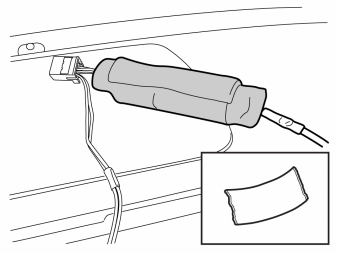
- Wrap the foam tape around the ferrite and the green connectors to prevent any rattling.
A
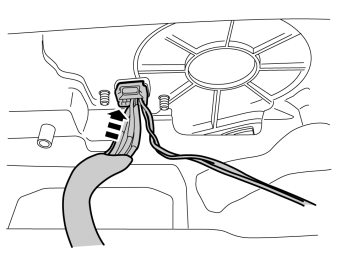
- Now take the gray connector on the joined cable harnesses and connect underneath the GPS cradle.
B
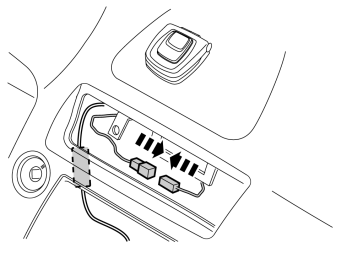
- Connect the two remaining small green connectors to each other.
A
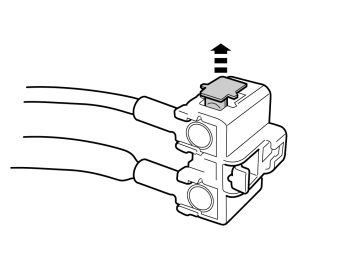
- Carefully pry up and remove the catch in the receptacle housing on the cable terminal for the socket marked 1 in the contact to the media player. Use a thin pointed object.
B
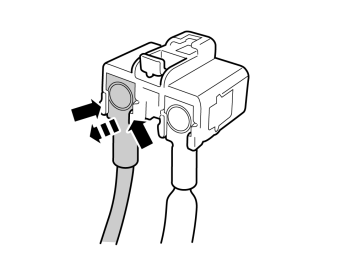
- Carefully pry up the two small catches at the rear edge of the receptacle housing and carefully pull out the cable terminal.
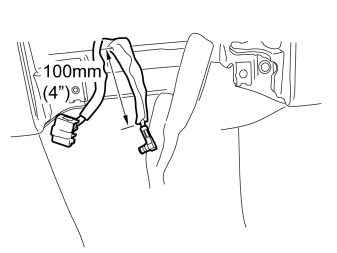
- Separate the two cables in the antenna cable harness for the media player from each other approximately 100 mm (4").
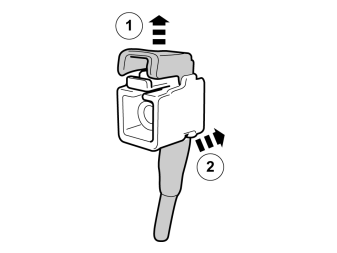
- Take the antenna cable B from the kit. Carefully pry up the catch and pull out the cable terminal from the receptacle housing.
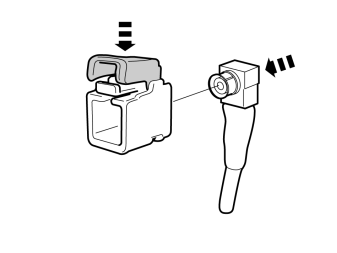
- Take the newly removed receptacle housing and carefully push it into the loose cable terminal on the contact in the cable for the media player.
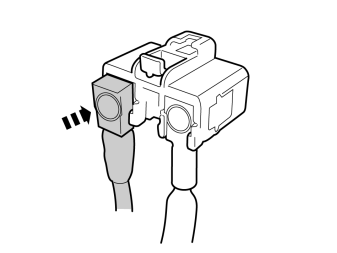
- Take the loose cable terminal in the antenna cable B and carefully secure the receptacle housing to the cables for the media player.
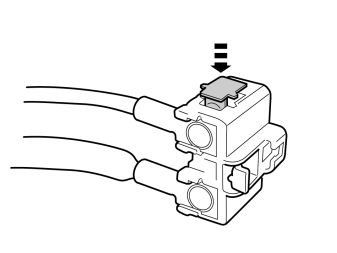
- Press the catch securely into the receptacle housing.
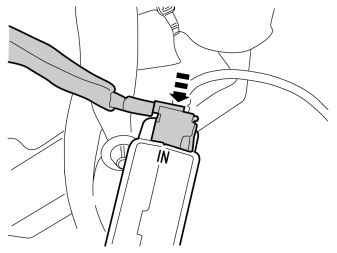
- Connect the previously disconnected cable terminal on the cable from the media player's receptacle housing to IN on TMC unit C.
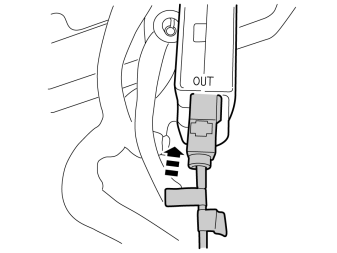
- Connect the remaining end to antenna cable B to OUT on TMC unit C.
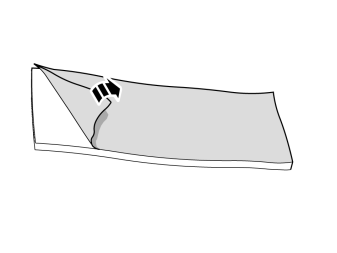
- Take the foam tape from the kit and remove the protective tape from it.
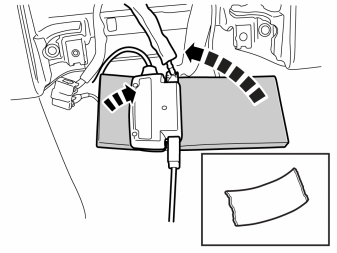
- Wrap foam tape around the TMC unit.
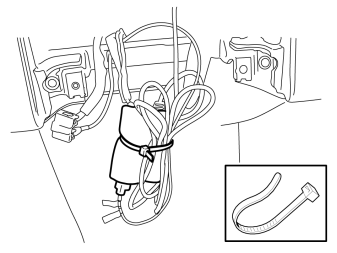
- Clamp the cable excess around the TMC unit using a cable tie from the kit. Ensure that there is enough excess to connect the antenna cable to the media player and the cable to the GPS cradle.
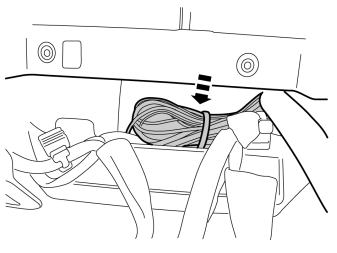
- Place the cable excess and TMC unit C in the space under the location for the media player.
A and B
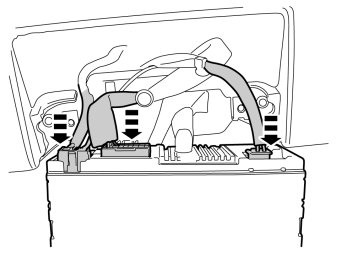
- Connect the disconnected connectors to the media player.
Примечание: Space is confined at the media player and there are many cables so take care to ensure that it is positioned so that no cables are trapped or are at risk of being chafed.
- Install the media player and tighten using the two screws.
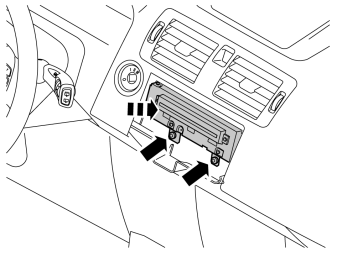
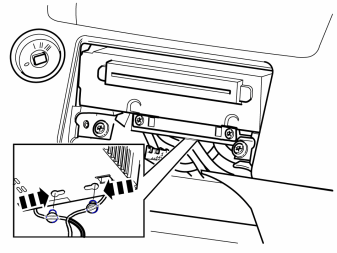
A and B
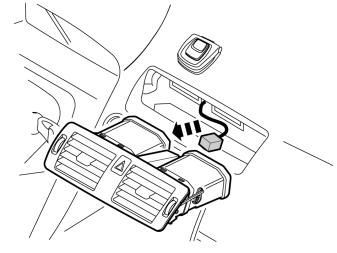
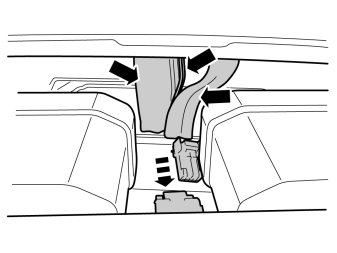
- Now position the cable harnesses from the GPS cradle and the hazard warning flasher in-between the two air ducts, when pushed into position.
- Secure the two small green connectors from the thin cable harness from the GPS cradle using a piece of butyl tape in a suitable position to prevent rattling.
- Connect the connector to the hazard warning flasher. Check between the ribs in the outlets so that the cables do not obstruct the air ducts.
- Carefully press the outlets into place.
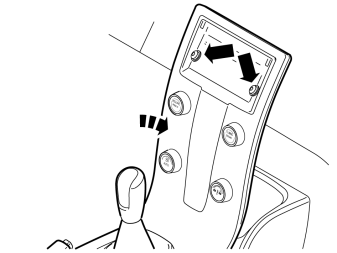
- Refit the centre console.
- Connect the climate panel connector.
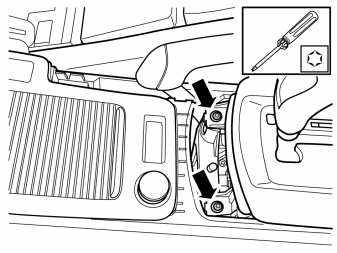
Applies to cars with manual gearbox
Applies to all models
Applies to the C70
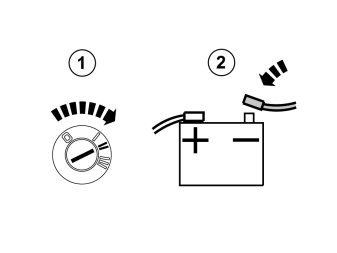
- Turn the ignition key to position II.
- Reconnect the battery negative lead.
Обсуждение и оценка
0Пока нет комментариев. Будьте первым.