Применимость
| Модель | Двигатель | Год |
|---|---|---|
| XC90 | — | 2003 |
Preparations

- Position the driver's seat in the rearmost position
- Turn the ignition key to position 0
- Disconnect the battery negative lead.
Примечание: Wait at least five minutes before disassembling the connectors or removing other electrical equipment.
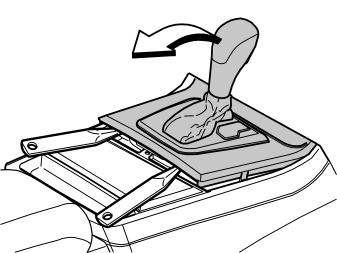
Applies to cars with automatic transmissions
- Turn the ignition key to position II.
Applies to all models
- Move the gear selector lever to its rearmost position
- Carefully pry off the gear selector lever panel at the lower edge using a weatherstrip tool. Pull the panel backwards to access the screws for the dashboard environment panel.
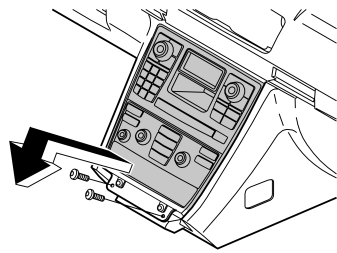
- Remove the screws holding the bracket for the dashboard environment panel and the control module
- Pull out the bracket at the lower edge. Pull downwards from the top edge of the centre console
- Disconnect the connectors from the dashboard environment panel and control module. Disconnect the connectors for the Mini disc player and/or CD-player/changer if applicable.
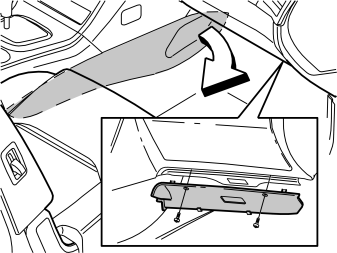
- Remove the centre console right-hand side panel. Pull off the panel starting at the front edge. Then pull backwards until all the clips release
- Remove the right-hand side soundproofing panel. First remove the two screws. Then pry off the panel at the top edge.
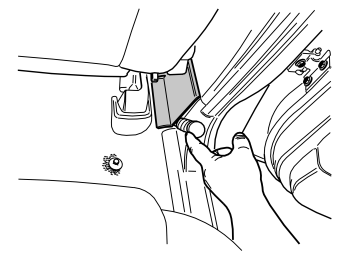
- Carefully pry off the panel above the joint between the right-hand door sills, at the lower edge using a weatherstrip tool.
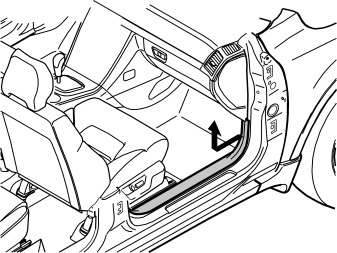
- Remove the sill trim panel for the right-hand front door. Pull off the panel starting at the front edge until the clip releases. Continue backwards until the remaining clips have released
- Unhook the sill trim panel from the B-post panel and the panel at the lower edge of the B-post panel.
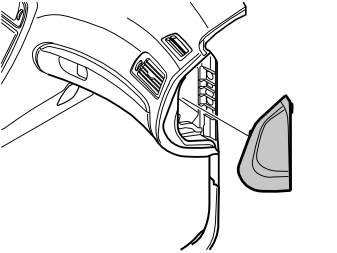
- Remove the panel on the right end of the dashboard.
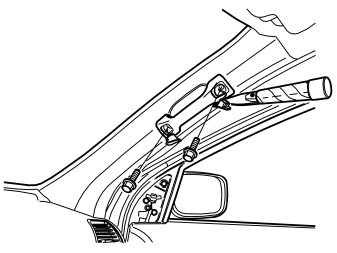
- Pry off the cover on the grab handle in the right-hand front door. Remove the screws.
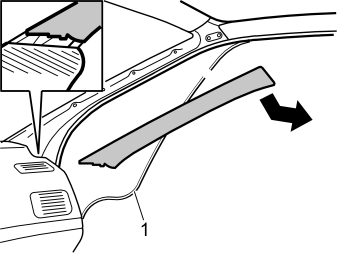
- Remove the rubber strip (1) at the front edge of the right-hand front door
- Remove the right-hand A-post panel by carefully pulling the top edge of the panel outwards until the clip on the inside releases. Pull up from the mounting in the dashboard.
Примечание: Do not damage the headlining.
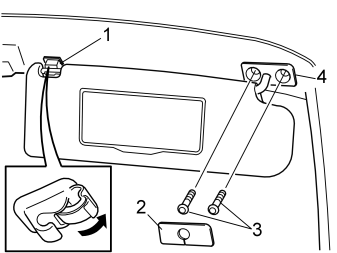
- Remove the sun visor from the inner mounting (1) on the right-hand side
- Carefully pry the cover (2) off. Remove the two screws (3) for the sun visor mounting
- To remove the headlining: Remove the inner mounting (1) by prying up as illustrated. Then carefully pull the mounting (secured by four catches) from the roof.
Примечание: Do not damage the headlining.
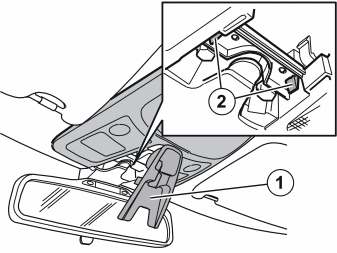
- Fold down the cover (1) by carefully pulling down the front edge of the cover
- Squeeze the catches (2). Pull the front edge of the panel downwards. Then pull the rear edge off.
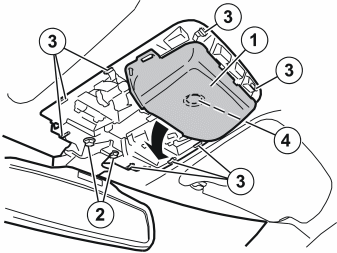
- Remove the rear view mirror and the front interior lighting (1). First remove the two screws (2) and then press in the eight catches (3) around the interior lighting
- Carefully pull the components downwards and allow them to hang by their wiring. (The interior lighting is secured to the roof using the clip (4).).
Installing the integral antenna
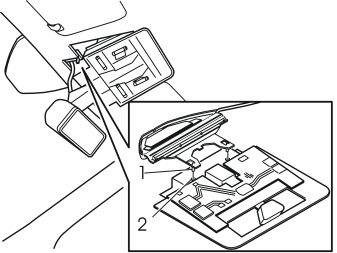
- Install the new antenna. Carefully bend the headlining downward and slide the antenna backward and inwards. Align the antenna lugs (1) with the grooves in the bracket (2)
- Insert the cable at the inside of the front edge of the headlining. Route the cable out towards the right-hand A-post
- Secure the cable using butyl tape
- Reinstall the bracket and rear view mirror. Tighten the screws. Tighten to 10 Nm (7.5 lbf. ft)
- Reinstall the panel. Securely lock the panel using the cover.
Cable routing and connection
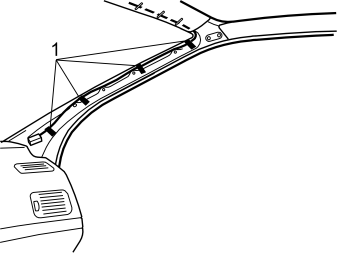
- Route the cable down from the headlining along the right A-post
- Tape the cable onto the existing cable harness as illustrated (1).
Внимание: Ensure that the cable is not routed over the inflatable curtain. This could compromise the function of the inflatable curtain in the event of an accident.
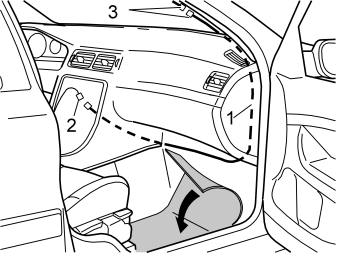
- Push the carpet to one side by the right-hand front seat
- Take the extension cable (1) from the kit. Route the cable between the A-post and the right-hand side of the dashboard, continue along the right-hand end to the front edge of the floor
- Route the cable to the left along the front edge of the floor and up to the inside of the centre console
- Connect the cable (1) to the corresponding cable (2) from the hands free box
- Connect both connectors (3) at the right A-post to each other
- Wrap the foam tape around the connectors to prevent rattling.
- Reinstall the A post panel. Tighten the grab handle. Tighten to 10 Nm (7.5 lbf. ft). Reinstall the cover
- Reinstall the rubber strip in the right-hand front door
- Reinstall the panel on the end of the dashboard
- Reinstall the sun visor. Tighten the screws. Tighten to 10 Nm (7.5 lbf. ft). Reinstall the cover and the inner mounting
- Fold the carpet on the right-hand side back into place
- Reinstall the panel on the door trim for the right-hand front door. Press the B-post lower panel into place
- Reinstall the soundproofing panel on the right-hand side
- Reinstall the right-hand side panel for the centre console
- Connect the connectors to the dashboard environment panel. If applicable connect the CD player and/or Mini disc player connectors
- Position the bracket. Tighten the bracket using the two screws. Reinstall the gear selector lever panel.
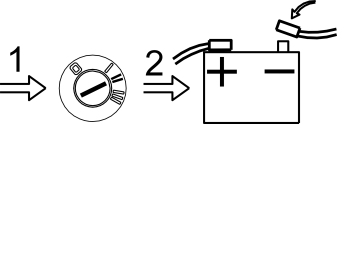
- Turn the ignition key to position II
- Reconnect the battery negative lead.