Примечание: Install the aerial according to the separate instructions.
Примечание: Cars with leather upholstery require new leather upholstery, customised for hands-free equipment, for the head restraint.
- Make a note of the radio code.
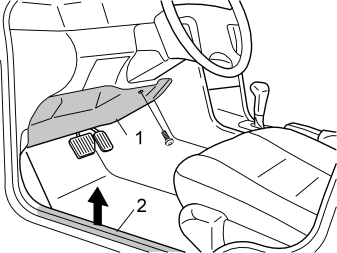
- Remove the soundproofing panel (1) and the sill moulding (2) on the driver's side.
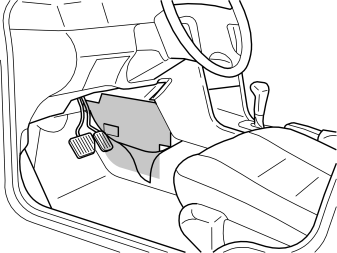
- Fold the floor carpet down. Remove the carpet support at the centre console.
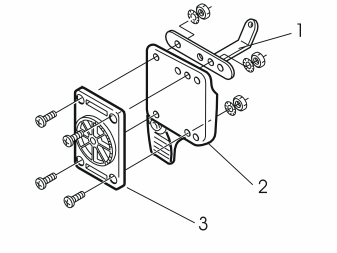
- Install the mounting plate (1) on the bracket (2) together with the mounting plate for the carphone holder (3). Tighten using screws, washers and nuts.
Illustration A applies to Nokia
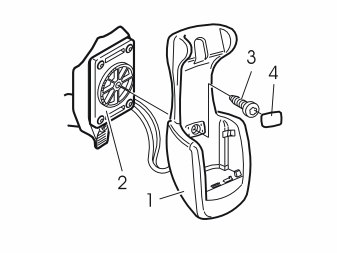
- Screw the carphone holder (1) onto the mounting plate (2) using the screw (3)
- Install the cover (4).
Illustration B applies to the Ericsson T28
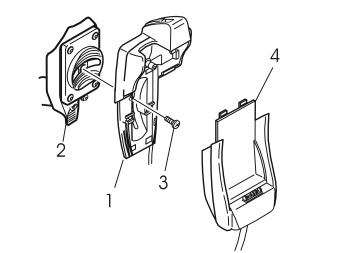
- Screw the upper section of the carphone holder (1) onto the mounting plate (2) using the screw (3)
- Press the lower section (4) of the carphone holder onto the upper section.
Illustration C applies to the Ericsson T20 etc.
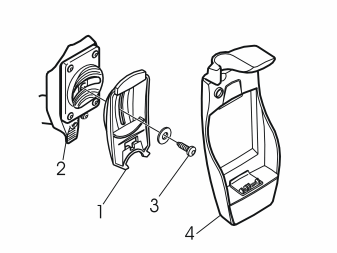
- Screw the mounting for the (1) carphone holder onto the mounting plate (2) using the screw (3)
- Press the carphone holder (4) onto the mounting (1).
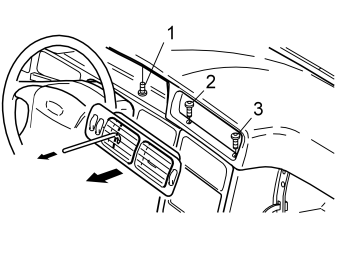
Remove:
- the ventilation grille by pulling straight backwards using a hooked object
- the screws (1, 2, 3).
Illustration A applies to the Ericsson T20/T28 etc.
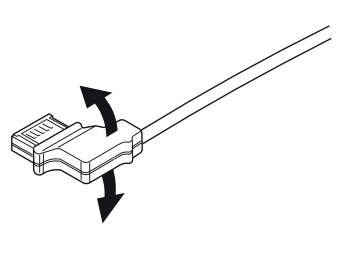
- Disconnect the connector on the single cable for the carphone holder.
Illustration B applies to Nokia
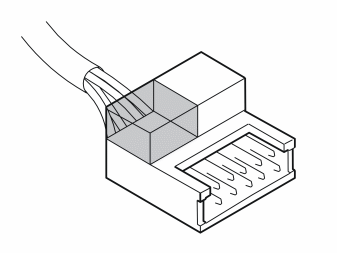
- A cut-out must be filed out of the connector on the long thicker cable from the carphone holder so that the connector can be routed through the dashboard. File the thicker section of the connector until it goes through.
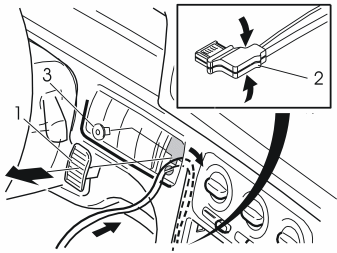
Applies to all models
- Remove the panel (1)
- Insert the two cables from the carphone holder into the hole
- Connect the aerial cable with the round connector to the cable from the aerial. Route the other cable down underneath the dashboard along the heater duct and down towards the floor.
Applies to the Ericsson T20/T28 etc.
- Assemble the connector (2) on the cable from the carphone holder.
Applies to all models
- Install the plastic nut (3) from the kit.
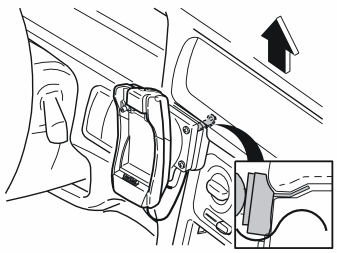
- Lift up the top of the dashboard slightly. Insert the angled section of the mounting plate in the gap under the ventilation outlet in the panel.
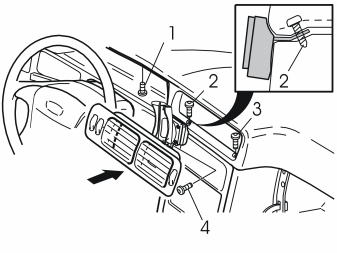
- Install the screws (1, 2, 3). Ensure that the screw (2) goes through the hole in the angled section of the mounting plate
- Secure the bracket using a screw (4) from the kit
- Reinstall the ventilation grille.
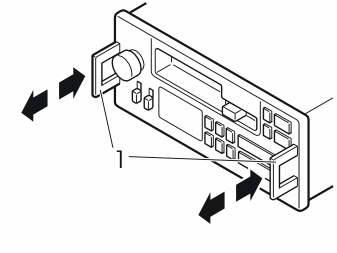
- Detach the radio by fully pressing in and releasing the latch handles (1)
- Pull out the latch handles and the radio.
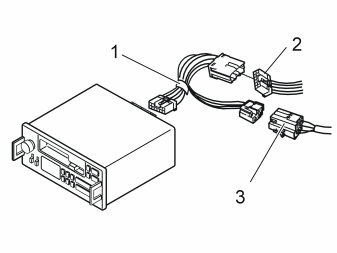
- Disconnect the existing 14-pin connector (2) from the radio
- Connect the junction cable (1) (from the kit) between the radio and the connector (2)
- Connect the cable harness (3) with the 3-pin connector, from the kit, to the junction cable (1)
- Route the cable harness (3) in the radio tray, underneath the dashboard and down towards the floor along the heater duct on the driver's side.
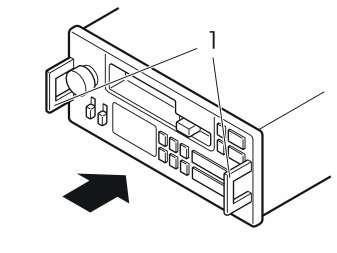
- Reinstall the radio. Press in the latch handles (1).
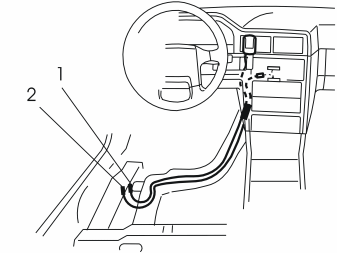
- Raise the driver's seat to the uppermost position
- Route the cable harness (1) from the carphone holder, and the cable harness (2) from the radio down under the floor carpet as illustrated.
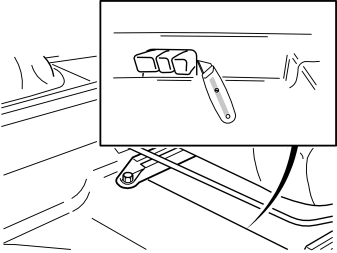
- Cut the carpet at the air vent under the driver's seat as illustrated. This is so the wiring can be connected.
Applies to Nokia
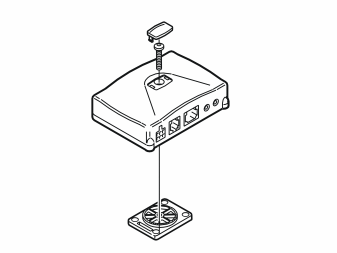
- Tighten the “hands-free”-control module to the mounting plate using the screw
- Install the cover.
Illustration A applies to the Ericsson T20/T28 etc.
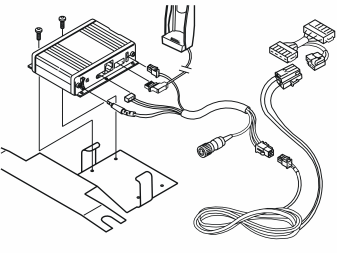
- Connect the wiring from the carphone holder and the radio to the “hands-free”control module
- Screw the “hands-free”control module onto the bracket.
Illustration B applies to Nokia
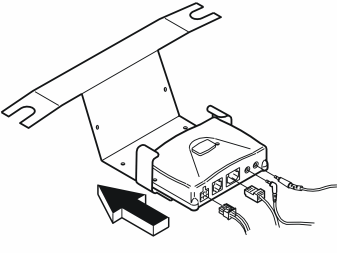
- Press the “hands-free”control module onto the bracket. Connect the wiring from the carphone holder and the radio.
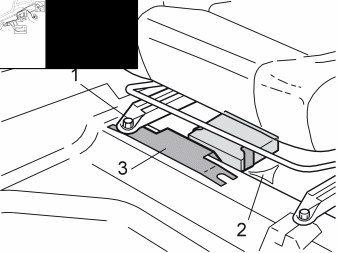
- Slacken off the screw (1) slightly
- Insert the “hands-free”control module with the bracket (3) under the carpet at the right-hand seat rail. Tighten the screw (1)
- Fold back the carpet.
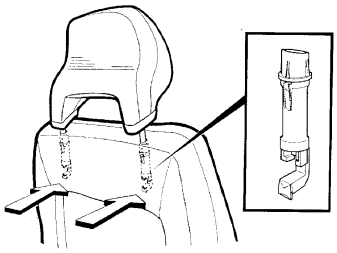
- Remove the driver's seat head restraint. Press in the catches while pulling the head restraint up.
Applies to cars equipped with “WHIPS (whiplash protection system)”seats
- Remove the label from one of the head restraint supports.
Applies to all cars
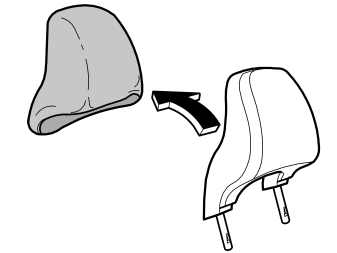
- Remove the upholstery from the head restraint. If the zip fastener catch is missing on the zip fastener, separate the teeth at the ends of the zip fastener. Then pull the zip fastener apart.
Illustration A applies to model years up to 1998 inclusive
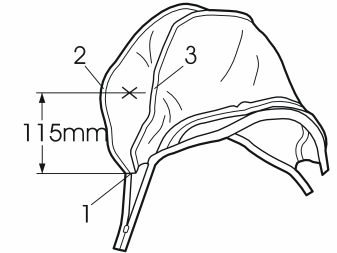
- Mark up for holes on the right hand side of the head restraint. Mark up from the front seam (1) 115 mm (4 1/2”) upwards and between the two seams (2, 3).
Illustration B applies to model years from 1999- inclusive
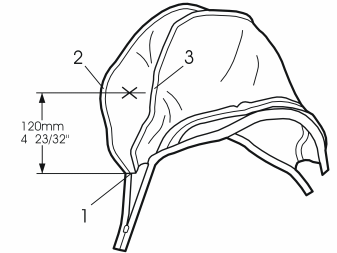
- Mark up for holes on the right hand side of the head restraint. Mark up from the front seam (1) 120 mm (4 23/32”) upwards and between the two seams (2, 3).
- Turn the head restraint upholstery inside out.
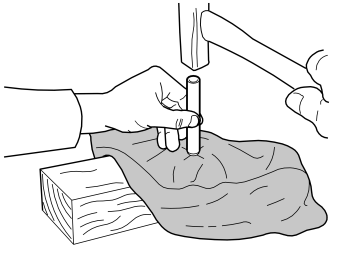
- Punch out the hole using the hole punch from the kit. Use a wooden or cork underlay
- Turn the head restraint upholstery the right way out
- Carefully thread the upholstery over the microphone and the head restraint.
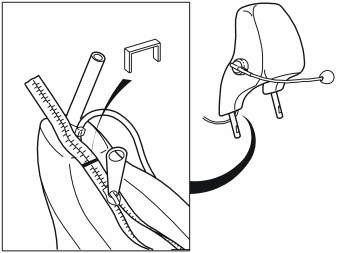
- Close the zip fastener. If there is no zip fastener catch, take a suitable zip fastener catch from the kit. Close the zip fastener catch. Lock the ends of the zip fastener using staples
- Push the ends of the zip fastener inside the upholstery.
Applies to cars equipped with “WHIPS (whiplash protection system)”seats
- Install the previously removed label on one of the support legs for the head restraint.
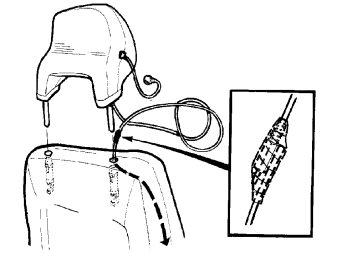
- Insert a curtain wire from the top and down the reverse of the back rest between the upholstery and the padding
- Tape the switch on the microphone cable to the curtain wire. Pull down through the seat
- Install the new head restraint.
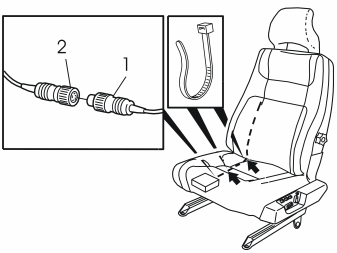
- Secure the cable under the seat. Use tie straps
- Connect the cable (1) from the head restraint to the cable harness (2) on the “hands-free”control module.
Примечание: Ensure that no cables are stretched or come loose when the seat is at the limit positions.
- Reinstall the sill moulding, carpet support and the soundproofing panel
- Enter the anti-theft radio code.
Обсуждение и оценка
0Пока нет комментариев. Будьте первым.