Применимость
| Модель | Двигатель | Год |
|---|---|---|
| V70 (00-08) | — | 2000–2002 |
| V70 XC (01-) / XC70 (-07) | — | 2001, 2002 |
Примечание: This accessory is connected to the car's electrical system. It requires software unique to the car
- Move the front seat to its rearmost position.
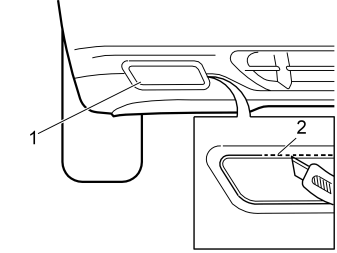
- Raise the car
- Cut out the embossed covers (1) on the left and right-hand side of the bumper.
Примечание: Cut around the outer (2) marking.
- Score around the marking
- Carefully cut through the material
- Remove the cover. Sand the edges if necessary.
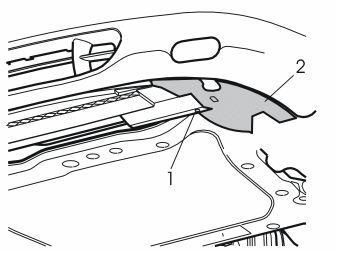
- Remove the screw (1) from the air baffle (2) for the front brake
- Remove the air baffle. Pull it backward.
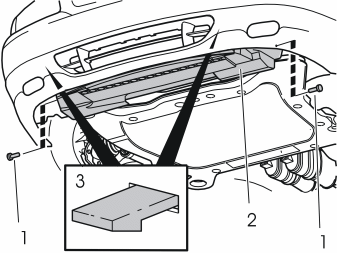
- Remove the screws (1). Slacken off the air baffle (2)
- Release the catches (3). Pull the air baffle backward
- Remove the air baffle.
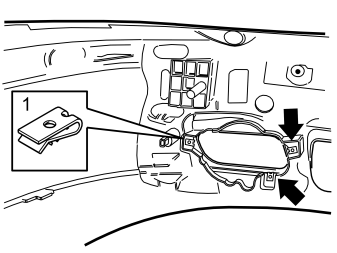
- Install the spring nuts (1) in the holes.
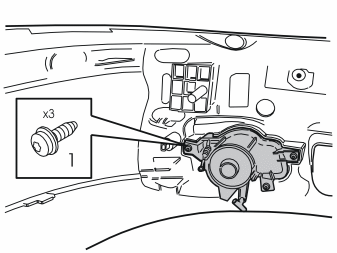
- Install the fog lamp with the screws (1) from the kit.
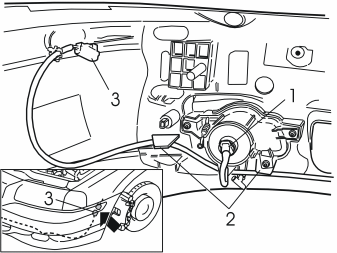
Illustration 7A
- Take the cable harness from the kit. Connect the short cable (1) to the left-hand fog lamp. Connect the long cable to the right-hand fog lamp
- Press the cable into place in the two clamps (2)
- Connect the connector (3) to the pre-routed connector at the left-hand fender liner.
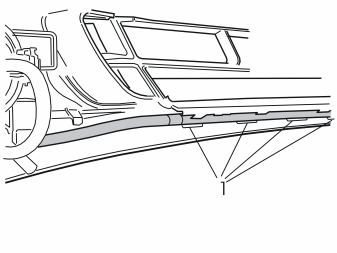
Illustration 7B
- Press the cable harness for the right-hand fog lamp into place under the air intake. Use the existing clamps (1).
- Reinstall the air baffles.
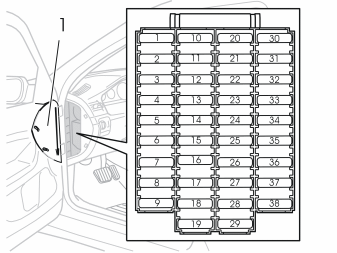
- Remove the cover (1) for the fuse holder
- Install a 15 A fuse in terminal 3 for model year 2000 cars. in terminal 18 for model year 01 cars-.
- Reinstall the cover.
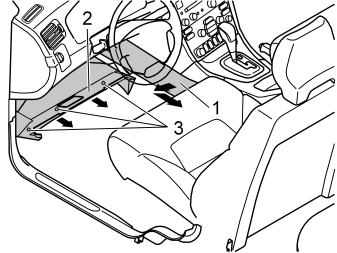
- Remove the side panel (1). Slacken off the screw clip at the rear edge of the panel. Pull the panel outward / backward
- Remove the soundproofing panel (2). Carefully pry it loose. Use a weatherstrip tool or similar. The soundproofing panel is secured with three clips (3).
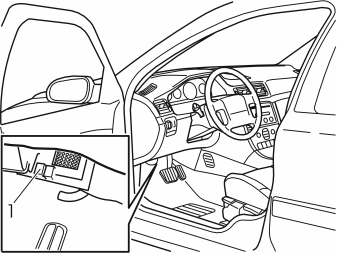
- Install the relay (1) from the kit in the relay holder socket marked MI11
- Reinstall the soundproofing panel and the side panel.
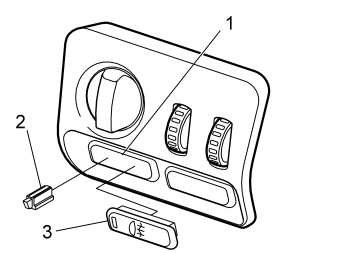
- Remove the cover (1) from the lighting control panel
- Install the light bulb (2)
- Install the button (3) from the kit. Press the button into place
- Program the software. See the service information in VIDA
- Check the function. Align the lamps.