Применимость
| Модель | Двигатель | Год |
|---|---|---|
| S80 (07-) | B6304T2 | 2008–2010 |
| S80 (07-) | B6304T4 | 2011–2013 |
| S80 (07-) | B6324S | 2007–2010 |
| S80 (07-) | B6324S5 | 2011–2013 |
| V70 (08-) | B6304T2 | 2008–2010 |
| V70 (08-) | B6304T4 | 2011–2013 |
| V70 (08-) | B6324S | 2008–2010 |
| V70 (08-) | B6324S5 | 2011–2013 |
| XC60 | B6304T2 | 2009–2010A |
| XC60 | B6304T4 | 2011, 2012 |
| XC70 (08-) | B6324S | 2008–2010 |
| XC70 (08-) | B6324S5 | 2011–2013 |
Applies to the S80
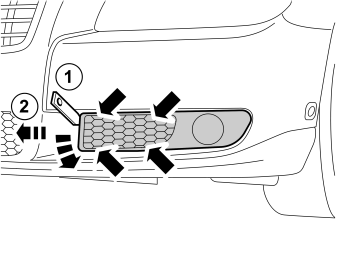
- Remove the left-hand cover panel under left-hand headlamp by first carefully prizing loose the right-hand end face until the four clips on the inside release, following which, pull it out to the right.
Примечание: Do not damage the paintwork.
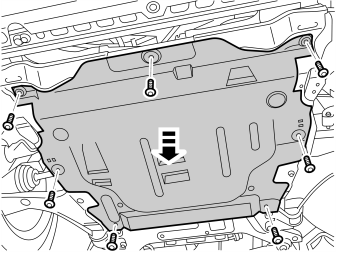
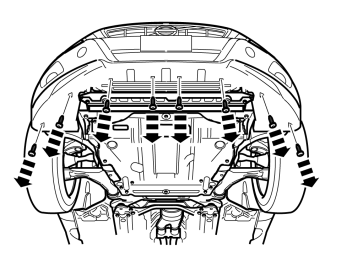
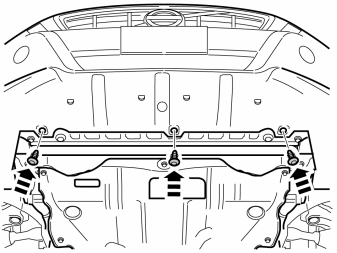
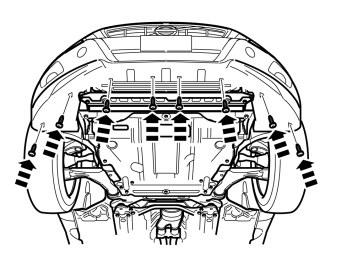
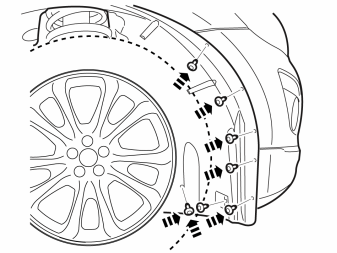
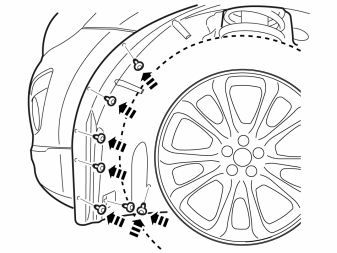
- Remove the engine splash guard.
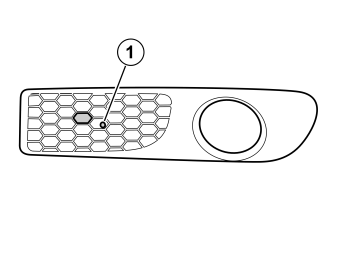
- Drill out the marked hexagonal surface and cut/file until it is level at the edges.
- Drill a Ø 8.5 mm (21/64 ") diameter hole in the hexagonal surface (1) approximately as illustrated.
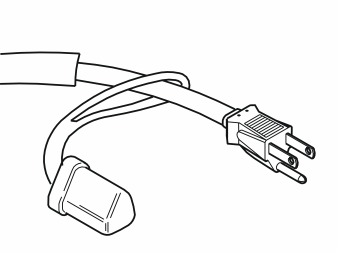
Illustration A, B, C and D
- Take the front engine block heater socket's components from the kit and assemble the front engine block heater socket as illustrated.
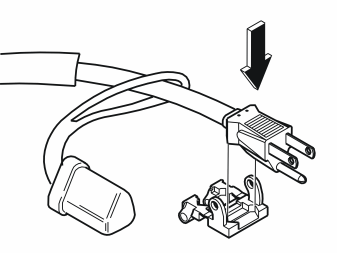
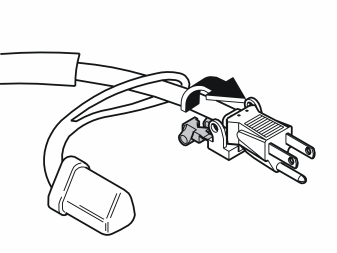
Illustrations A and B
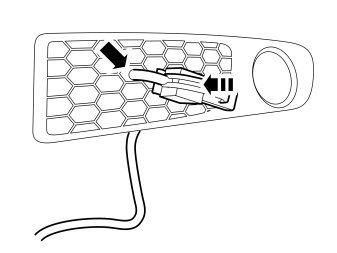
- Secure the front engine block heater socket's connector into the panel.
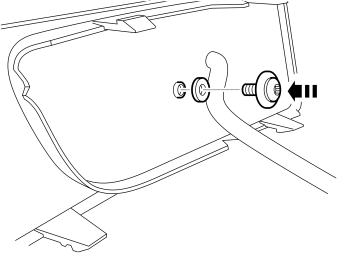
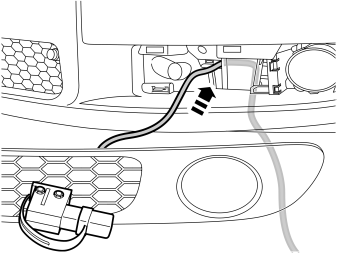
Illustrations A, B and C
- Route the front engine block heater socket's cable on the inside of the strut, over/inside the left-hand front corner of the subframe and let it hang down as illustrated.
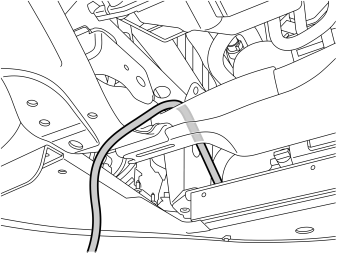
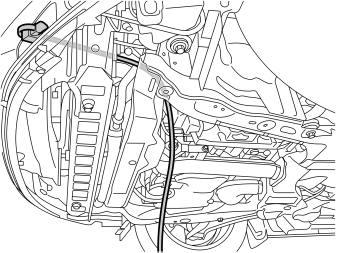
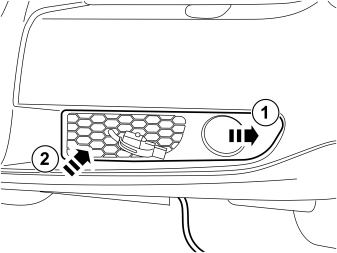
- Press in the panel with the connector in its location.
Applies to the V70
- Remove the engine splash guard.
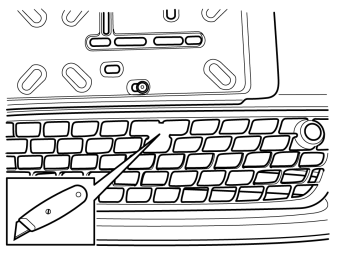
- Take a sharp knife. Cut off the grille section as illustrated.
Illustration A, B, C and D
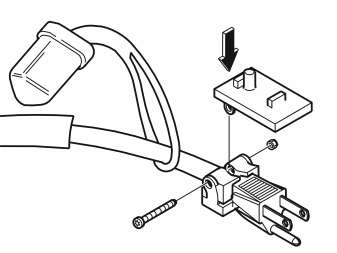
- Take the front engine block heater socket's components from the kit and assemble the front engine block heater socket as illustrated.
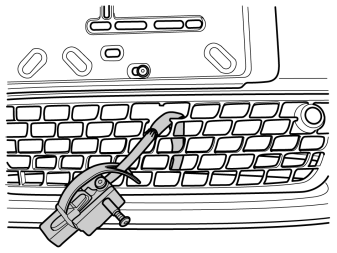
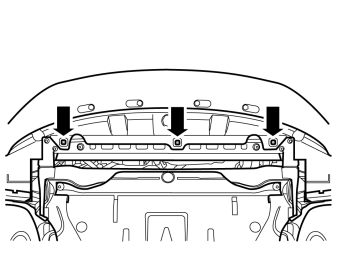
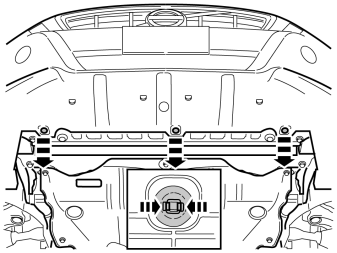
- Disconnect the three clips from the air baffle. Pull the air baffle downwards slightly to facilitate access.
Illustrations A and B
- Route the front engine block heater socket's cable on the inside of the strut, over/inside the left-hand front corner of the subframe and let it hang down as illustrated.
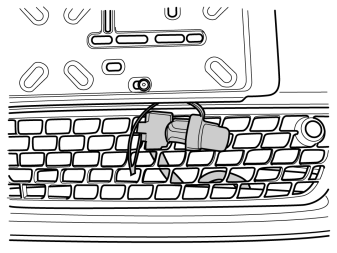
- Press the connector into place.
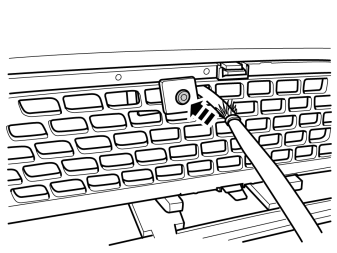
- Install the front engine block heater socket in the hole below, centre it in the hole. Tighten in the connector using a Torx screw (L=40 mm) and the mounting plate from the kit.
Applies to the XC70
- Remove the engine splash guard.
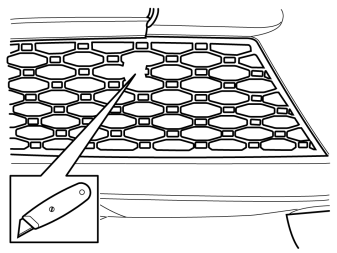
- Take a sharp knife. Cut off the grille section as illustrated.
Illustration A, B, C and D
- Take the front engine block heater socket's components from the kit and assemble the front engine block heater socket as illustrated.
Illustration E
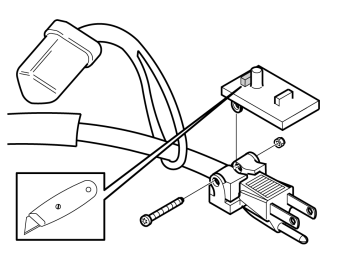
- Cut off the small lug on the rear mounting plate.
- Disconnect the three clips from the air baffle. Pull the air baffle downwards slightly to facilitate access.
Illustrations A and B
- Route the front engine block heater socket's cable on the inside of the strut, over/inside the left-hand front corner of the subframe and let it hang down as illustrated.
- Press the connector into place.
- Install the front engine block heater socket in the hole below, centre it in the hole. Tighten in the connector using a Torx screw (L=40 mm) and the mounting plate from the kit.
Applies to all models
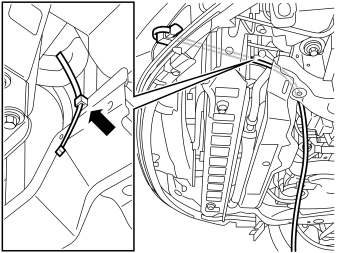
- Install a tie strap with edge clip on the panel edge in the front edge at the left-hand front corner of the subframe.
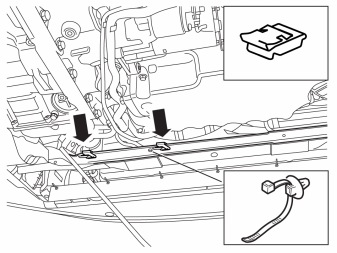
- Take two clips from the kit and install them on the upper edge of the subframe, and turned in toward the subframe U-profile. Install the clips approximately in the positions illustrated.
- Install a tie strap with clip in the hole in the upper edge of the subframe in order to clamp up any excess cable. The tie strap must be fitted turned in toward the subframe U-profile
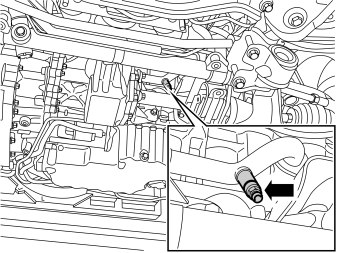
- Drain the coolant.
- Tighten the nipple after the coolant has been drained.
Applies to the XC60
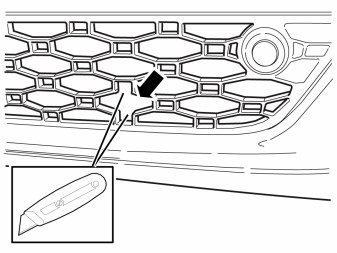
- Take a sharp knife and cut off the grille sections as illustrated.
- Detach the three clips from the air baffle by squeezing the catches together and pulling them off.
- Detach the air baffle from the bumper cover.
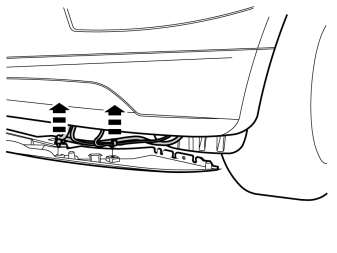
- Disconnect the cable harness and the washer hoses with clips from the air baffle's left-hand side.
- Secure the left-hand end of the air baffle just below the bumper cover.
Illustration A, B, C and D
- Take the front engine block heater socket's components from the kit and assemble the front engine block heater socket as illustrated.
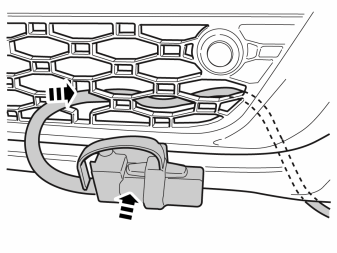
- Insert the cable through the hole in the grille.
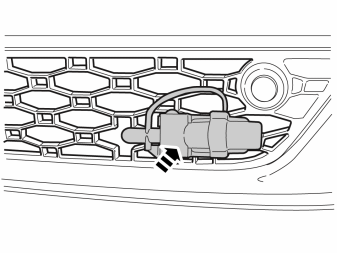
- Position the connector in place.
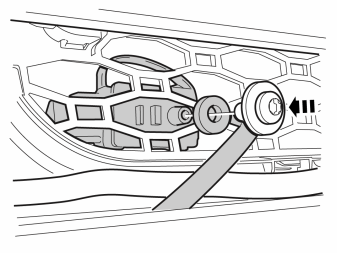
- Install the front intake's connector in the hole underneath and center it. Tighten the connector using Torx screw and washer and spacer ring from the kit.
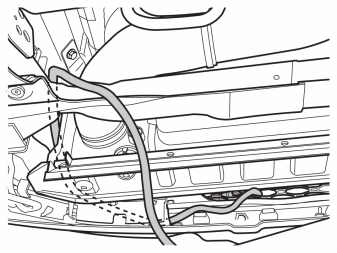
- Route the front intake cable to the left through the rubber seal at the lower edge, up between the bracket for the radiator and bracket for the collision member. Then route down at the rear edge of the front member in the subframe and allow the cable to hang.
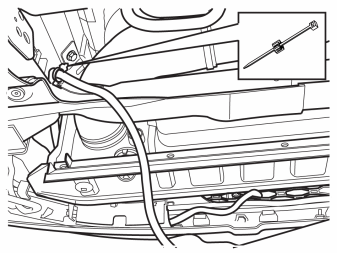
- Install a tie strap with edge clip on the panel edge in the front edge at the left-hand front corner of the subframe.
- Take two clips from the kit and install them on the upper edge of the subframe, and turned in toward the subframe U-profile. Install the clips approximately in the positions illustrated.
- Install a tie strap with clip in the hole in the upper edge of the subframe in order to clamp up any excess cable. The tie strap must be fitted turned in toward the subframe U-profile
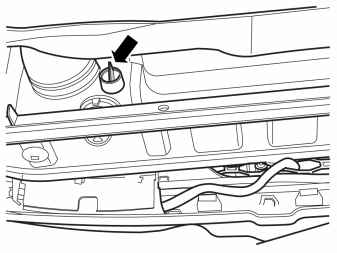
- Drain the coolant.
- Tighten the tap after the coolant has been drained.
Applies to all models
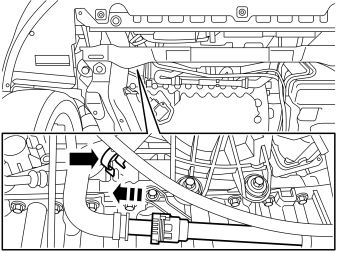
- Detach the double clamp on the cable to the alternator that is located on the thermostat housing hose.
- Rotate the catch on the thermostat housing pipe anticlockwise, detach the hose and drain the remaining coolant.
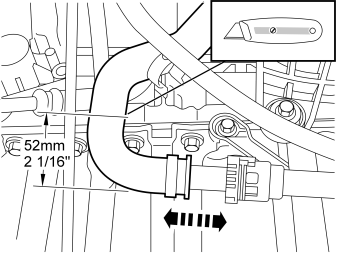
- Cut off the hose using a sharp knife in accordance with the measurements. Make the incision as straight as possible. The short hose-end that was cut off shall be used again.
Подсказка: Install a piece of tape over the cutting location and mark with a pen where the incision should be. Reinstall the hose connection in the pipe in order to support the cutting process.
Примечание: Do not damage the adjacent cable harnesses.
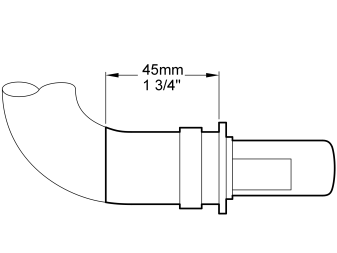
- Cut out the short cut-off hose section as illustrated.
- Discard the cut-off hose bend.
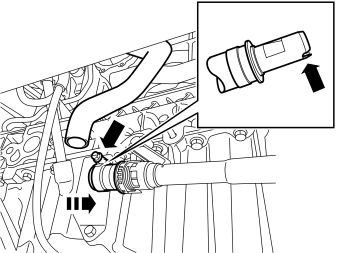
- Remove the short hose-end and press it on the pipe that runs to the thermostat housing. Make sure that the cut-out in the hose connection is turned down and fits into the corresponding pin in the pipe connection.
- Rotate the catch on the pipe clockwise against the stop.
- Take a hose clamp from the kit and install it on the hose-end.
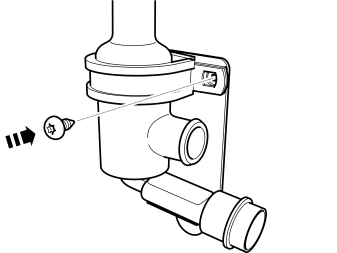
- Take the engine block heater, bracket, rubber coated clamp and screw from the kit and assemble them as illustrated.
- Do not tighten the screw yet.
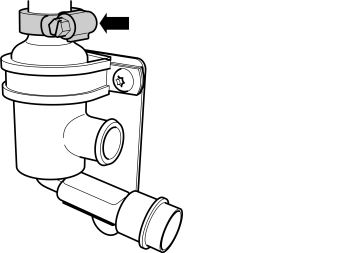
- Take the hose clamp from the kit and fit it onto the engine block heater's upper connection.
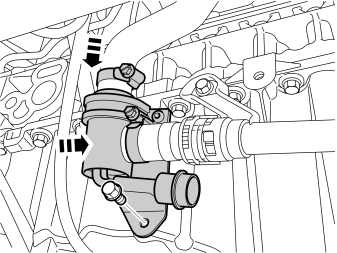
- Position the engine block heater with bracket in the front edge of the oil sump and connect both hose-ends to the engine block heater's connections.
- Take a screw from the kit and tighten the bracket with engine block heater into the existing hole in the oil sump.
Примечание: The screw is self-tapping so insertion may be slow. Make sure that the screw is centred straight into the hole, so that the screw head is flat against the bracket.
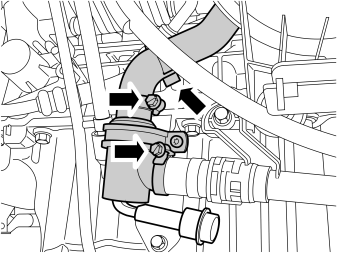
- Now adjust the engine block heater in the rubber coated clamp so that the hoses are properly fitted on the engine block heater's connections.
- Tighten the screw to the rubber coated clamp.
- Tighten the hose clamps to the engine block heater.
- Install the double clamp to the cable for the alternator in the engine block heater's upper hose.
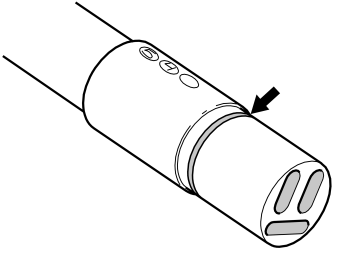
- Lubricate the O-ring on the connector for the heater's cable with low temperature grease P/N 1161427.
Примечание: Do not get any grease on the surfaces of the connector.
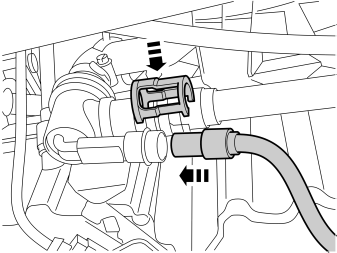
- Connect the cable from the front engine block heater socket to the engine block heater and press it in firmly.
- Press a locking sleeve from the kit over the cable splice.
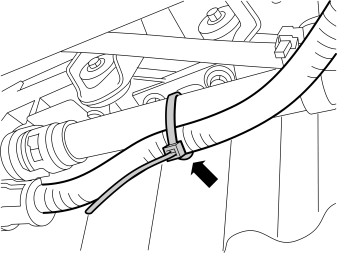
- Clamp the cable in at the pipe that runs to the thermostat housing using a tie strap.
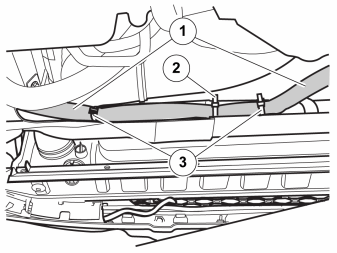
- Press the cable for the front engine block heater socket into the two clips (1) and the cable tie (2) with edge clip in the front edge of the subframe.
- Clamp the excess with the cable tie using clips and two new cable ties (3) between the clips at the subframe.
Примечание: There is a lot of cable excess.
Applies to the XC60
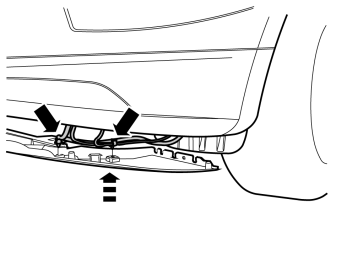
Applies to all models
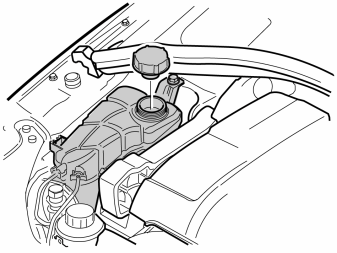
- Fill with coolant, run the engine to operating temperature, bleed the cooling system and check that there are no leaks.
- Top up the cooling system as required.
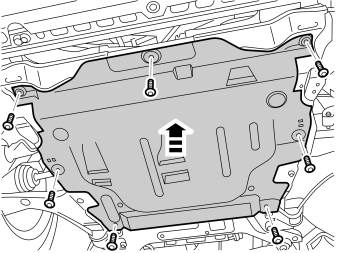
- Reinstall the engine splash guard. Tighten.