Применимость
| Модель | Двигатель | Год |
|---|---|---|
| S80 (07-) | B8444S | 2007–2009 |
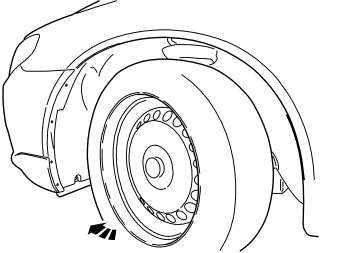
- Turn the front wheels so that the screws in the wing liner are accessible.
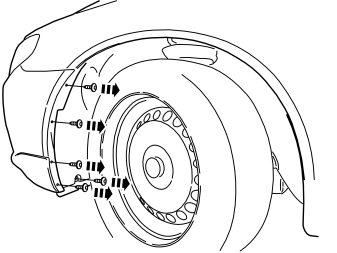
- Remove the screws in the front edge of the wing liner.
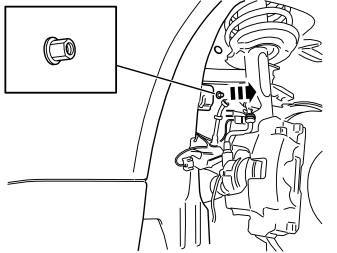
- Remove the plastic nut that holds the wing liner into the body.
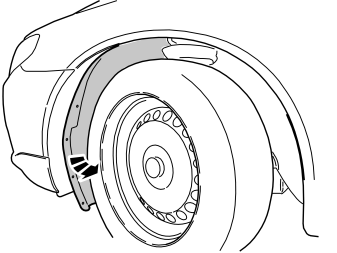
- Fold the wing liner out of the way.
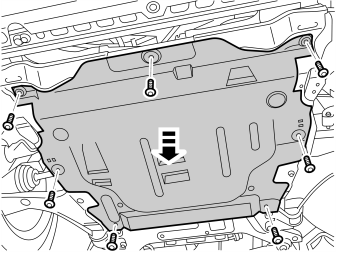
- Remove the screws and the engine splash guard.
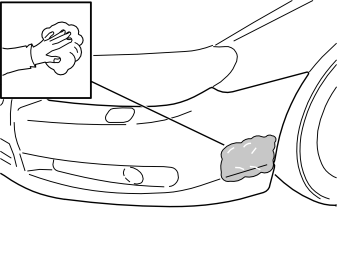
- Clean the bumper cover. Use a mixture of 30% windscreen washer fluid and 70% water. Clean where the cutting template for the front engine block heater socket is to be secured.
- Wipe dry.
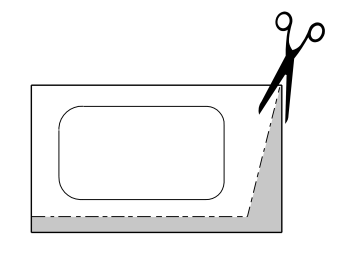
- Take the template for the front engine block heater socket from the kit and cut it in accordance with the dotted lines.
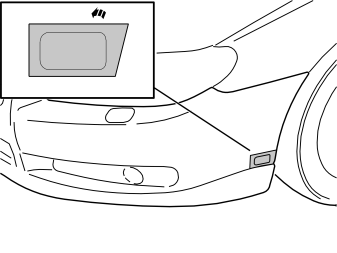
- Remove the protective backing tape on the template from the kit. Secure the template edge to edge with the front edge of the front wing and the embossing in the bumper cover as illustrated.
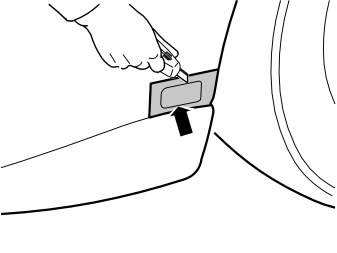
- Take a sharp knife. First make a thin cut along the edges of the inside of the template. This provides a groove to follow. Then cut carefully out of the bumper cover.
Примечание: Cut carefully. It is easy to slip with the knife and move outside the template.
- Remove the template.
- Install the protective cover for the front engine block heater socket from the kit. Check that it aligns. Adjust the hole using a knife or file as necessary.
- Smooth off the hole edges. Remove any swarf.
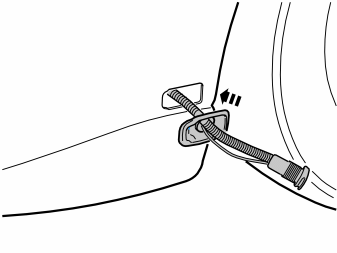
- Press the protective cover (from the kit) into place in the hole cut in the bumper cover.
- Insert the cable for the front engine block heater socket together with the ground lead from the kit through the protective cover.
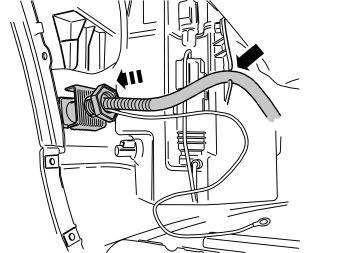
Illustrations A and B
- Install the attaching brace and nut from the kit.
- Rotate the connector for the front engine block heater socket so that the cover opens backwards (Illustration B).
- Tighten the front engine block heater socket to the bumper cover.
- Plug the electrical connector into the front engine block heater socket. Use the connector as a counterhold when tightening.
- Press the cable into the holder on the washer fluid reservoir.
- Remove the cover on the radiator expansion tank.
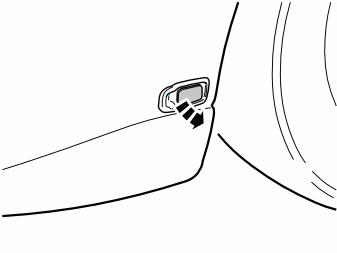
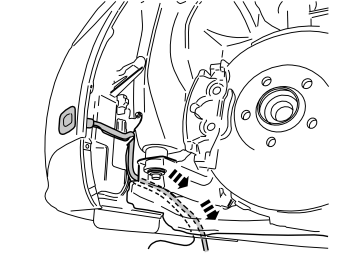
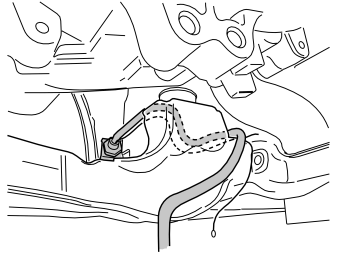
Illustrations A and B
- Route the cable with the ground cable from the front engine block heater socket in front of the left-hand front mounting for the subframe and down on the inside of the subframe.
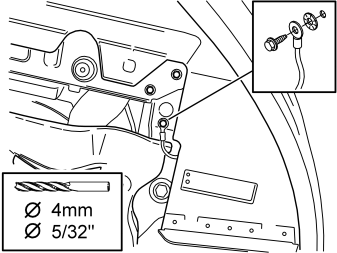
- Drill a Ø4 mm (Ø5/32") diameter hole for the ground cable for the front engine block heater socket in the underside of the front member in the location illustrated.
- Deburr the edges, remove the drill swarf and apply rustproofing agent to the edges.
- Take a screw and toothed washer from the kit and tighten in the ground cable.
- Clamp up the excess ground cable to the cable for the front engine block heater socket using a tie strap from the kit.
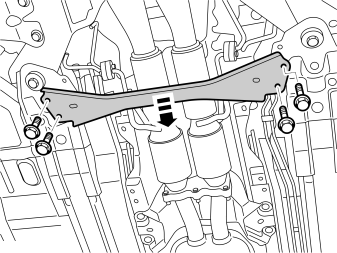
- Remove the four screws in the strut under the exhaust manifold and remove the strut.
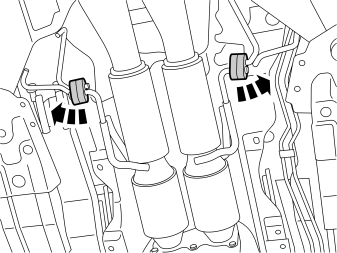
- Detach the rubber mountings from the exhaust manifold.
Illustration A
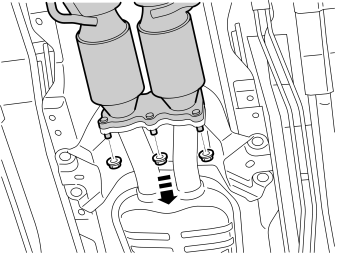
- Remove the nuts in the rear joint by the front silencer.
Illustration B
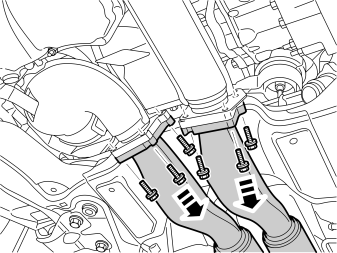
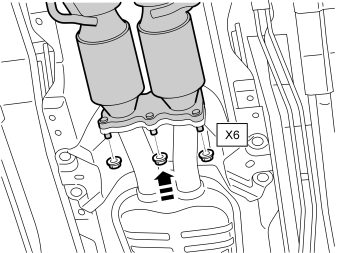
- Remove the screws in the front joint.
Illustration C
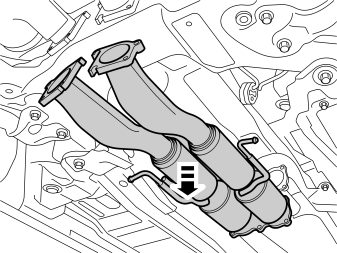
- Remove the exhaust manifold.
Примечание: New gaskets, screws and nuts must be used for installation.
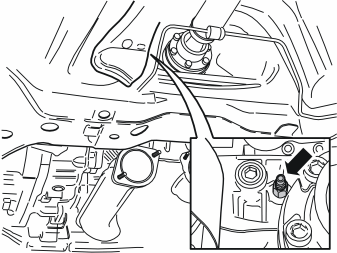
- Detach the engine block drain nipple under the left-hand side of the rear manifold and drain the coolant.
- Tighten the nipple when the coolant is drained.
Illustration A
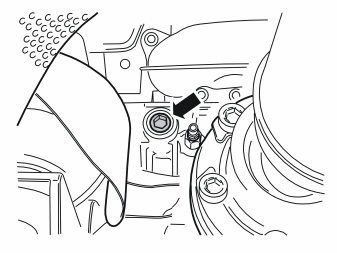
- Remove the plug in the engine block under the left-hand side of the rear manifold.
Illustration B
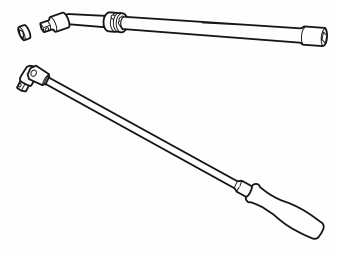
- Use hexagon socket P/N 9512965, socket extension 120 mm (4 ¾ ") with spherical end, socket extension 500 mm (19 11/16 ") with spherical end and handle.
Illustration C
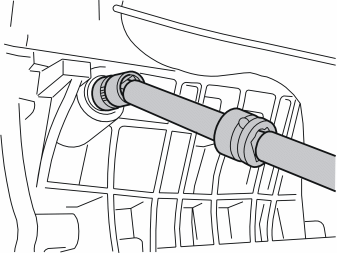
- Apply a piece of butyl tape on the hexagon socket so that the plug does not fall away when it is unscrewed.
Примечание: Removing the plug requires significant force.
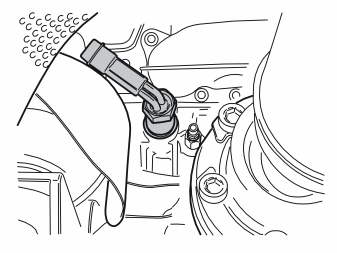
- Take the heater from the kit and install it in the engine block.
Подсказка: Rotate the connector around in the engine block heater's threaded section in an attempt to reduce friction.
- Brush thread sealant part no. 1161056 on the threads.
- Engage the threads in the engine block by turning the whole engine block heater clockwise until the connector reaches the stop position. Guide the threaded section of the engine block heater with one hand and turn with the other.Hold the threaded section firmly with one hand and rotate the connector down anticlockwise to the stop position with the other. Rotate the whole heater body clockwise again to the stop position and repeat until the engine block heater is screwed into the engine block.
Примечание: Make sure that the heater has engaged the threads properly before tightening.
Illustration A
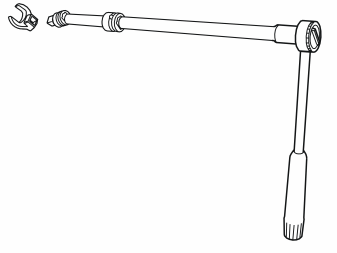
- Take tool part no. 9814012, a ½ "- 3/8" adapter, the two socket extensions and a ½ " ratchet handle.
Illustration B
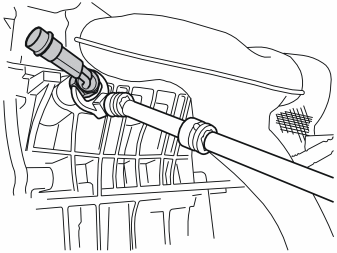
- Tighten the heater firmly to the engine block.
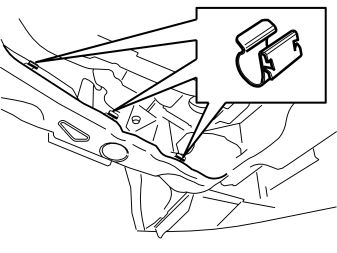
- Press the three clips from the kit into the panel edge on the inside of the subframe.
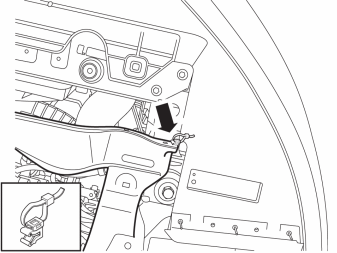
- Press in the edge clip with tie strap on the outer edge at the left-hand front corner of the subframe.
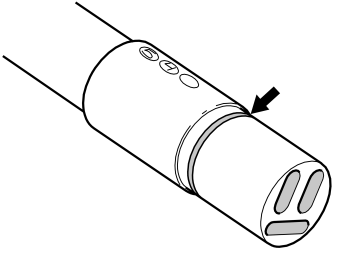
- Take the joint cable from the kit.
- Grease in the O-ring on the connector to the engine block heater's cable, as well as the O-ring for the cable to the front engine block heater socket using low temperature grease P/N 1161427.
Примечание: Do not get any grease on the surfaces of the connector.
Illustration A
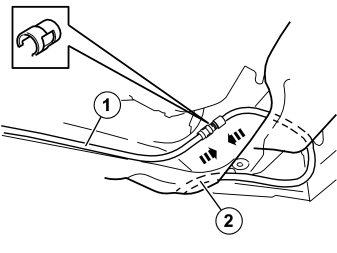
Примечание: If the passenger compartment connector socket shall be installed at the same time then install the junction connector in accordance with illustration D and E, and connect the cables to it.
- Connect the joint cable (1) to the engine block heater and to the cable (2) from the front engine block heater socket. Press the connectors together firmly and install a locking sleeve from the kit over the cable splice.
Illustration B
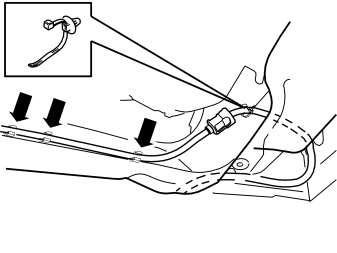
- Take a tie strap equipped with clip from the kit and clamp the cable splice into the small hole on the inside and front corner of the subframe.
Примечание: The strap must clasp the cable, and not the connectors.
- Press the cable into the three previously installed clips.
Illustration C
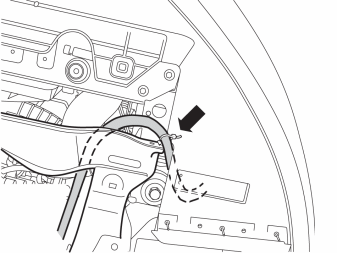
- Clamp the cable from the front engine block heater socket into the tie strap of the installed edge clip.
Illustration D
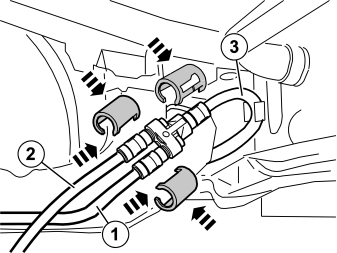
Applies when fitting passenger compartment connector at the same time
- If the passenger compartment connector socket shall be installed at the same time then install the junction connector now. Grease in the O-rings on the connectors to the junction connector, and the connector on the cable to the passenger compartment connector socket, in accordance with the previous description.
- Take the locking sleeves and screw from the kit.
- Connect the cables in accordance with the following:
- Press the cables firmly into the junction connector and press the locking sleeves in over the cable splices.
Illustration E
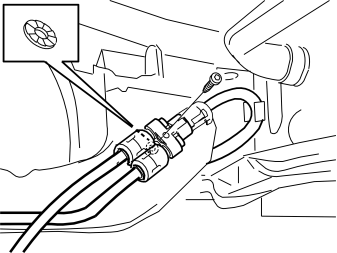
Applies when fitting passenger compartment connector at the same time
- Tighten the junction connector into the subframe in the existing hole using the screw and nut. The washer must be located between the junction connector and the subframe.
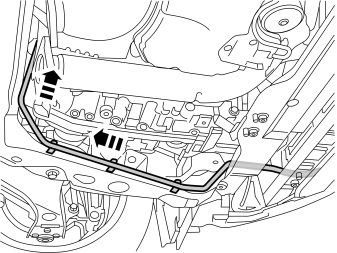
- Route the cable up in the rear edge of the gearbox and on to the engine block heater.
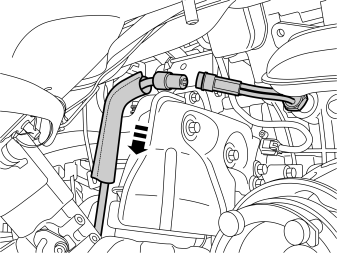
- Take the radiation shield from the kit and thread on the joint cable from the front engine block heater socket.
Illustration A
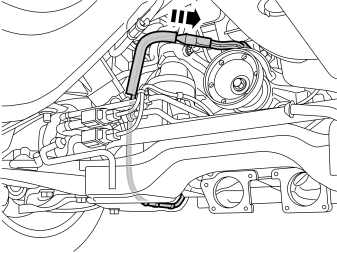
- Firmly press in the connector to the engine block heater.
Illustration B
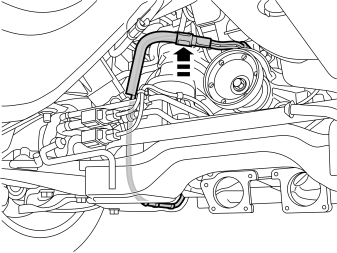
- Press a locking sleeve (from the kit) over the cable splice.
- Check that the cable does not chafe against moving parts or sharp edges in the engine compartment. Use tie straps from the kit to secure the cable.
Примечание: Do not clamp the cable directly to brake pipes, fuel lines, AC pipes or pipes to the power steering.
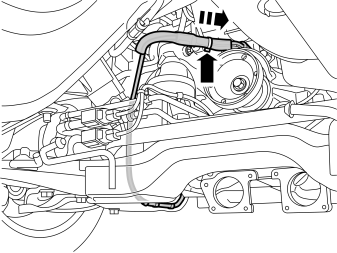
- Pull the radiation shield up so that it fully covers the connector on the engine block heater.
- Take the grey tie strap from the kit and clamp the radiation shield by the heater in the upper edge.
Illustration A
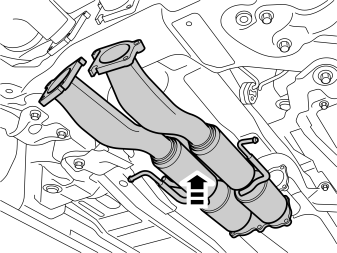
Illustration B
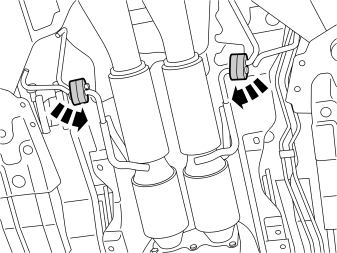
Illustration C
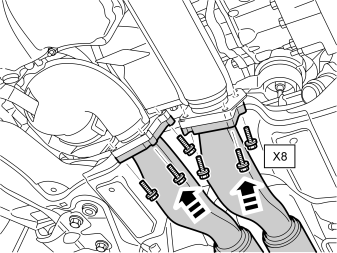
Illustration D
- Make sure that all sealing surfaces are thoroughly cleaned. Reinstall the exhaust manifold with new gaskets, clamp nuts and screws from the kit. Tightening torque 25 Nm (18.5 lbf.ft.).
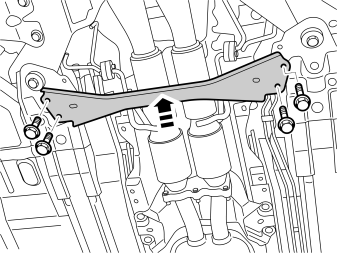
- Reinstall the strut and tighten the screws, tightening torque 60 Nm (44 lbf.ft.).
- Fill with coolant, run the engine to operating temperature, bleed the cooling system and check that there are no leaks.
- Top up the cooling system as required.
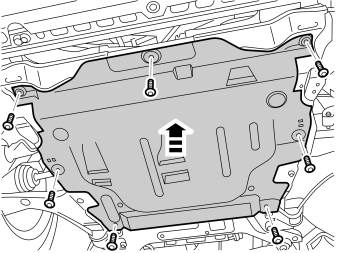
- Reinstall the engine splash guard.
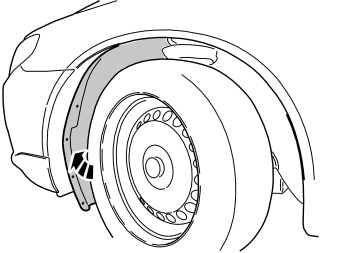
- Reinstall the wing liner.
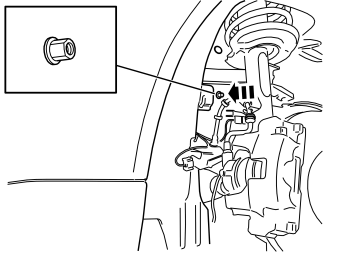
- Reinstall the plastic nut that holds the wing liner into the body.
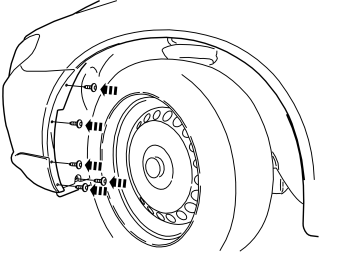
- Tighten the screws in the front edge of the wing liner.