Применимость
| Модель | Двигатель | Год |
|---|---|---|
| XC90 | — | 2007–2015 |
Preparations
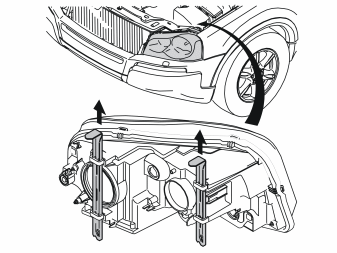
- Detach the left-hand headlamp by pulling up the two locking pins and then carefully pulling away the headlamp forwards.
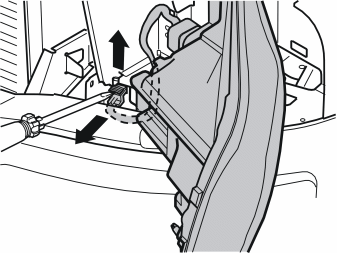
- Carefully prize up the catch on the connector for the headlamp using a screwdriver.
- Pull the catch up completely, detach the connector and place the headlamp to one side.
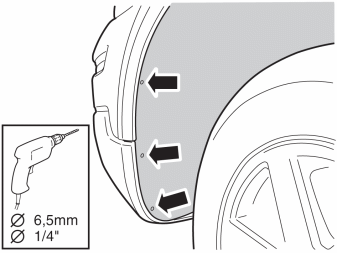
For cars with fuel-driven parking heater installed.
- Drill out the three rivets from the front edge of the left wing liner.
- Remove the remains of the rivets.
- Move the wing liner aside and fasten it so that the parking heater is accessible.
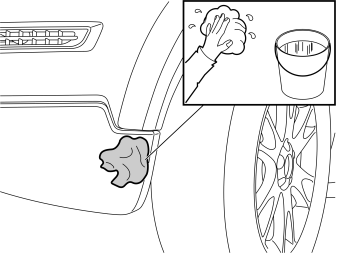
- Clean the surface on the bumper cover where the front engine block heater socket will be secured.
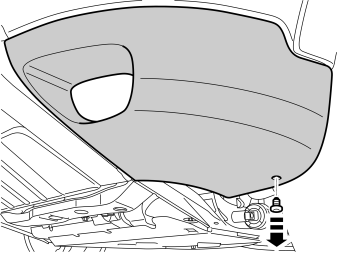
- Remove the clip on the panel for the front fog lamp.
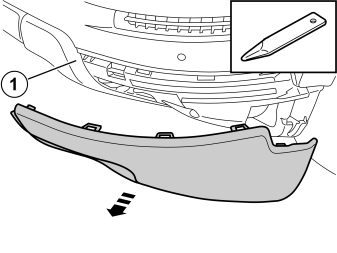
- Remove the panel over the fog lamp by carefully prising it loose from the bumper shell with a weatherstrip tool. The panel is held in place with catches. The corner (1) of the other panel section must be pryed loose since it overlaps the panel.
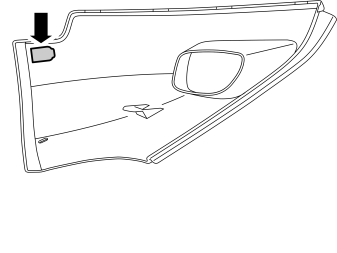
- Cut out according to the existing marking on the inside of the panel for the protective cover for the front engine block heater socket.
- Test and cut until the protective cover fits.
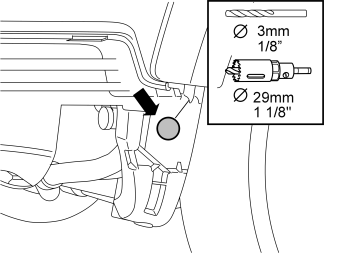
- Drill a Ø 29 mm (1 1/8 ") diameter hole using a hole saw according to the existing marking in the lower edge of the bumper cover. Pre-drill using a Ø 3mm (1/8 ") diameter drill bit.
Примечание: It is important that the hole is drilled right in the centre of the marking in order to correspond with the hole cut out earlier.
- Even out the hole edges and remove the drill swarf.
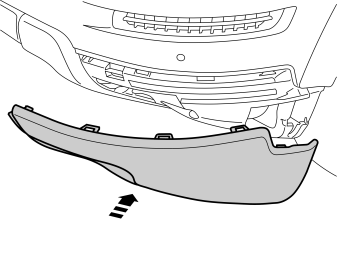
- Reinstall the front fog lamp panel.
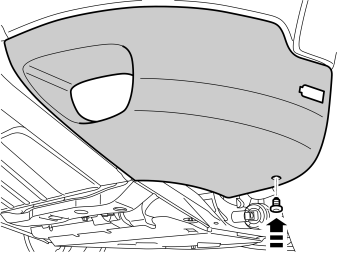
- Press the clip into the panel.
Installing the front engine block heater socket
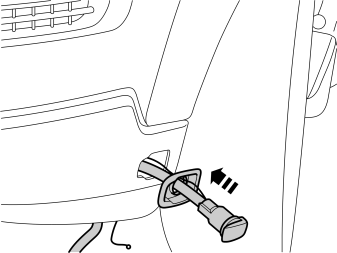
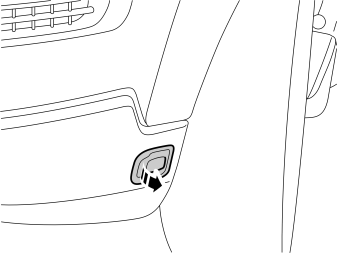
- Press the protective cover (from the kit) into place in the hole cut in the bumper cover.
- Insert the cable for the front engine block heater socket together with the ground lead from the kit through the protective cover.
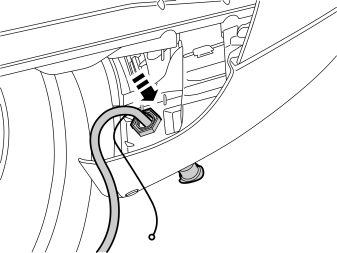
Illustrations A and B
- Install the nut from the kit.
- Rotate the connector for the front engine block heater socket so that the cover opens backwards (Illustration B).
- Plug the electrical connector into the front engine block heater socket. Use the connector as a counterhold when tightening.
- Tighten the front engine block heater socket to the bumper cover.
- Remove the cover on the cooling system expansion tank.
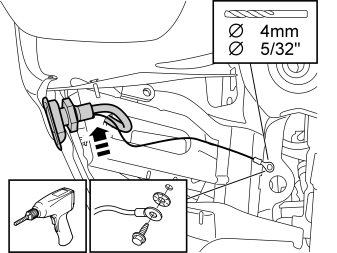
- Drill a hole in the front/lower edge of the side member with a Ø4 mm (5/32") bit.
- Apply anti-corrosion agent to the edges of the holes and secure the ground cable with the enclosed Ø4.8 mm (3/16") flanged screw and toothed washer.
Примечание: Connect the ground cable to the side member, not to the subframe.
- Secure the excess ground cable length with a tie strap from the kit.
- Guide the cable for the front engine block heater socket up where the headlamp was located.
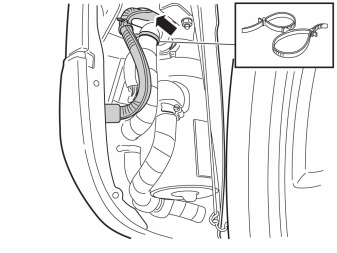
For cars with fuel-driven parking heater installed.
- Route the cable to the front intake and ground cable along the parking heater induction pipe. Secure them to the pipe with a double tie strap.
- Route the cables to the underside of the bracket beneath the headlamp.
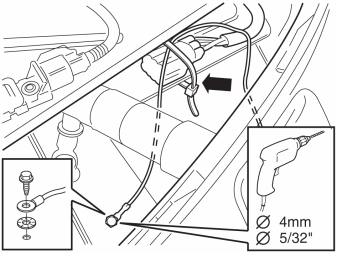
- Drill a hole in the front/top edge of the side member with a Ø4 mm (5/32") bit.
- Apply anti-corrosion agent to the edges of the holes and secure the ground cable with the enclosed Ø4.8 mm (3/16") flanged screw and toothed washer.
- Secure the excess length of ground cable with a tie strap from the kit. Clamp it at the grey connectors of the parking heater.
Installing the engine block heater
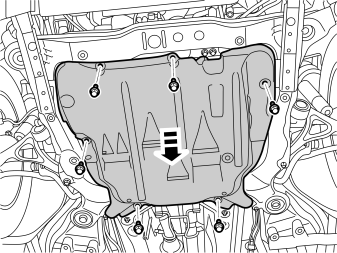
- Remove the engine splash guard.
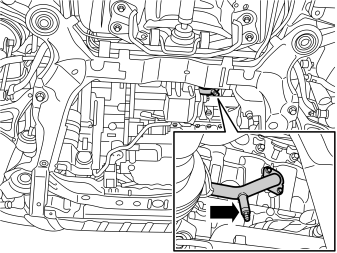
- Detach the nipple and drain the coolant.
- Retighten the nipple after the coolant has been drained.
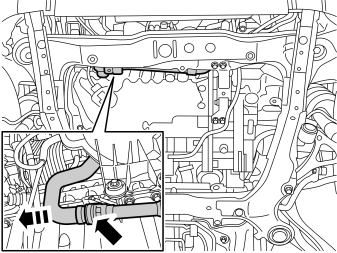
- Turn the catch on the coolant pipe that runs to the thermostat housing anticlockwise and pull out the hose.
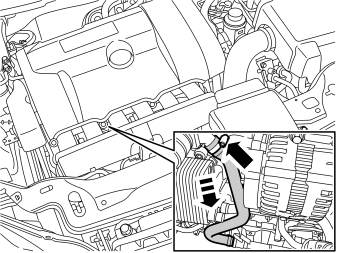
- Detach the hose clamp on the hose to the thermostat housing inside the intake manifold and remove the hose.
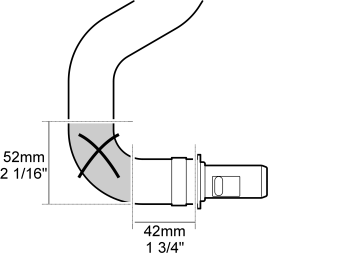
- Cut the removed hose as illustrated. First cut to a dimension of52 mm (1 1/16 ").
- Discard the small cut-off hose bend.
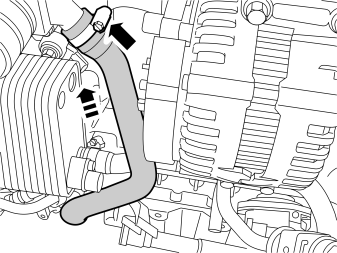
- Reinstall the longer of the hose sections onto the thermostat housing's connection and tighten the hose clamp. Make sure that the cut-out in the upper hose-end fits into the corresponding pin in the pipe connection in the thermostat housing.
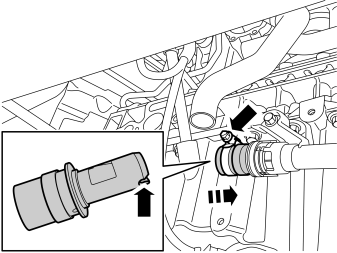
- Remove the short hose-end and press it on the pipe that runs to the thermostat housing. Make sure that the cut-out in the hose connection is turned down and fits into the corresponding pin in the pipe connection.
- Rotate the catch on the pipe clockwise against the stop.
- Take a hose clamp from the kit and install it on the hose-end.
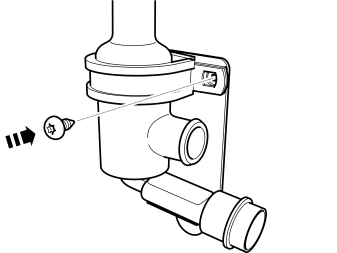
- Take the engine block heater, bracket, rubber coated clamp and screw from the kit and assemble them as illustrated.
- Do not tighten the screw yet.
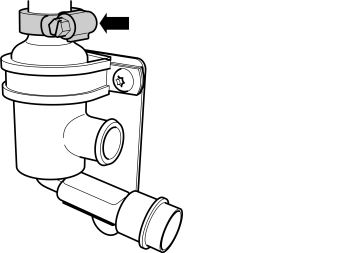
- Take a hose clamp from the kit and fit it onto the engine block heater's upper connection.
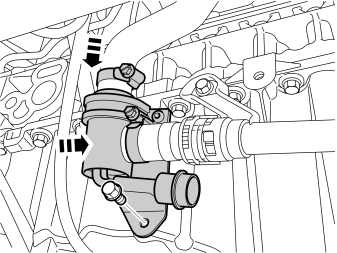
- Position the engine block heater with bracket in the front edge of the oil sump and connect both hose-ends to the engine block heater's connections.
- Take a screw from the kit and tighten the bracket with engine block heater into the existing hole in the oil sump.
Примечание: The screw is self-tapping so inserting it may be slow. Make sure that the screw is centred straight into the hole, so that the screw head is flat against the bracket.
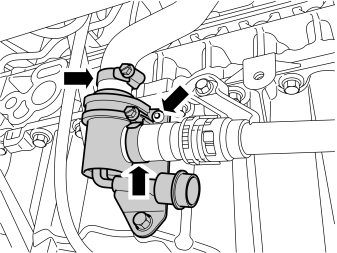
- Now adjust the engine block heater in the rubber coated clamp so that the hoses are properly fitted on the engine block heater's connections.
- Tighten the screw to the rubber coated clamp.
- Tighten the hose clamps to the engine block heater.
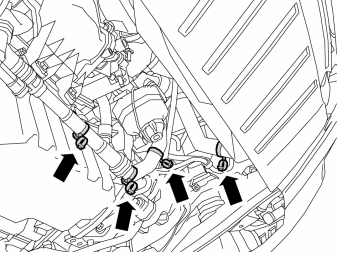
- Take four double tie straps from the kit and secure them on the pipe and hose to the thermostat housing as well as the lower hose to the radiator.
- Check that the cable does not chafe against sharp edges or moving parts in the engine compartment.
Осторожно: Do not clamp the cable directly to brake pipes, fuel lines, AC pipes or pipes to the power steering.
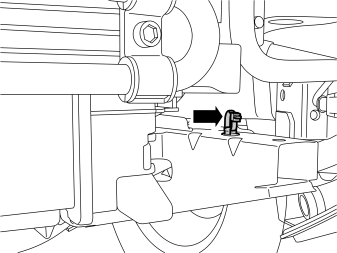
- Take a tie strap equipped with clip and press it into the hole on the top of the left-hand bracket to the skid plate.
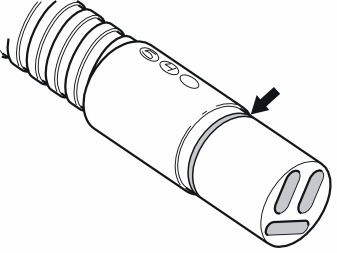
- Take the joint cable from the kit.
- Grease in the O-ring on the connector on the cable to the front engine block heater socket, use low temperature grease P/N 1161427.
Примечание: Do not get any grease on the surfaces of the connector.
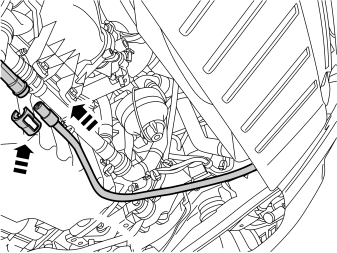
- Connect the joint cable in the engine block heater and press it in firmly.
- Press a locking sleeve from the kit over the cable splice.
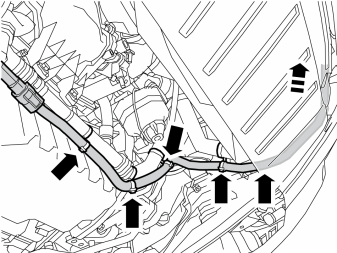
- Clamp the joint cable from the engine block heater into the recently installed tie straps and route it up to the location for the headlamp. The cable must be routed up on the outside of the left-hand side member.
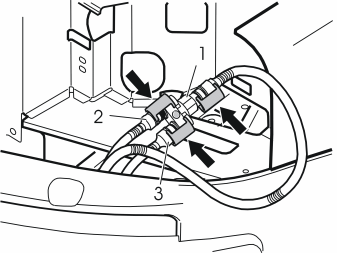
Applies when fitting passenger compartment connector at the same time
- If the car is equipped with passenger compartment connector then the branch connector is to be installed now.
Connect:
- socket (1) on the branch connector to the cable for the front engine block heater socket.
- sockets (2, and 3) on the branch connector to any of the cables for the engine block heater and branch connector.
Illustration A
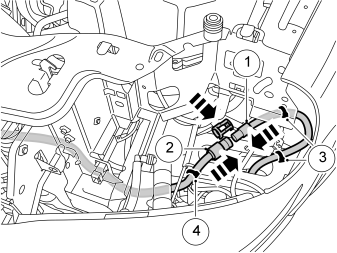
This cable joint must be secured under the headlamp's lower bracket (Illustration B).
- Connect the cable from the front engine block heater socket (1) to the recently routed joint cable (2) from the electric engine block heater and press the connectors together firmly.
- Press in a locking sleeve from the kit over the cable splice.
- Take tie straps (3) from the kit and clamp in the cable for the front engine block heater socket into the holes in the plates.
- Clamp the joint cable using a tie strap (4) into the hole in the plate.
Illustration B
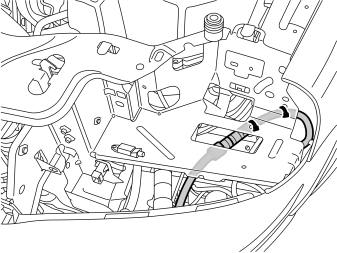
- Take a tie strap from the kit and clamp the cable joint on the underside of the headlamp's lower bracket. Use the rear of the two holes in the bracket.
Finishing work
- Connect and reinstall the left-hand headlamp.
- For cars with fuel-driven heater: Reposition the left wing liner and rivet it in place.
- Fill with coolant, run the engine to operating temperature, bleed the cooling system and check that there are no leaks.
- Top up the cooling system as required.
- Reinstall the engine splash guard and torque tighten the screws to 25 Nm (18.5 lbf.ft.).
Обсуждение и оценка
0Пока нет комментариев. Будьте первым.