Применимость
| Модель | Двигатель | Год |
|---|---|---|
| XC90 | B8444S | 2005–2009 |
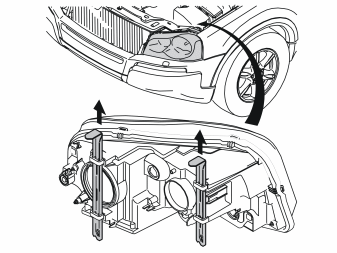
- Detach the left-hand headlamp by pulling up the two locking pins and then carefully pulling away the headlamp forwards.
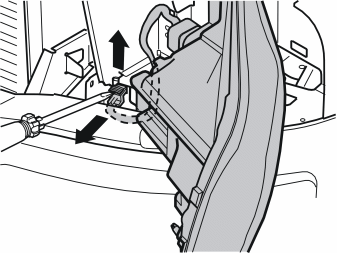
- Carefully prize up the catch on the connector for the headlamp with a screwdriver.
- Pull the catch up completely, detach the connector and place the headlamp to one side.
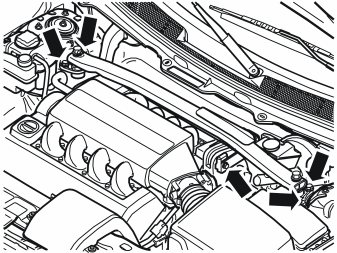
- Remove the screw in the upper engine mounting. Remove the four screws holding the strut between the spring strut turrets and lift out the strut.
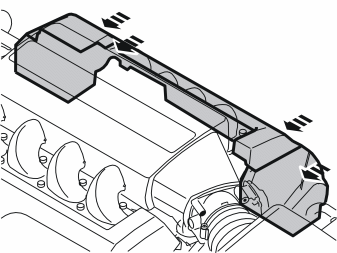
- Remove the rear engine cover behind the intake manifold by pulling it away backwards. It is fitted with four rubber mountings.
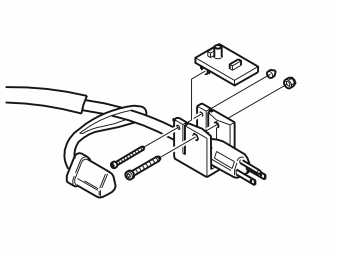
- Take the front socket from the kit and assemble as illustrated.
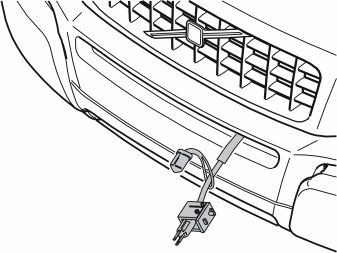
- Guide the front socket's cable in through the centre hole, next furthest to the left in the grille.
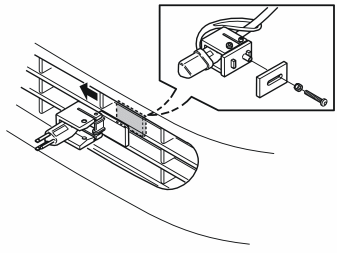
- Take a screw, washer and attaching plate from the kit and install the front socket. Push it as far as possible to the left and tighten it.
- Route the cable to the left, in through the rubber seal on the left-hand side of the radiator and under the plate on the underside of the headlamp.
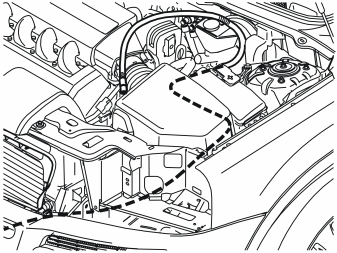
- Route the cable back along the left-hand side of the air cleaner and between the air cleaner and fuse holder. Continue to route it backwards, under the ABS system and up between the cable duct and brake fluid reservoir.
- Check that the cable does not chafe against sharp edges or moving parts in the engine compartment.
- Clamp with tie straps from the kit.
Примечание: Do not clamp the cable against brake pipes, fuel lines or air conditioning (A/C) pipes.
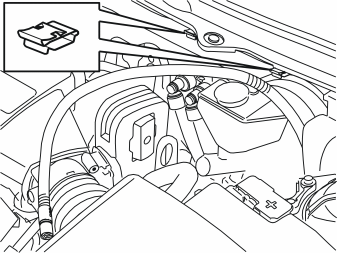
- Take two clips from the kit and install them in the edge of the plate at the front edge of the panel above the windscreen wiper arms.
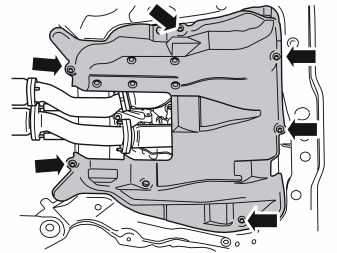
- Remove the six screws from the engine splash guard.
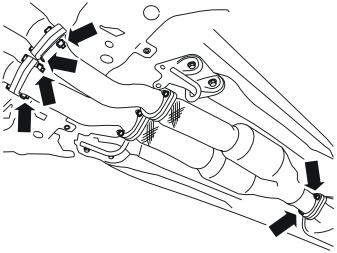
- Remove the four nuts in the joints to the manifold and the two in the joint in the front edge of the front silencer.
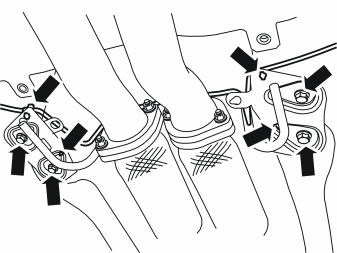
- Detach the pipe above the exhaust manifold from the clips in the brackets to the exhaust manifold's front mounting.
- Remove the four screws in the brackets
- Detach the heat deflector plate's two clips from the brackets.
- Remove the exhaust pipe and catalytic converters.
Примечание: Take care with the twisted parts of the exhaust manifold.
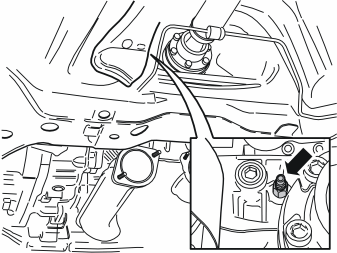
- Detach the engine block drain nipple under the left-hand side of the rear manifold and drain the coolant.
- Tighten the nipple when the coolant is drained.
Illustration A
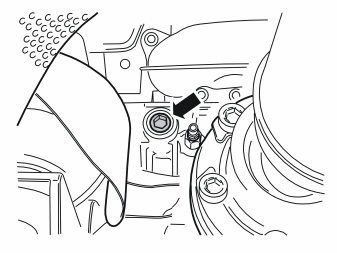
- Remove the plug in the engine block under the left-hand side of the rear manifold.
Illustration B
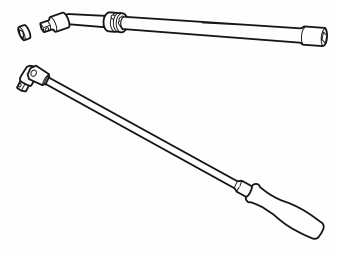
- Use hexagon socket part no. 9512965, socket extension 120 mm (4 ¾ ") with spherical end, socket extension 500 mm (19 11/16 ") with spherical end and handle.
Illustration C
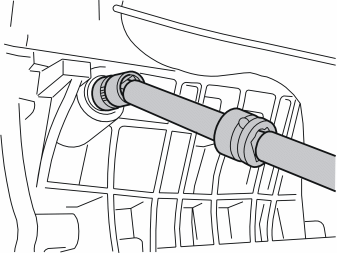
- Apply a piece of butyl tape on the hexagon socket so that the plug does not fall away when it is unscrewed.
Примечание: Removing the plug requires significant force.
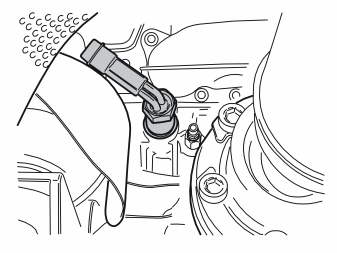
- Take the heater from the kit.
Подсказка: Try to rotate the connector in the heater before installation to reduce any friction.
- Brush thread sealant part no. 1161056 on the threads.
- Install the heater in the engine block and manually screw it on as far as possible. It may be difficult to make the threads engage in the hole as the connector rotates stiffly in the threaded part of the heater.
Illustration A
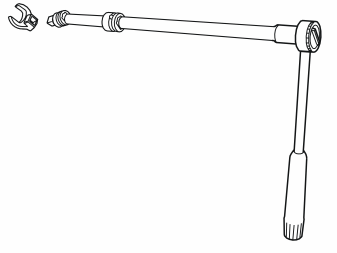
- Take tool part no. 9814012, a ½ "- 3/8" adapter, the two socket extensions and a ½ " ratchet handle.
Illustration B
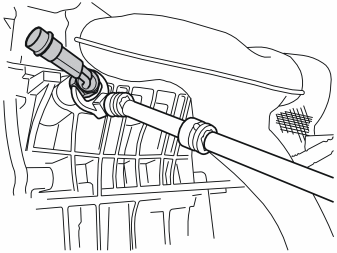
- Tighten the heater firmly to the engine block.
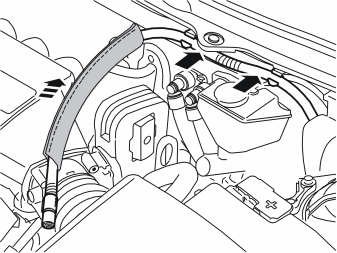
- Press the cable to the engine block heater into the clips.
- Take the radiation shield from the kit and pull it on the end of the cable.
- Guide the cable down to the location where the engine block heater was installed.
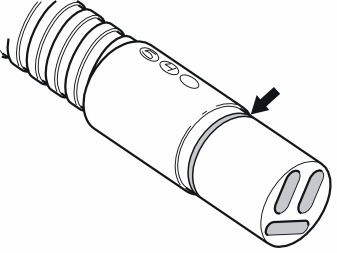
- Grease in the O-ring on the connector for the heater's cable using low temperature grease (part no. 1161417-9).
Примечание: Do not get any grease on the surfaces of the connector.
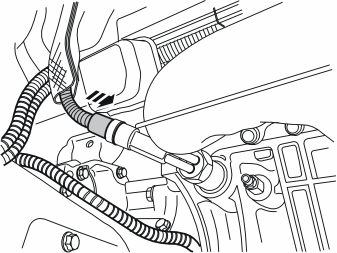
- Firmly press in the connector to the engine block heater.
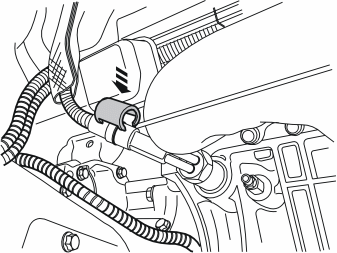
- Press a locking sleeve (from the kit) over the cable splice.
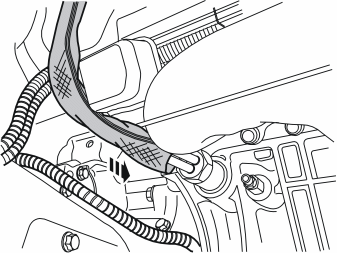
- Pull the radiation shield down so that it fully covers the connector.
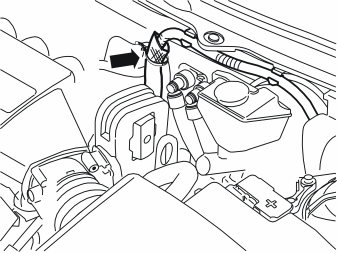
- Take the grey tie strap from the kit and tighten the radiation shield to the cable at the top edge.
- Connect and reinstall the left-hand headlamp.
- Reinstall the engine's rear protective cover.
- Reinstall the strut between the spring strut turrets.Torque tighten the four M10 screws to 50 Nm (37 lbf.ft.) and the M12 screw to 80 Nm (59 lbf.ft.).
- Make sure that all sealing surfaces are thoroughly cleaned and reinstall the exhaust manifold with new gaskets and clamp nuts from the kit. Torque tighten to 25 Nm (18.5 lbf.ft.).
- Clamp the pipe above the bracket into its clips.
- Align the clips for the heat deflector plate's mounting in the bracket for the exhaust manifold's mounting.
- Tighten the bracket for the exhaust manifold's mounting to 25 Nm (18.5 lbf.ft.).
- Fill with coolant, drive to normal operating temperature and bleed the system. Check that there are no leaks.
- Top up with coolant as required.
- Reinstall the engine splash guard and torque tighten the screws to 25 Nm (18.5 lbf.ft.).
Обсуждение и оценка
0Пока нет комментариев. Будьте первым.