Применимость
| Модель | Двигатель | Год |
|---|---|---|
| XC90 | — | 2008–2013A |
Примечание: Some steps in these installation instructions are presented with illustration only.
Installing, decor panel
Glove box
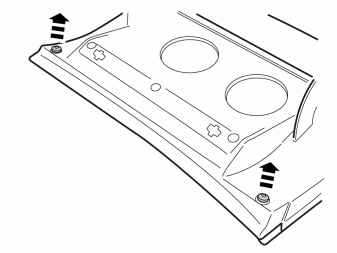
- Open the glove box hatch. Remove the two outer screws that hold the decor strip.
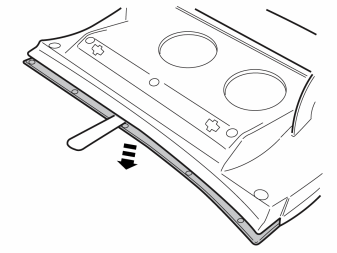
- Carefully bend loose the decor strip from the glove box hatch with a weatherstrip tool. It is fastened with three clips.
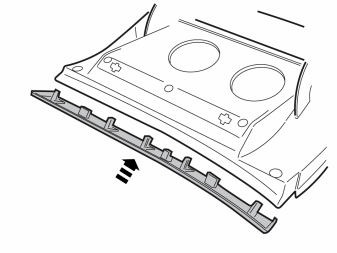
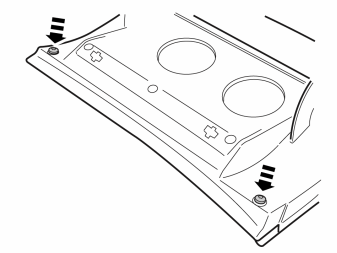
- Get a new panel from the kit and press it into place, instead of the removed.
Ashtray
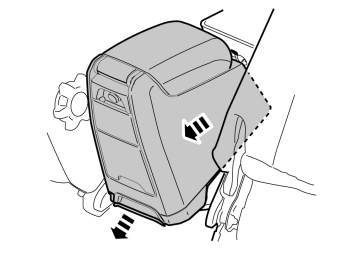
- Grab the handle at the trailing edge/lower edge of the rear part of the tunnel console. Pull backwards until the locks by the sides release, and pull loose the unit backwards.
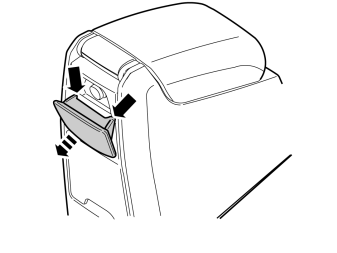
- Open the ashtray.
- Press down the ashtray until the catches by the sides are clear from the stops in the holder.
- Pull out the ashtray more and lift it out.
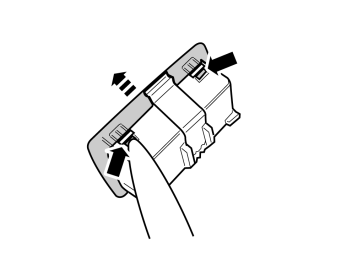
- Unfasten the panel's lock catches and unhook it from the top edge on the ashtray.
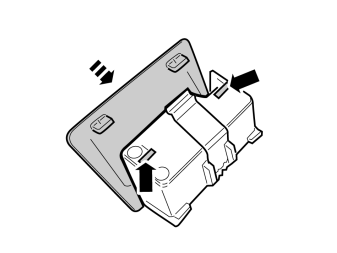
- Get a new panel from the kit. Hook it on in the ashtray's top edge and press at the bottom so that the lock catches engage.
Rear, cup holder
Illustration A
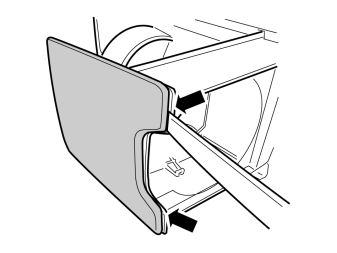
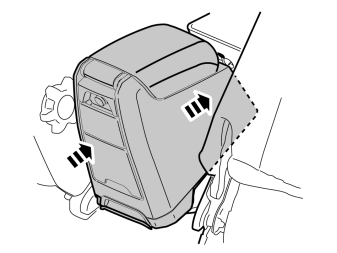
- Pull out the cup holder. Lay the tunnel console on the side on a surface that will not cause any damage.
- Carefully bend loose the panel on both sides at the bottom so that the panel's small lock catches are in the clear.
Illustration B
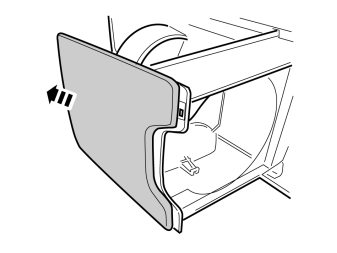
- Push up the panel so that it unhooks from the four attachments on the inside. New panel is included in the kit.
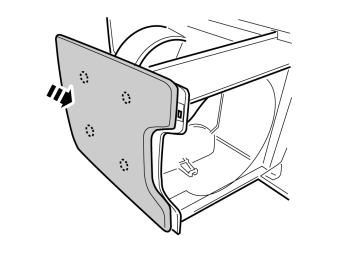
- Get a new panel from the kit. Fit the four attachment catches in the holder and press into place.
Cover, middle console
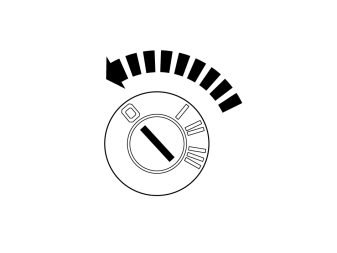
- Turn the ignition key to position 0.
Примечание: Wait at least three minutes before unplugging the connectors or removing other electrical equipment.
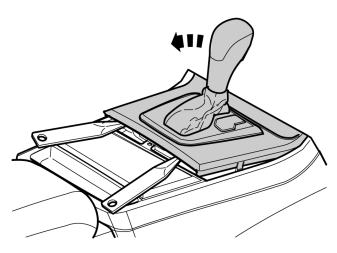
Applies to cars with automatic gearbox
- Turn the ignition key to position II.
Applies to all models
- Move the gear selector lever to its rearmost position.
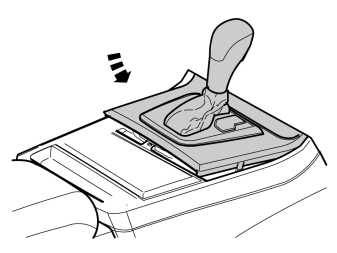
- Use a weatherstrip and pry off the gear selector panel at the rear edge.
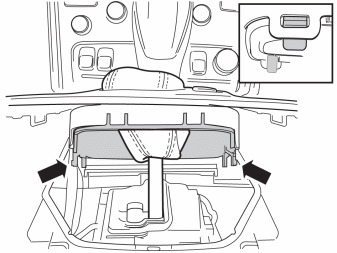
- Press in the catches and remove the panel.
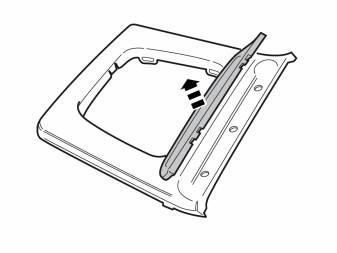
- Remove the pen box from the panel.
- Place the panel aside, new is included in the kit.
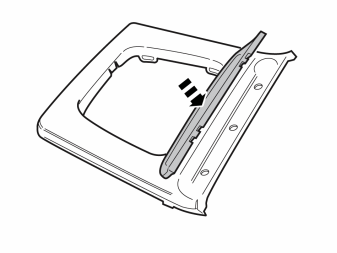
- Get a new panel from the kit.
- Press the pen box into place.
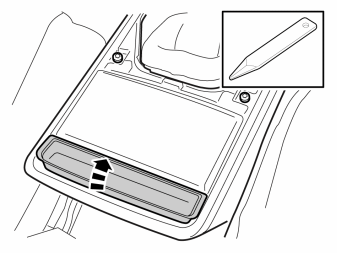
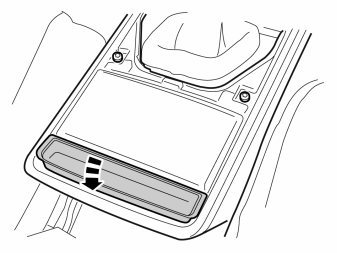
- Carefully bend loose the small rear compartment in the tunnel console with a weatherstrip tool.
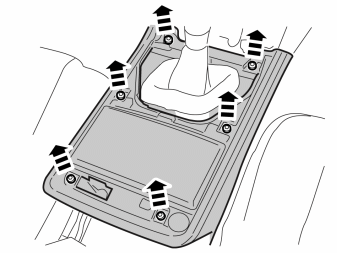
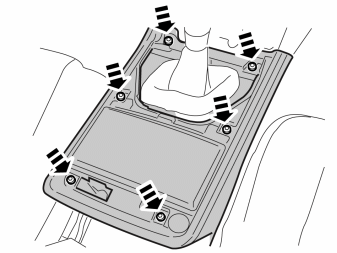
- Remove the six screws in the frame for the tunnel console.
- Lift away the frame.
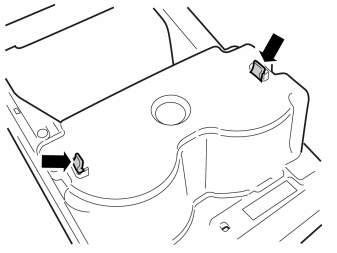
- Place the frame upside down on a surface that will not cause any damage.
- Move the attachment catches to the side and press them out through the bottom.
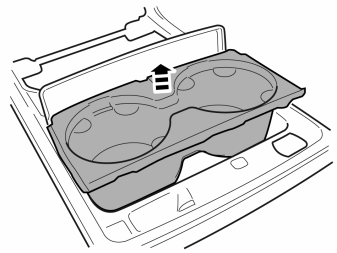
- Open the cover and pull up the insert.
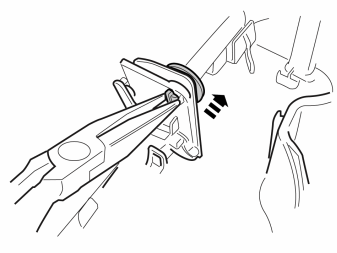
- Press together the cover's middle attachment clips with spring and carefully press it out.
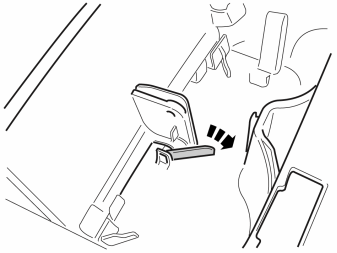
- Fold the arm forward so that it moves from the middle attachment.
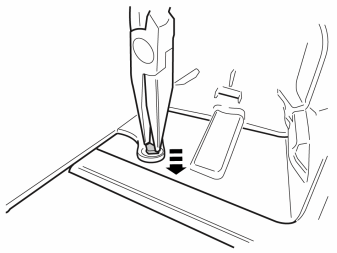
- Press together the cover's attachment clips on both sides and press them.
Illustration A
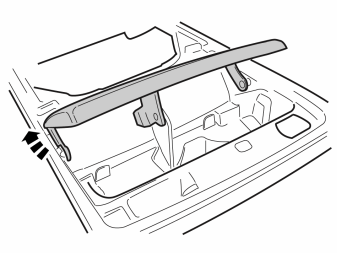
- Bend out the cover's attachment arms from the holes in the sides. First bend up the cover's left attachment.
Illustration B
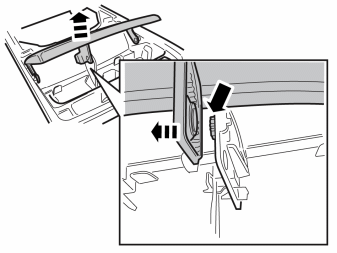
- Pull away the cover's middle attachment so that it is clear of the gear.
- Lift out the cover. New cover is included in the kit.
Illustration A
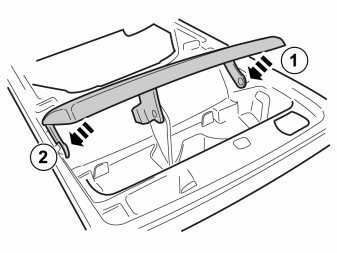
- Get a new cover from the kit and install.
Illustration B
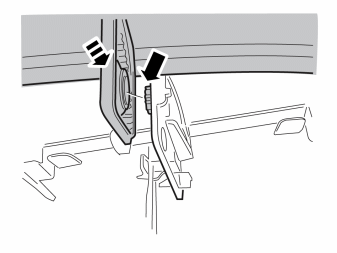
- Make sure that the gear ends up correctly in the cover's rack.
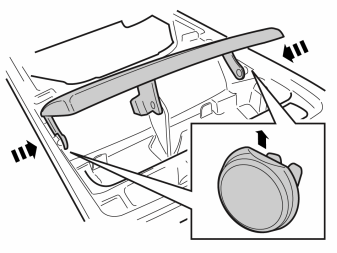
- Press the clips into place on both sides. Make sure that the clips' bevelled part faces up.
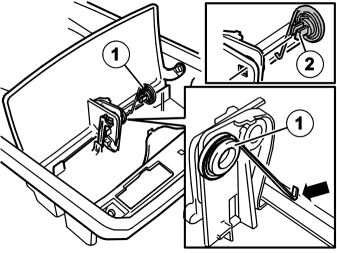
- Check that the internal catch on the spring is attached in the clip.
- Align the spring's arm against the cover and install the clip (1) with the spring. The catches (2) on the clip shall be placed vertically.
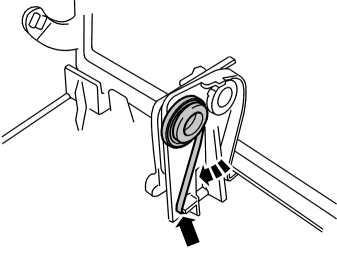
- Move the spring's arm backwards so that the catch engages in the attachment under the clip.
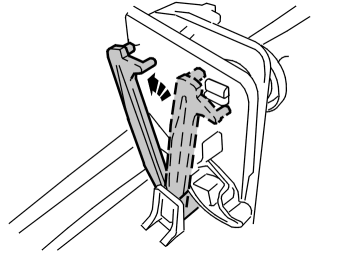
- Move the arm forward for the mechanism.
- Check the function of the cover.
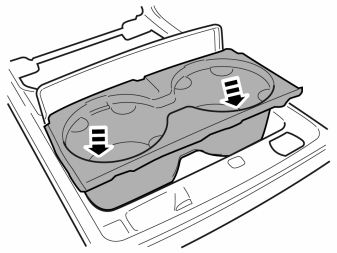
- Press the cup holder into place and make sure that the clips engage.
- Get the new panel and press into place in the gear lever's holder. Make sure that the catches engage.
Обсуждение и оценка
0Пока нет комментариев. Будьте первым.