Применимость
| Модель | Двигатель | Год |
|---|---|---|
| XC90 | — | 2006–2015 |
Примечание: Do not do the work at a temperature below 20°C (68°F).
Installing the decor panel
Tail lamp
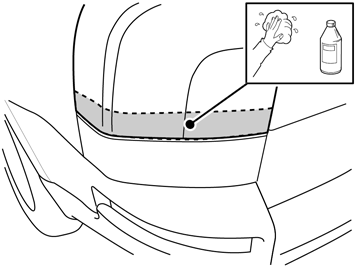
- Clean the lower edge of the tail lamp using isopropanol.
- Wipe dry.
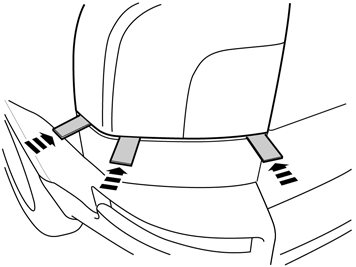
- Cut off a few pieces of cardboard and insert them between the lower edge of the tail lamp and the panel.
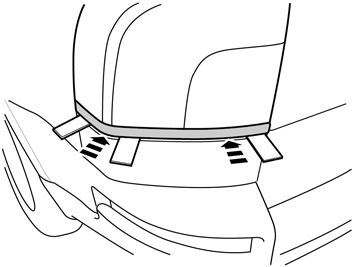
- Take one of the decor trims for the tail lamp from the kit.
- Place the trim temporarily against the tail lamp and the cardboard pieces.
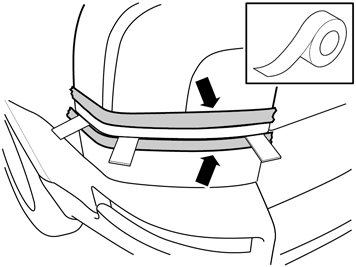
- Apply masking tape to each side of the trim.
Примечание: Position the uppermost piece of tape a few millimeters below the upper edge of the trim.
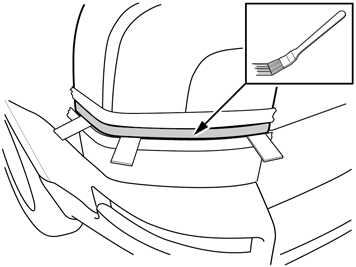
- Apply primer to the surface, part no. 1161765.
Примечание: Repeat the steps for the other tail lamp.
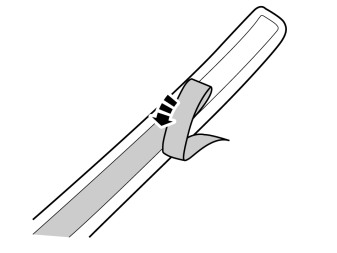
- Remove a small piece of the protective tape from the longer part of the trim.
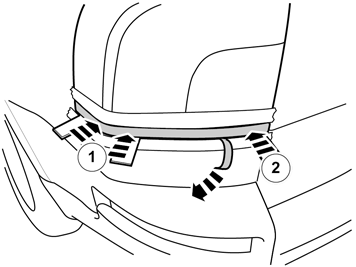
- Position the molding against the tail lamp and the cardboard pieces so that the angled corner of the molding aligns with the corner of the tail lamp (1).
- Press the molding against the tail lamp where the tape was removed (2).
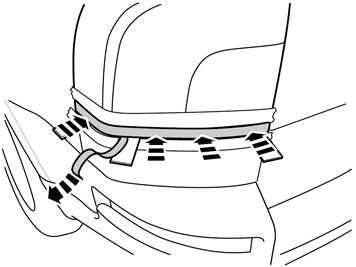
- Keep the trim in position and pull off the tape afterwards, at the same time as pushing the trim in place. Continue until the entire trim has been secured into place.
- Remove the cardboard pieces.
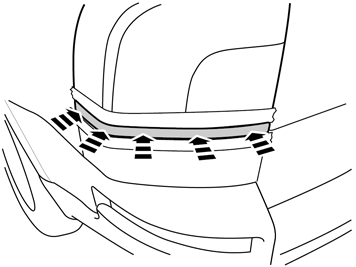
- Now secure the molding properly on the tail lamp along its entire length.
- Remove the masking tape.
- Repeat the steps for the other tail lamp.
Door mirrors
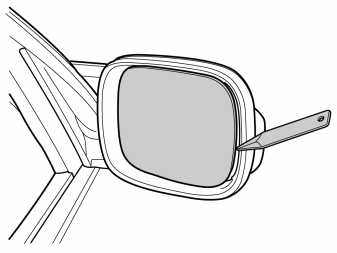
- Carefully prise loose the mirror glass using a weatherstrip tool.
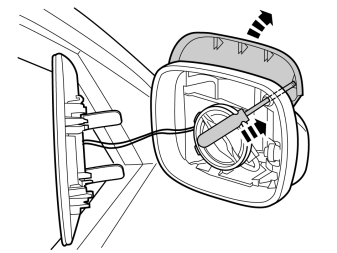
- Carefully pry out the mirror cover using a small screwdriver.
Примечание: Do not damage the wiring for the mirror glass or the damper blade.
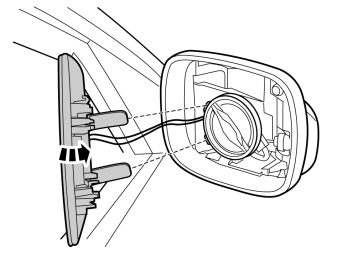
- Reinstall the mirror glass.
Примечание: Ensure that the damper blade fits in its cradle.
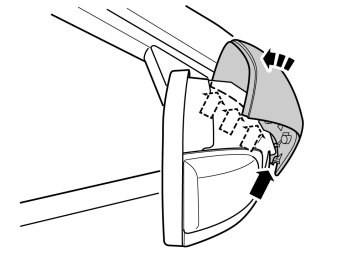
- Install the new cover.
- Repeat the steps for the other mirror.
Rear side window
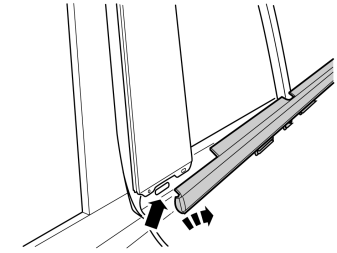
- Lift up the rear end of the weatherstrip on the rear doors so that the hooks release. Lift it up further and turn it out from the window.
Примечание: Take care not to bend the metal strip.
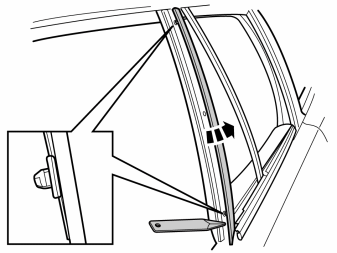
- Carefully pry off the panel at the rear edge using a weatherstrip tool until the two clips at the top and bottom release.
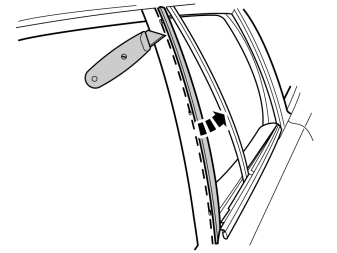
- Turn the panel out at the rear edge so that the tape at the front edge can be cut off.
- Now carefully cut off the panel's front edge from the tape from the top and down.
Примечание: Place the piece against the panel to prevent cutting through the paint.
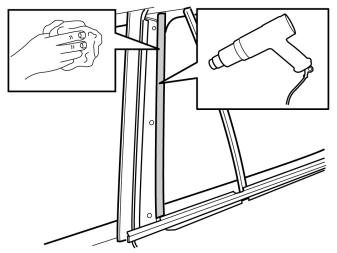
- Remove the remaining pieces of tape. Use a hot air gun to soften the tape.
Примечание: Do not damage the rubber strip when using the hot air gun.
- Clean the marked surface using isopropanol and wipe dry.
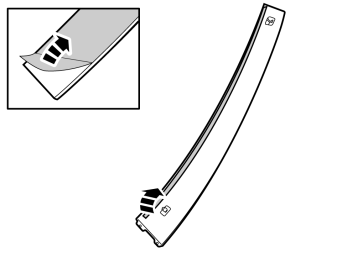
- Remove the protective tape from the decor panel.
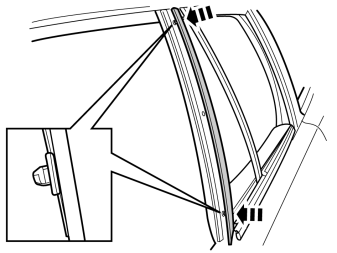
- Position the panel clips in the holes in the door arch and press into place.
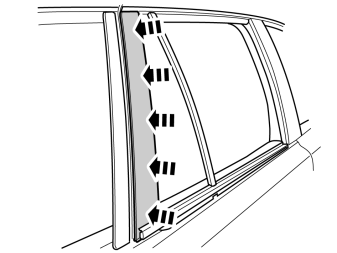
- Press the decor strip firmly onto the clips and tape.
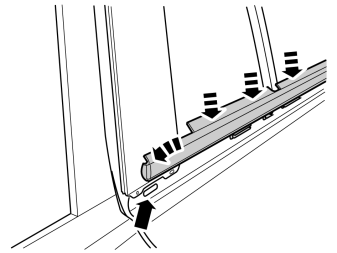
- Press the weatherstip into place. Ensure that the hook at the rear edge engages in the hole in the door arch.
- Repeat the steps for the other side window.
Bumper cover
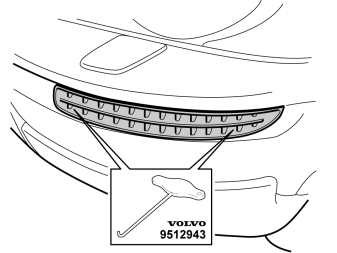
- Remove the bumper cover grille on both sides by carefully pulling them off using tool part no. 9512943.
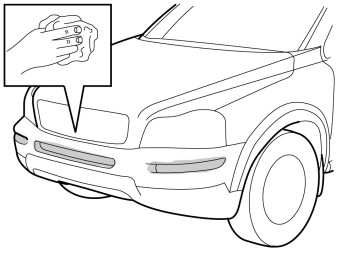
- Clean the bumper cover where the decor moldings are to be secured.
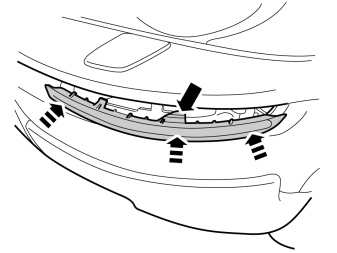
- Align the decor panel in the cut-out and press it into place. Ensure that all hooks engage.
- Repeat the operation on the other side.
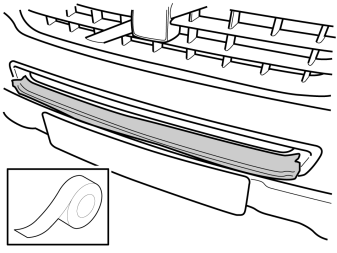
- Apply a piece of tape as protection along the lower edge of the central grille.
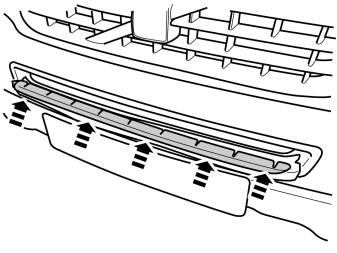
- Take a long decor molding from the kit. Place the upper side of the long horizontal plate in the grille and secure it.
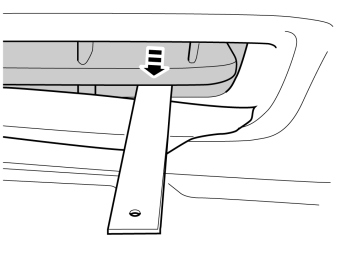
- Hold the lower side of the plate using a weatherstrip tool and at the same time press the upper side of the decor molding until the catches engage the plate. A click should be clearly heard.
- Repeat this along the entire decor molding.
- Remove the tape strip.
Обсуждение и оценка
0Пока нет комментариев. Будьте первым.