Примечание: This accessory requires software unique to the car.
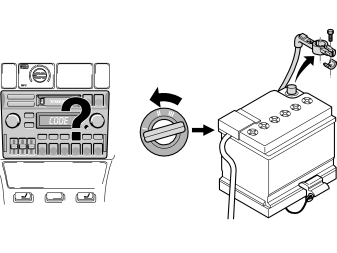
- Make a note of the radio code if applicable
- Turn the ignition key to position 0
- Disconnect the battery negative lead.
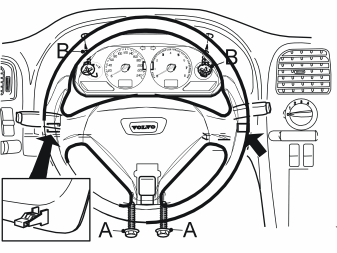
- Remove the two screws (A) from underneath the steering column. Lower the steering column
- Remove the two screws (B). Remove the surround from the combination instrument (pull the lower edge of the surround).
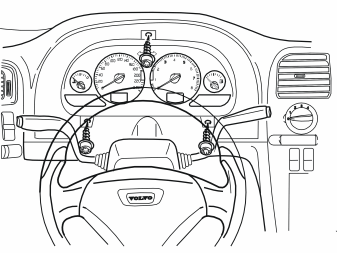
- Remove the three screws and remove the combined instrument panel.
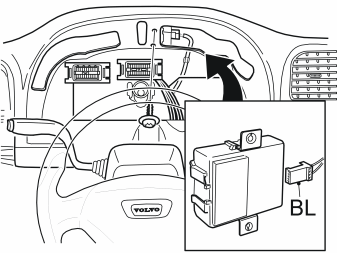
- Take the 5-pin blue (BL) connector
- Connect the blue connector to the receiver
- Install the receiver using two screws.
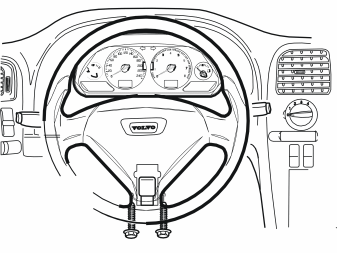
- Reinstall the combined instrument panel and the surround
- Install the two screws for the steering column. Tighten to 15 Nm (11 lbf. ft.).
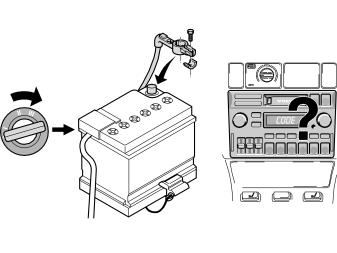
- Turn the ignition key to position II.
Внимание: Ensure that no one is inside the car when reconnecting the battery.
- Reconnect the battery negative lead
- If applicable, re-enter the radio code
- Set the car clock to the correct time
- Program the software. See the service information in VIDA
- Check the function. Use the Service Manual.
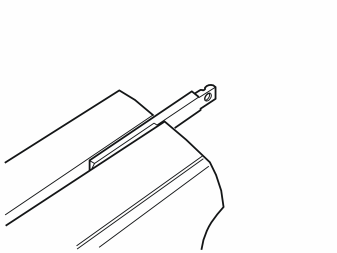
- Remove the key from the kit. Secure the key in a vice with copper or aluminium protected jaws.
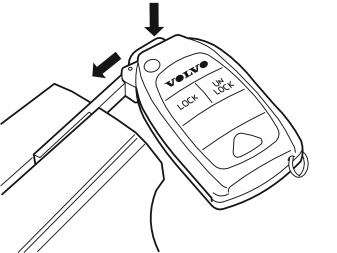
- Take the remote control, lock the key mounting using a piece of butyl tape in the folded out position
- Press the key mounting for the remote control on the key, until the holes in the key mounting are opposite the corresponding grooves in the key.
Примечание: Ensure that the key is properly secured in the key mounting on the remote control, the lock pin must be in the groove in the key.
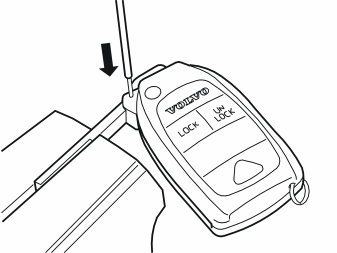
- Remove the lock pin from the kit. Carefully knock the pin in the key mounting using a small drift.
Примечание: Do not damage the remote control and the key when installing.
- Remove the butyl tape. Remove the key from the vice
- Ensure that the key can be folded inwards and that it locks in the limit position.
Обсуждение и оценка
0Пока нет комментариев. Будьте первым.