Preparations
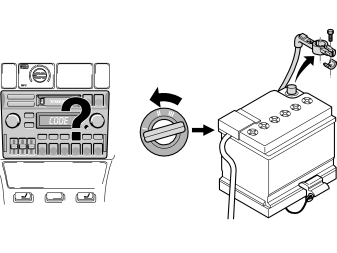
- Note the anti-theft radio code (if applicable)
- Turn the ignition key to position 0
- Disconnect the battery negative lead.
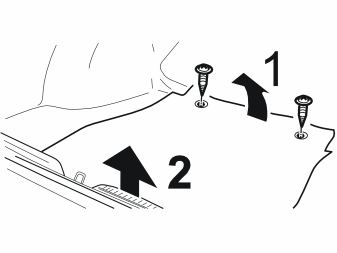
- Remove the two screws (1) from the cargo compartment carpet
- Remove the cargo compartment carpet and the rear panel (2).
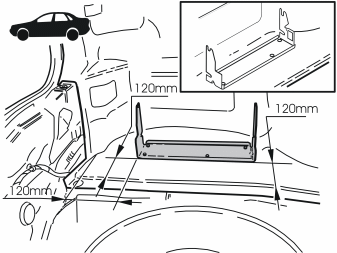
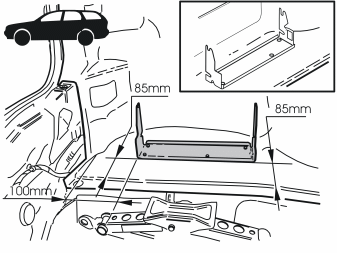
- Position the CD bracket as illustrated. Mark out four holes
- Drill four Ø7 mm (9/32") holes.
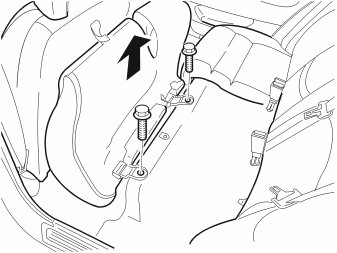
- Fold the rear seat forward. Remove the mounting screws
- Remove the rear seat.
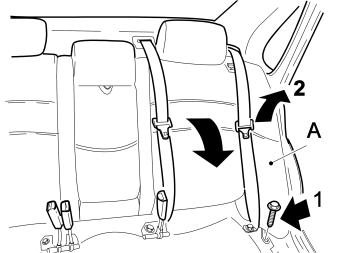
- Fold down the backrest
- Remove the backrest section (A) on the left-hand side.
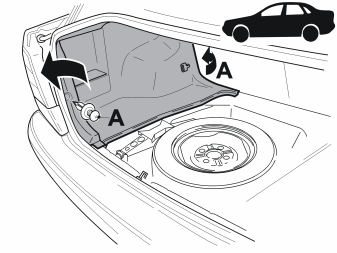
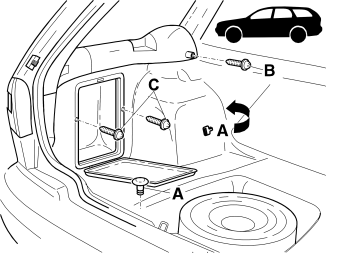
- Remove the clip (A). Remove the screw (B). On models equipped with a side hatch also the screws (C)
- Remove the left-hand cargo compartment panel from the lower edge. Use a twisting movement.
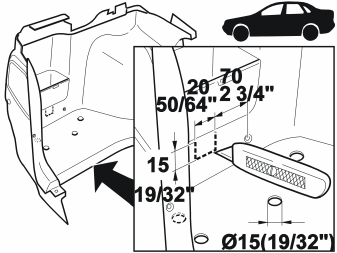
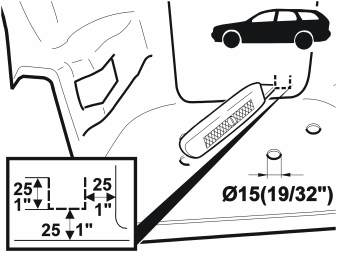
- Drill the four holes in the cargo compartment panels out to Ø15 mm (19/32")
- Cut out the cargo compartment panel as illustrated. This is important so that the cable harness can then be routed through the cargo compartment panel.
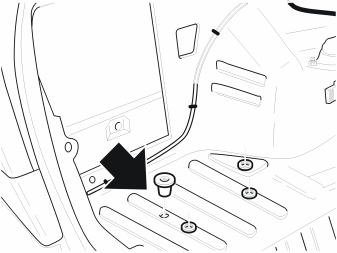
- Remove the insulation panel above the drilled holes
- Treat the holes using rustproofing agent
- Install the rivet nuts (Volvo special tool P/N 1159689-7).
Routing wiring, cargo compartment
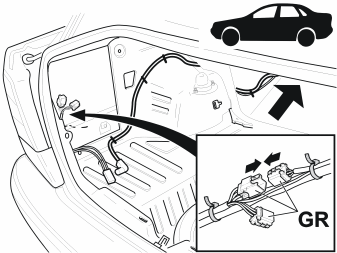
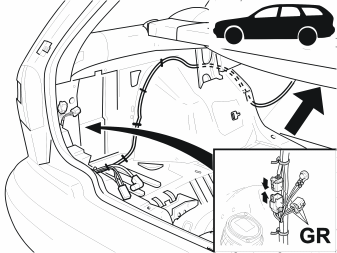
From chassis number 415 000 inclusive:
- Locate the 4-pin grey (GR) connector
- Remove the tape
- Connect the grey connector. Route the CD-changer and DIN cable harnesses in the cargo compartment as illustrated.
Примечание: From chassis number 600000 inclusive the DIN cable harness is pre-routed in the cargo compartment in certain variants. In the S40 it is located under the parcel shelf. In the V40 it is located between the C and D posts.
- Secure the cable harnesses using tie straps.
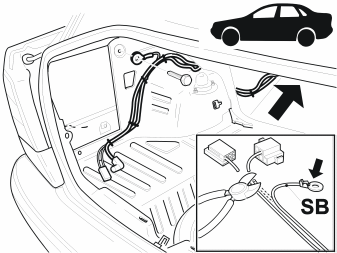
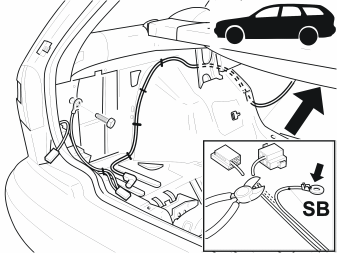
Up to chassis number 415 000:
- Cut off the connectors for the cable harness for the CD changer
- Install a ring terminal on the black (SB) cable and connect it to ground
- Route the CD changer and DIN cable harnesses in the cargo compartment as illustrated.
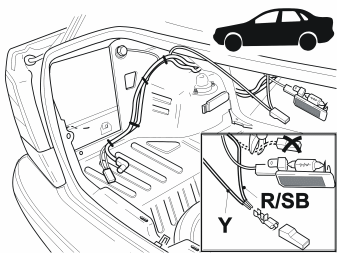
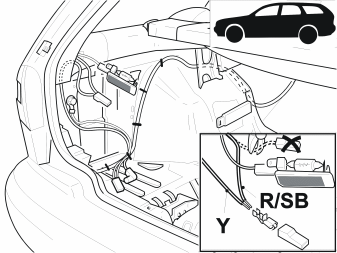
Up to chassis number 415 000:
- Disconnect the red and black (R/SB) cable from the cargo compartment lighting. Cut off the cable terminal
- Connect the red and black cable and the yellow (Y) cable from the CD-changer cable harness in a new cable terminal
- Install a receptacle housing
- Secure the CD-changer cable harness to the existing cable harness.
Installing and connecting the CD changer
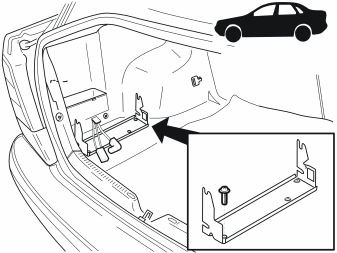
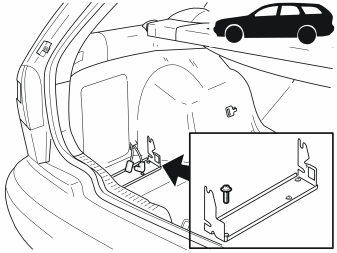
- Pull the wiring through the hole in the cargo compartment panel
- Reinstall the cargo compartment panel
- Install the clips for the cable
- Install the CD bracket.
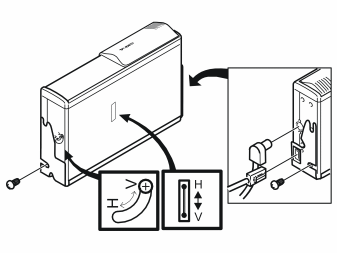
- Remove the transport screws
- Check that the lever at the rear and on the right hand side are in the "V" position
- Protect the holes for the transport screws and levers from dust using adhesive labels
- Install the CD changer using six screws
- Connect the CD changer cable harness
- Connect the DIN connector.
Cable routing, tunnel and centre console
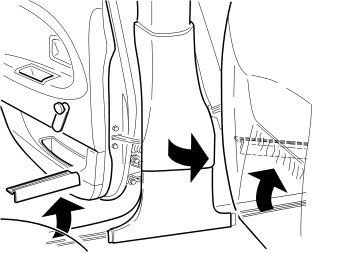
Примечание: If the DIN wiring is pre-routed continue to point 19.
- Remove the sill trim panels and the panel from the left-hand B post.
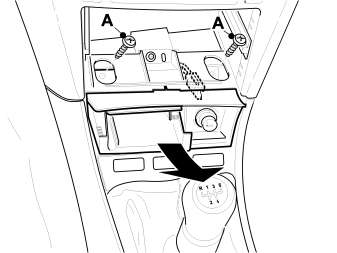
Up to chassis number 600,000:
- Remove the radio
- Disconnect the connectors and antenna cable
- Where applicable: Remove the storage compartment from the centre console
- Remove the ashtray
- Remove the screws (A) and the ashtray holder
- Disconnect the cigarette lighter connector.
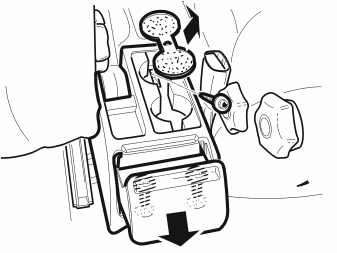
Up to chassis number 600,000:
- Remove the litter bin and the rubber mat in the mug holder
- Remove the 3 screws
- Remove the rear section of the centre console.
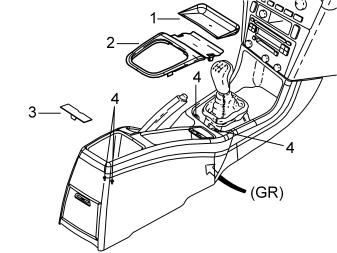
From chassis number 600,000 inclusive:
- Remove the radio. Disconnect the connectors
- Remove the rubber mat (1)
- Remove the gear selector lever panel (2) by pressing in the catches and removing it. Applies to cars with a 12V socket in the centre console panel:Remove the connector from the 12V socket. Applies to manual gearboxes: Press in the clips. Remove the boot
- Apply the parking brake
- Remove the cover (3) and the screws (4)
- Raise the front edge of the rear section of the centre console. Disconnect the grey (GR) connector
- Remove the rear section of the centre console completely.
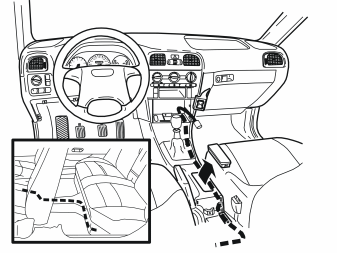
- Continue routing the DIN cable from the cargo compartment under the carpet along the sill of the left-hand rear door. Pull it over the floor in front of the rear seat towards the centre console. Continue along the centre console to the radio compartment
- Secure the DIN cable using tie straps. Ensure that the cable does not interfere with the parking brake.
- Connect the cigarette lighter connector. Install the ashtray
- Where applicable: Install the centre console locker
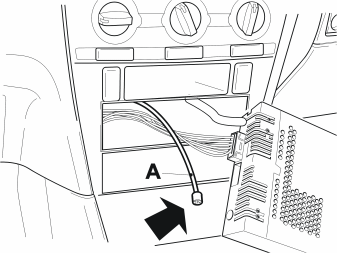
- Connect the DIN cable (A) to the radio. Install the radio. If the DIN cable is already installed in the car: Remove the radio and locate the DIN cable (it is secured to the radio cable harness). Connect the DIN cable. Reinstall the radio
- Turn the ignition key to position II.
Внимание: Ensure that nobody is in the car when connecting the battery.
- Reconnect the battery negative lead
- Enter the anti-theft radio code
- Set the car clock to the correct time
- Check the function
- Reinstall the other removed components.