Preparations
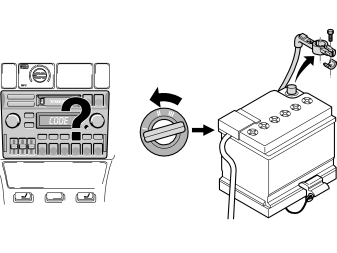
- Note the anti-theft radio code (if applicable)
- Turn the ignition key to position 0
- Disconnect the battery negative lead.
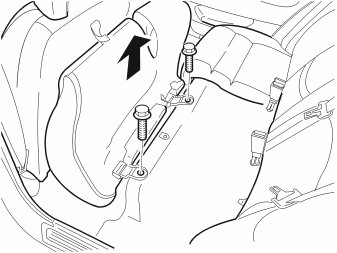
- Fold the rear seat forward. Remove the mounting screws
- Remove the rear seat.
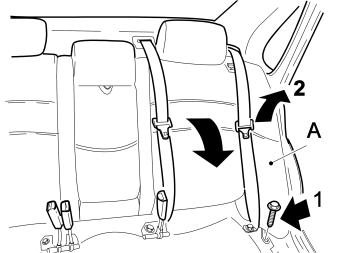
- Remove the rear head restraint
- Fold down the backrest completely
- Remove the secured backrest section (A) on both the left and right-hands sides.
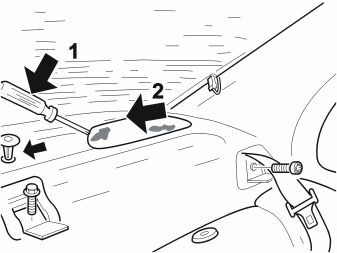
- Remove the loudspeaker grilles
- If applicable: Remove the loudspeakers
- If applicable: Remove the three mounting points for the child seat (Child Restraint Anchorages)
- Turn the mounting plates for the seat belt. Remove the screws and the clip
- Remove the parcel shelf (there is a clip in the centre of the parcel shelf).
Installing and connecting the CD changer
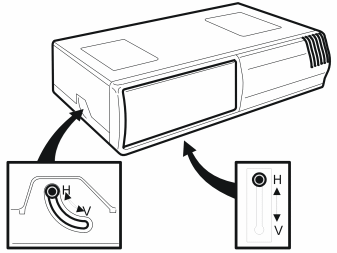
- Remove the transport screws
- Ensure that the lever underneath the CD changer and the lever on the left-hand side of the CD changer are in position “H”.
- Protect the transportation screw holes and the lever holes against dust. Use decals from the kit.
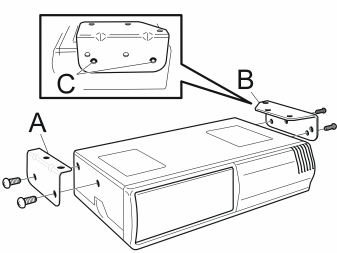
- Install the bracket (A) on the CD changer using two screws
- Install the bracket (B) using two screws, use holes (C).
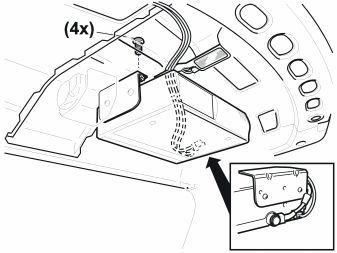
- Install the CD changer. Tighten the four screws
- Connect the CD changer cable harness
- Connect the DIN connector. Ensure that the connector clicks securely into the correct position.
Примечание: From chassis number 600000 inclusive the DIN cable harness is pre-routed in the cargo compartment underneath the parcel shelf in certain variants.
- Secure the cable harnesses using tie straps.
Routing wiring, cargo compartment
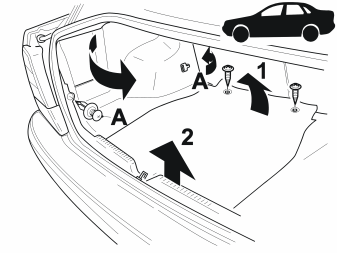
Remove:
- the two screws and the carpet from the cargo compartment (1)
- the rear panel (2)
- the clips (A) and the left-hand panel in the cargo compartment.
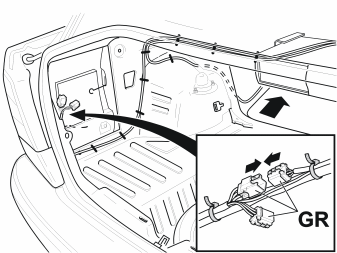
From chassis number 415 000 inclusive:
- Locate the 4-pin grey (GR) connector
- Remove the tape
- Route the CD cable and the DIN cable harnesses in the cargo compartment as illustrated
- Connect the grey connector. Secure the cable harnesses using tie straps.
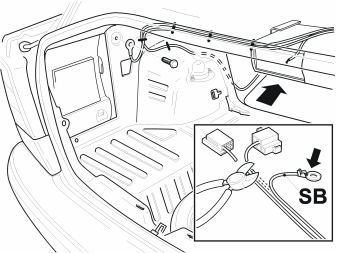
Up to chassis number 415 000:
- Cut off both connectors for the CD changer as close to the terminals as possible
- Route the black (SB) cable and the DIN cable harnesses in the cargo compartment as illustrated
- Install the cable terminal on the black cable. Connect it to ground.
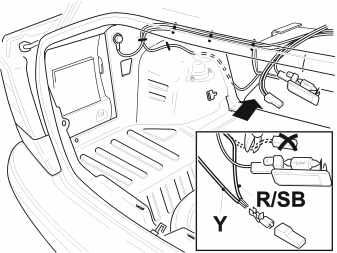
Up to chassis number 415 000:
- Remove the red and black (R/SB) cable from the lighting in the cargo compartment. Cut the cable terminal
- Connect the red and black cable and the yellow (Y) cable from the CD-changer cable harness to a new cable terminal
- Install a receptacle housing
- Secure the CD-changer cable harness to the existing cable harness.
Cable routing, tunnel and centre console
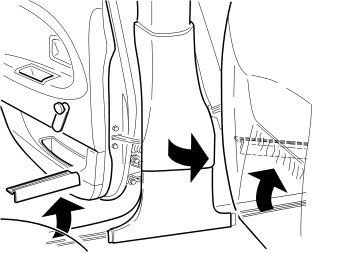
Примечание: If the DIN wiring is pre-routed continue to point 17.
- Remove the sill trim panels and the panel from the left-hand B post.
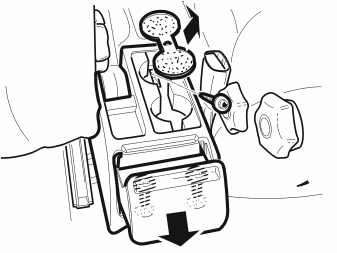
Up to chassis number 600 000:
- Remove the litter bin and the rubber mat in the mug holder
- Remove the 3 screws
- Remove the rear section of the centre console.
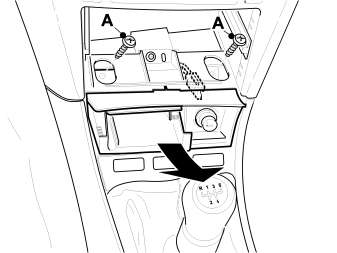
Up to chassis number 600 000:
- Remove the radio
- Disconnect the connectors and antenna cable
- Where applicable: Remove the storage compartment from the centre console
- Remove the ashtray
- Remove the screws (A) and the ashtray holder
- Disconnect the cigarette lighter connector.
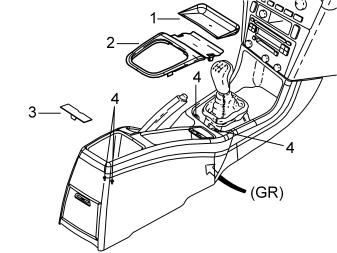
From chassis number 600 000 inclusive:
- Remove the radio. Disconnect the connectors
- Remove the rubber mat (1)
- Remove the gear selector lever panel (2) by pressing in the catches and removing it. Applies to cars with a 12V socket in the centre console panel: Remove the connector from the 12V-socket. Applies to manual gearboxes:Press in the clips. Remove the boot
- Apply the parking brake
- Remove the cover (3) and the screws (4)
- Raise the front edge of the rear section of the centre console. Disconnect the grey (GR) connector
- Remove the rear section of the centre console completely.
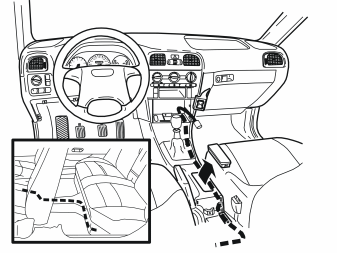
- Continue routing the DIN cable from the cargo compartment under the carpet along the sill of the left-hand rear door. Pull it over the floor in front of the rear seat towards the centre console. Continue along the centre console to the radio compartment
- Secure the DIN cable using tie straps. Ensure that the cable does not interfere with the parking brake.
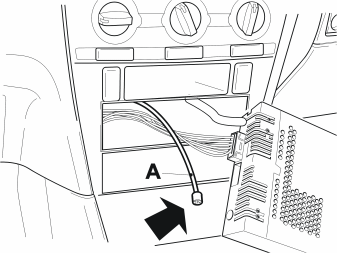
- Connect the cigarette lighter connector. Install the ashtray
- Where applicable: Install the centre console locker
- Connect the DIN cable (A) to the radio. Install the radio. If the DIN cable is already installed in the car: Remove the radio and locate the DIN cable (it is secured to the radio cable harness). Connect the DIN cable. Reinstall the radio
- Turn the ignition key to position II.
Внимание: Ensure that nobody is in the car when connecting the battery.
- Reconnect the battery negative lead
- Enter the anti-theft radio code
- Set the car clock to the correct time
- Check the function
- Reinstall the other removed components
- Where applicable: Tighten the three mounting points for the child seat (Child Restraint Anchorages). Tightening torque: 21 Nm (15 lbf.ft.).
Обсуждение и оценка
0Пока нет комментариев. Будьте первым.