Применимость
| Модель | Двигатель | Год |
|---|---|---|
| XC90 | — | 2003–2006 |
Примечание: During installation the underlying surface must be kept at a temperature of at least +20°C (68°F).
Примечание: Console sockets must be made for auxiliary lights where fitted.
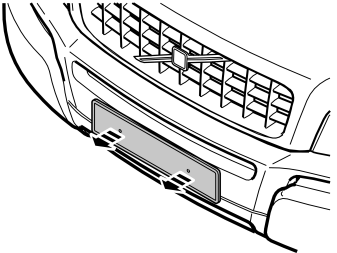
- Raise the car to a suitable working height.
- Remove the number plate and the number plate holder.
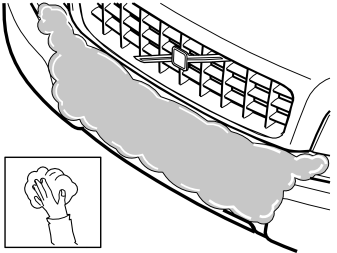
- Clean off the front of the car and wipe dry.
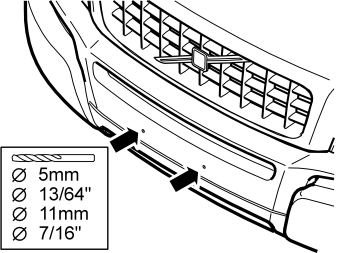
Applies to cars without expander nuts for the number plate holder
- Pre-drill with a Ø5 mm (13/64') diameter drill bit as per the two markings in the bumper cover.Drill out the holes to Ø11 mm (7/16') and deburr the hole edges. Drill deep enough in the foam plastic so that the expander nuts can be pressed fully into the bumper cover.
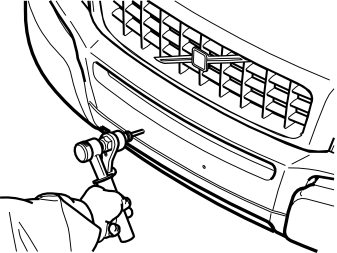
Applies to cars without expander nuts for the number plate holder
- Take the expander nuts from the kit and tighten them in the bumper cover, use tool P/N 9512782.
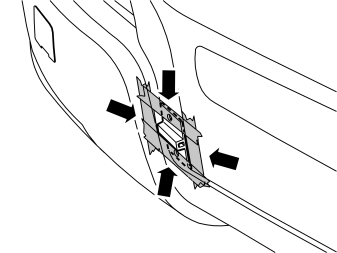
- Take the holder for one side from the kit and place it in the corner of the bumper cover panel, as illustrated. The holders are unique and only suit one of the two sides.
- Tape the holder securely to the body for marking the primer surfaces.
- Repeat the operation with the other holder.
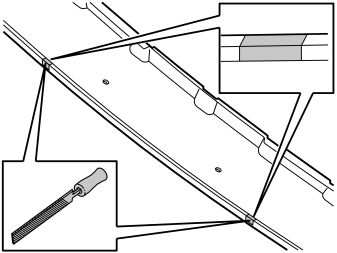
Applies to cars with auxiliary lights
- Saw/file out two recesses for the auxiliary lights' consoles in accordance with the markings on the inside of the decor panel top edge with a fine-toothed saw/file. Be careful with the tape.
- Even out the edges and remove the swarf.
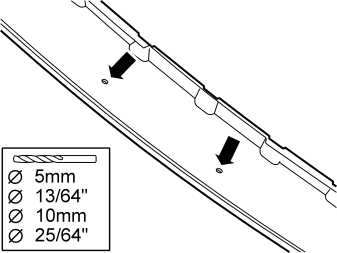
- Pre-drill the holes for the number plate holder as per the existing markings on the inside using a Ø5 mm (13/64') diameter drill bit. Drill out the holes using a Ø10 mm (25/64') diameter drill bit.
- Even out the hole edges and remove the swarf.
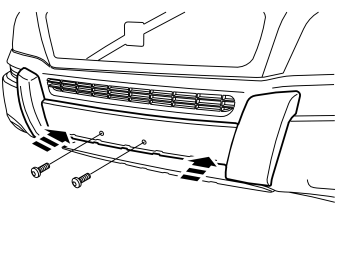
- Press in the panel onto the taped holders and check that the holes in the panel correspond with the holes in the bumper cover.Test with the screws from the kit and file out the holes as necessary.If the panel is removed for adjusting the holes, then tape on the holders again.
Illustration A
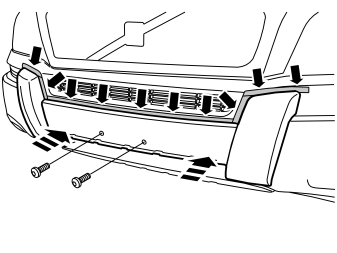
- Press the panel onto the holders (if the panel was removed to adjust the holes). Secure it to the body with the two screws, for marking the surfaces for applying the primer. Adjust the position of the panel in accordance with step 18.
Примечание: Do not remove the panel's protective tape at this point.
Illustration B
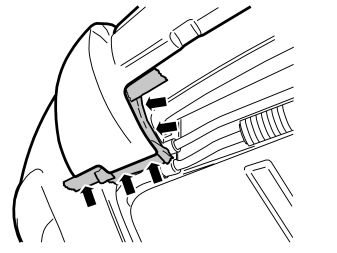
- Tape the body just in front of where the panel's mounting tape shall adhere. Tape edge to edge with the panel's edge on both sides.
- Remove the panel from the body.
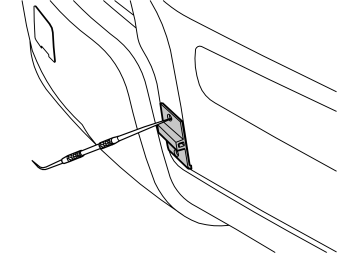
- Take the holder for one side from the kit and place it in the corner of the bumper cover panel as illustrated.
- Mark out for drilling holes in the bumper cover through the holes in the holder using a scriber.
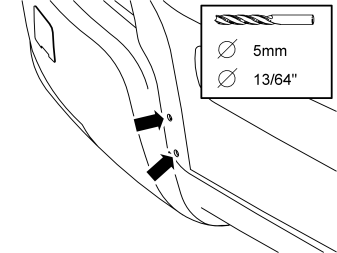
- Take a Ø5 mm (13/64') diameter drill bit and drill out the two holes.
- Even out the hole edges and remove the swarf.
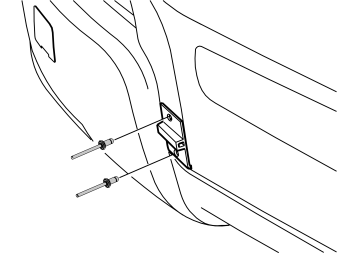
- Take two pop rivets from the kit and rivet in the holder to the bumper cover.
- Repeat the operation with the other holder.
Illustration A
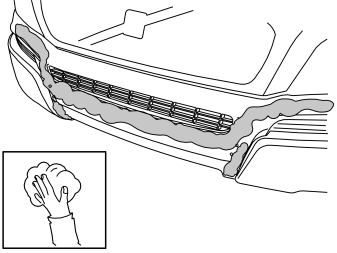
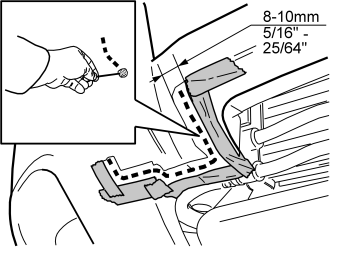
- Clean the marked surfaces between the inner tape edge and the marked line using isopropanol part no. 1161721 and wipe dry. The surface to be coated with primer must be 8 - 10 mm (5/16' - 25/64') wide, so adapt the cleaning to this.
Illustration B
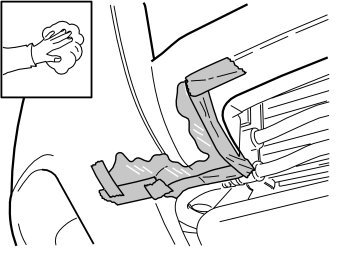
- Clean the right and left-hand sides.
Applying primer to the bodywork
Illustration A
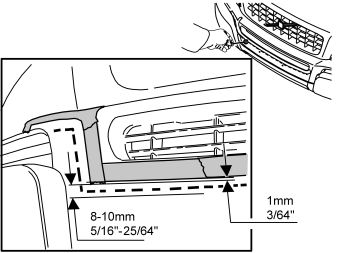
Illustration B
Примечание: The temperature of the car must be at least 20 °C (68 °F) when installing the panel.
Осторожно: The panel can be fitted at the earliest 15 minutes, and at the latest 3 hours, after applying the primer.
Applies to the right and left-hand sides:
- Take primer, P/N 1161727 for the painted surfaces, primer P/N 1161765 for the plastic surfaces in the lower section of the bumper cover, and cotton buds from the kit.
Примечание: The primer must be applied to the whole car in one operation. Any spillage must be wiped up immediately.
- Apply the primer between the inner tape edge and the marked line to a width of 8 - 10 mm (5/1 ' - 25/64').It is vital that no primer strays onto visible painted parts outside of the markings, especially at the top sides of the panels where there must be a space of approx. 1 mm between the primer and the inner tape marking.
- Carefully remove the tape when the primer has been applied.
- Allow the primer to harden for 15 minutes.
Applies to cars with auxiliary lights
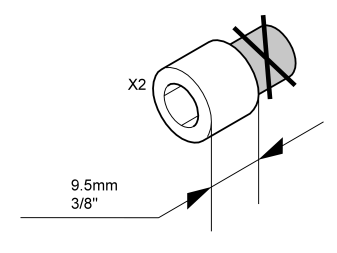
- Take the two spacer sleeves from the kit and cut them level with the larger collar so that the length is 9.5 mm (3/8').
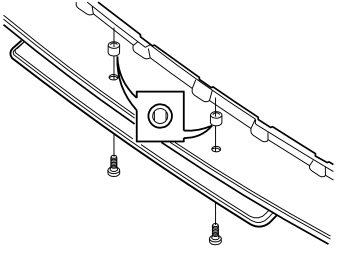
- Take two spacer sleeves and new screws from the kit. Install them together with decor panel and number plate holder.
Примечание: The end of the spacer sleeve with a constriction must be turned toward the decor panel.
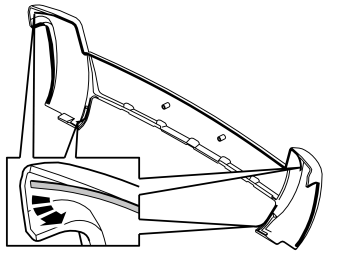
- Detach the protective backing slightly on all of the decor panel's mounting tapes.
Illustration A
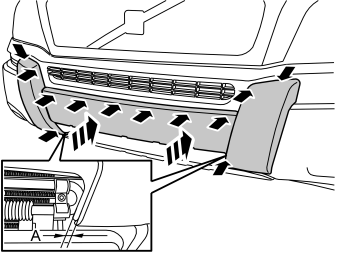
- Position the decor panel carefully at the bumper cover without securing the tape.
- Screw in the screws until they have engaged the threads in the bumper cover. Make sure that the tape tabs are accessible for removing the protective backing.
- Carefully press the decor panel into both holders on the inside without securing the tape.
- Adjust so that the measurement (A) is equal on both sides.
Illustration B
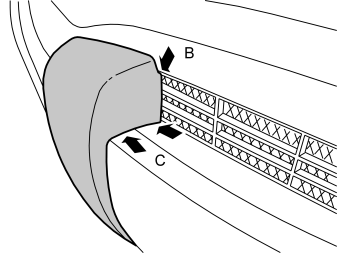
- Adjust the decor panel on both sides in accordance with illustration B:
- Carefully tear away all of the protective backing. Press the decor panel into the bumper cover so that the tape adheres. Press firmly all the way round.
- Tighten the number plate holder firmly and reinstall the number plate.
Примечание: Leave the car indoors for 2 hours after carrying out the work. Do not wash the car for 48 hours.
Обсуждение и оценка
0Пока нет комментариев. Будьте первым.