Применимость
| Модель | Двигатель | Год |
|---|---|---|
| S60 (-09) | — | 2001–2008 |
| S80 (-06) | — | 1999–2006 |
| V70 (00-08) | — | 2000–2008 |
Примечание: These installation instructions display installation on left-hand drive cars. Where the operations differ, right-hand drive versions are also displayed with text and images.
Steps 1-14 show installation on left-hand drive cars. For installation on right-hand drive cars carry out the procedures on the opposite side and/or mirrored.
Preparations

- Turn the ignition switch to position 0.
- Disconnect the battery negative lead.
Примечание: Wait at least five minutes before disassembling the connectors or removing other electrical equipment.
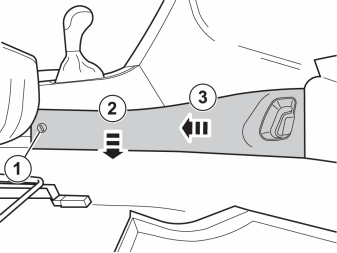
- Turn the clip (1) a quarter turn anti-clockwise.
- Pull the panel out by the rear edge.
- Then pull the panel backwards until the hooks release.
- Remove the panel.
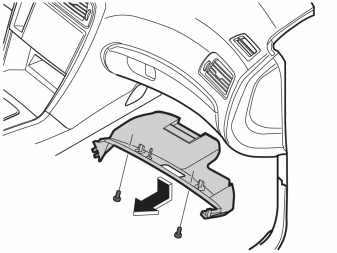
- Remove the screws and sound proofing bracket.
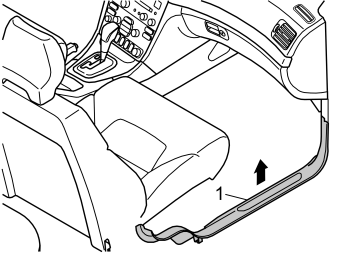
- Remove the sill trim panel (1).
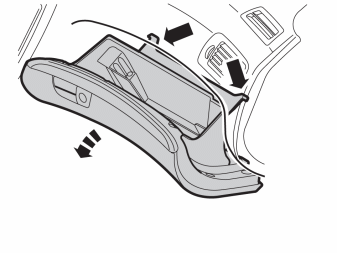
Applies to the S60 and V70
- Open the glovebox.
- Lift the two hooks on each side past the lugs.
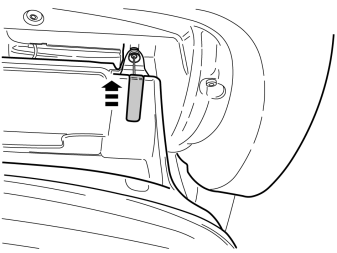
Applies to the S60 and V70
- Unhook the damping.
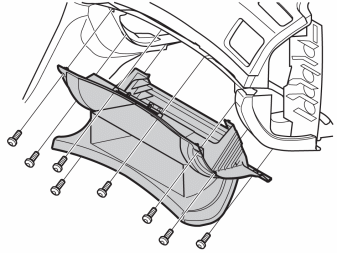
Applies to the S60 and V70
- Remove:
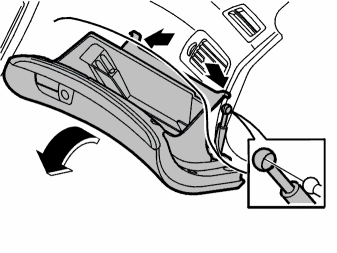
Applies to the S80
- Open the glovebox
- Lift the two hooks on each side past the lugs.
- Detach the gas struts by pulling straight out.
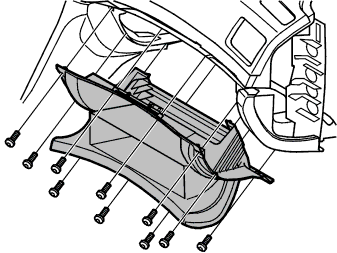
Applies to the S80
- Remove:
Connection for the mute relay
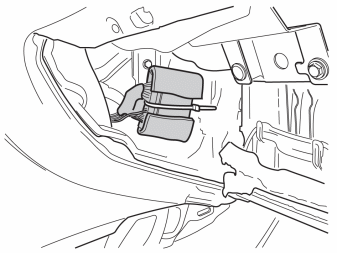
- Locate the mute relay.Cut off the tie strap and lift out the relay.
- Unplug the connectors.
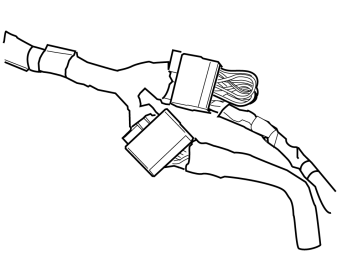
- Take the two cable harnesses from the kit and connect them to the disconnected connectors.
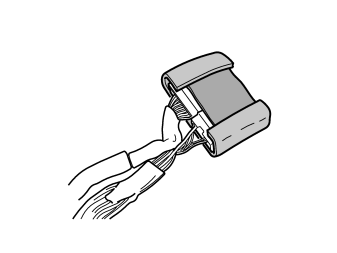
- Connect the new cable harnesses to the relay.
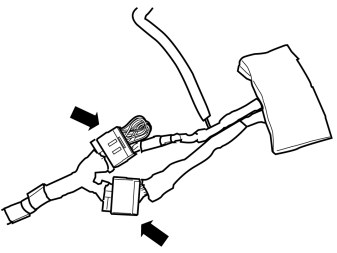
- Take the foam tape from the kit and cut it off in the middle. Tape one piece around each connector.
- Reinstall the relay using a tie strap.
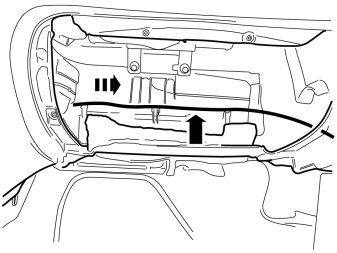
- Route the yellow cable from the relay to the sill. Secure the cable using a tie strap.
Cargo compartment, preparations
Steps 15–22 apply to the V70
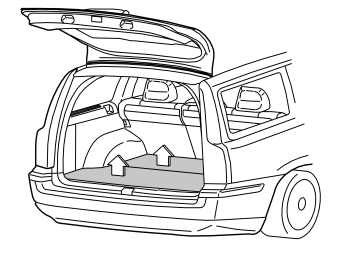
- Remove both the floor hatches. Lift the rear edges of the floor hatches slightly. Then pull the hatches backwards from their mountings.
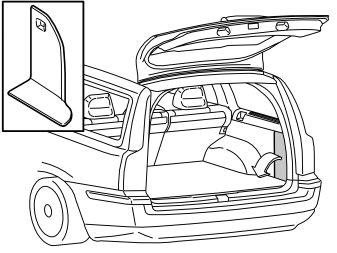
- Remove the folding panel in the cargo compartment.
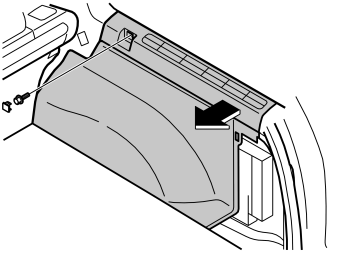
- Remove the side panel by first removing the cover and screw from the front edge.
- Pull the top of the panel out until the clips release.
- Fold the panel inwards. Lift the panel out.
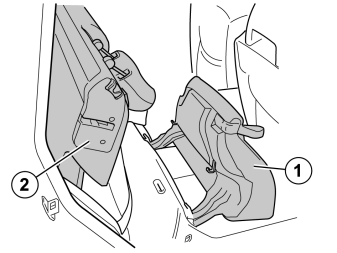
- Fold the right-hand seat cushion and rear backrest forward.
Applies to right-hand drive cars
- Fold both the seat cushions forward.
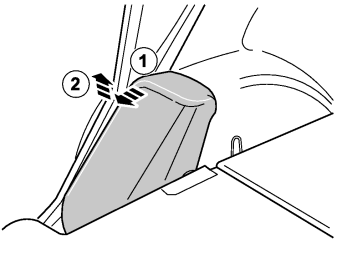
- Grasp the upper edge of the right-hand side cushion. Pull the side cushion forward so that the holder on the reverse releases.
- Slide the side cushion up. Remove the side cushion.
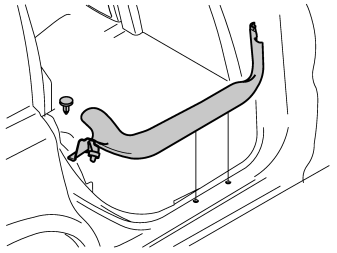
- Remove the sill trim panel at the right-hand rear door.
Applies to right-hand drive cars
- Remove the sill panel on both sides.
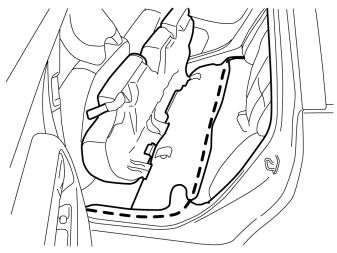
Applies to right-hand drive cars
- Fold back the rear seat's backrest temporarily.
- Pull the cable inside the floor carpets and the lower B post panel, over to the right-hand side.
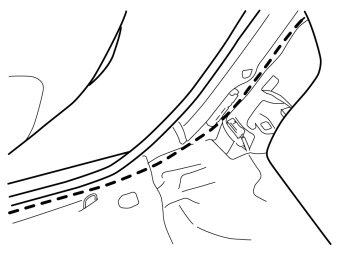
- Route the cable inside the floor carpets and the lower B post panel on towards the rear edge of the right-hand rear wheel arch. Route the cables along the existing cables harnesses to the cargo compartment.
Осторожно: Ensure that the cable is positioned so that there is no risk of it catching or rubbing.
Steps 23-30 apply to the S60 and S80
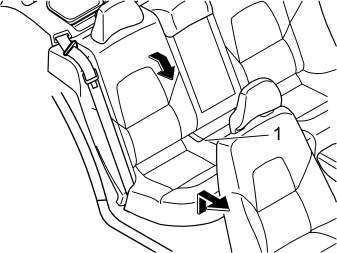
- Remove the seat cushion (1) by pulling it up at the front edge, pulling it forward and then lifting it away.
- Fold the right-hand rear backrest forward.
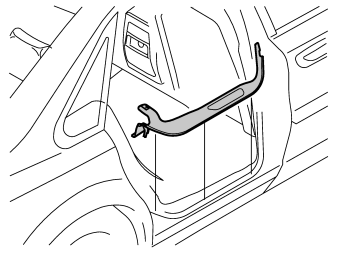
- Remove the sill trim panel at the right-hand rear door.
Applies to right-hand drive cars
- Remove the sill panel on both sides.
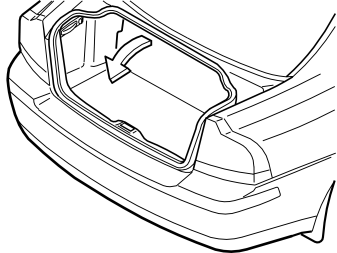
- Remove the cargo compartment carpet.
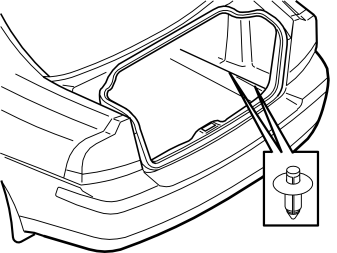
- Press the center of the clip at the bottom of the folding side panel. Press the clip until a click is heard.
- Remove the clips.
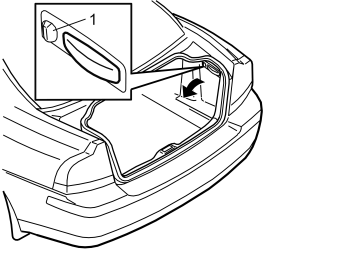
- Turn the handle (1) on the right-hand side through 90 degrees.
- Remove the clips.
- Fold the side panel inwards and lift it out.
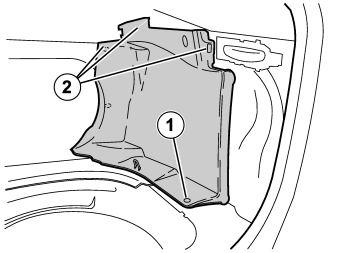
Remove:
- the clip (1)
- the clips (2)
- the panel.
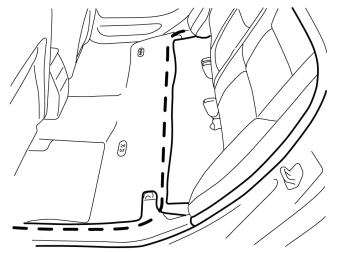
Applies to right-hand drive cars
- Fold back the rear seat's backrest temporarily.
- Pull the cable inside the floor carpets and the lower B post panel, over to the right-hand side.
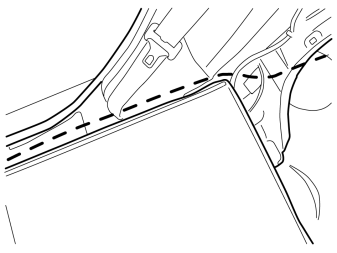
- Route the cable inside the floor carpets and the lower B post panel on towards the rear edge of the right-hand rear wheel arch. Route the cables along the existing cables harnesses to the cargo compartment
Примечание: Ensure that the cable is positioned so that there is no risk of it catching or rubbing.
Connection to the accessory electronic module (AEM), applies to all
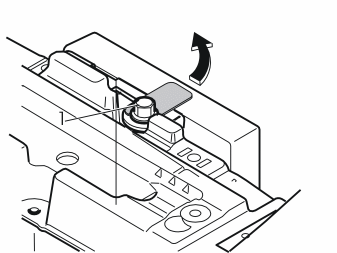
- Slacken off the screw (1) a few turns in the lock facing for the accessory electronic module (AEM) behind the right wheel arch.
- Pull the lock facing out to the right. Remove the lock facing.
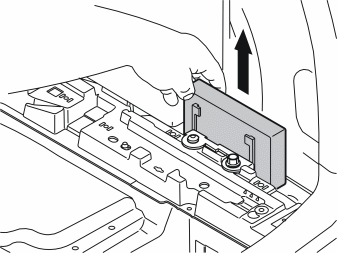
- Lift the accessory electronic module (AEM) out of the bracket.
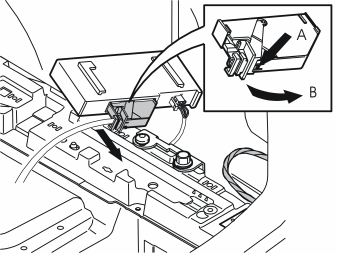
- Disconnect the large connector from the accessory electronic module (AEM). First press in the catch (A). Pull the black locking handle (B) in the direction of the arrow until a click is heard.
- Disconnect the connector from the accessory electronic module.
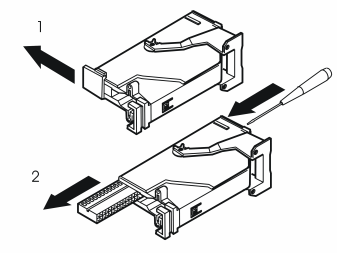
- Remove the black catch holding the black connector socket in place in the connector by pulling in the direction of the arrow.
- Remove the black connector socket. Insert a pointed object in the hole on the other end of the connector. Press the connector socket out.
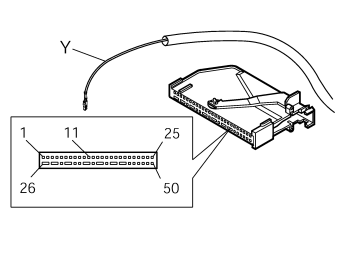
Примечание: The numerical markings on the top and bottom of the black terminal pin are extremely small, so be careful when installing the cable.
- Connect the routed yellow (Y) cable to terminal 11 (telemute) in the accessory electronic module's (AEM) black connector.
- Reinstall the black switch in the connector. Lock into place using the catch.
- Press the connector into the Accessory Electronic module. Secure using the black locking handle.
- Reinstall the accessory electronic module (AEM) with bracket and secure the cables using tie straps from the kit.
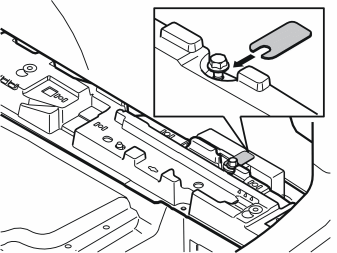
- Reinstall the black switch in the connector. Lock into place using the catch.
- Press the connector into the accessory electronic module. Secure the connector using the black lock handle.
- Reinstall the lock facing above the accessory electronic module (AEM). Tighten the screw. Tighten to 10 Nm (8 lbf.ft.).
Supplementary work
Reinstall:
- the glove box
- the sound barrier
- the side panel for the center console
- the sill trim panels
- side cushions
- side panels
- the luggage compartment mat
- Reinstall the rear seat.
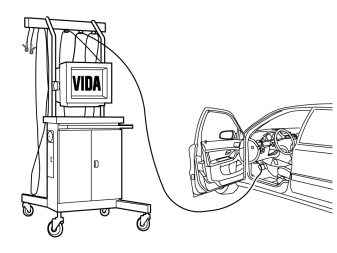
- Download the software for the accessory's function following the service information in VIDA.
Carry out a function test as follows:
- Turn the ignition key to position II.
- Turn on the radio.
- Check that the Bluetooth system's control panel lights up.
- Press the round button in the middle of the control panel.The radio should mute and a voice should start to speak.
- Press the button with the red handset symbol.The voice should stop and the radio sound should return.
Обсуждение и оценка
0Пока нет комментариев. Будьте первым.