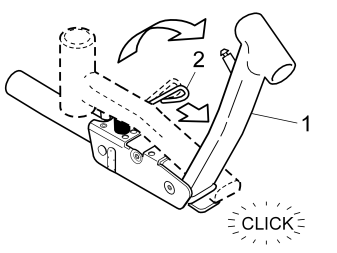
- Release the lever (1) by pulling the red catch (2).
Illustration A
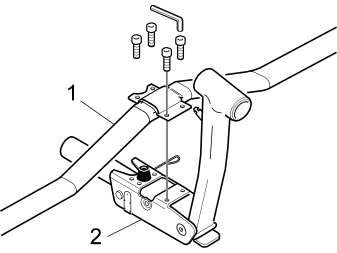
- Position the front-rear strut (1) as illustrated
- Position the strut on the bracket for the lever (2). Use the short Allen screws from the kit. Tighten crosswise to 9 - 11 Nm (6.5 - 8 lbf.ft.).
Illustration B
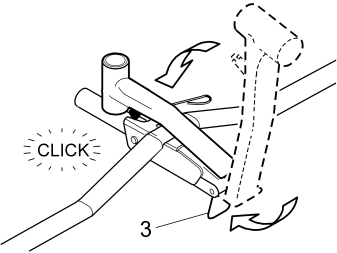
- Fold the lever back into place by pressing the red plate (3).
Примечание: If the lever does not release with the red plate, the lever will spring back into place under considerable tension.
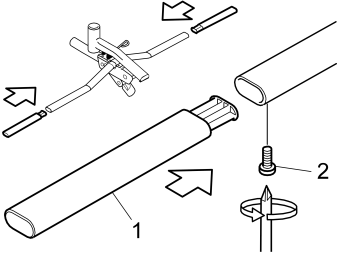
- Slide the extensions (1) into the front-rear strut. Lock into place using the screw (2).
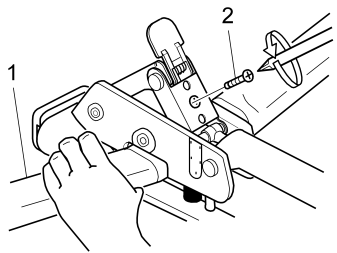
Внимание: Hold the front-rear strut (1) as illustrated to avoid trapping fingers.
- Undo the transport screw (2).
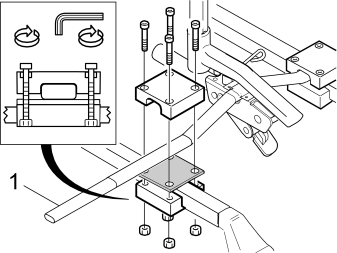
- Position the load carriers as close to the front-rear strut as possible.
Примечание: The extensions (1) for the strut must not be secured on the load carrier.
- Secure the strut as illustrated. Tighten to 9 - 11 Nm (6.5 - 8 lbf.ft.).
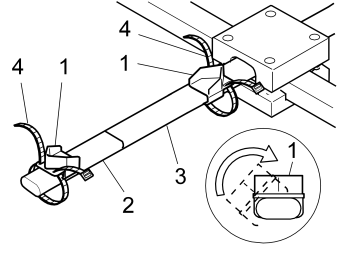
- Install the wheel holders (1) by twisting them. One wheel holder must be on the extension (2) and one on the strut (3).
Примечание: Only one wheel holder may be positioned on the extension.
- Position the short straps (2).
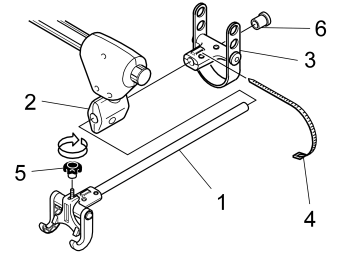
- Insert the rod (1) through the mounting (2)
- Secure the saddle holder (3)
- Insert the strap (4) for the saddle holder
- Install the lock knob (5)
- Install the plastic plug (6).
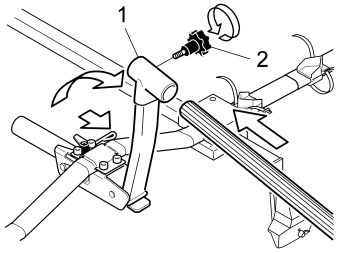
- Fold down the lever
- Press the bar into the mounting on the lever (1). Install the lock knob (2). Tighten.
Raising without a bicycle:
- Release the lever by pressing in the red plate.
Примечание: If the lever does not release with the red plate, the lever will spring back into place under considerable tension.
Raising with bicycle:
- Lift the bicycle slightly to release the lever.
Обсуждение и оценка
0Пока нет комментариев. Будьте первым.