Применимость
| Модель | Двигатель | Год |
|---|---|---|
| S60 (-09) | — | 2001–2009 |
Примечание: The following special tools are used for this installation: 999 5500, 999 5659, 999 5740 & 999 5740-1
Примечание: Carry out all the points in this instruction on the right and the left-hand sides, unless otherwise specified.
Preparations, rear suspension
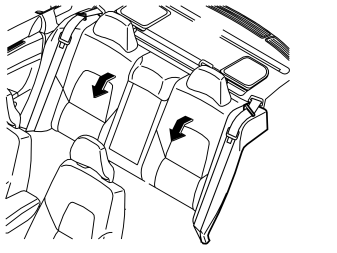
- Fold both the rear backrests forward.
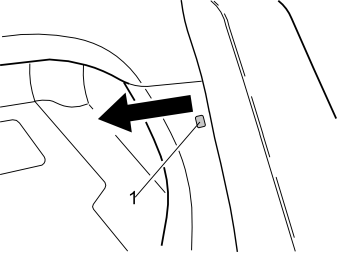
- Remove the clip (1) at the left-hand side cushion
- Pull the top edge of the front cargo compartment panel out to access the upper lock for the side cushion.
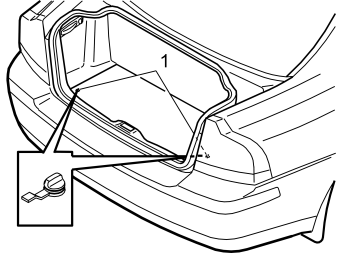
- Remove the cargo compartment carpet at the rear edge. Turn the two handles (1) a quarter turn.
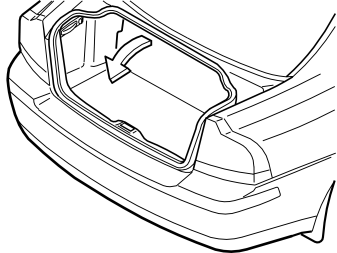
- Pull up the front of the cargo compartment carpet. Fold the front half back over the rear half of the cargo compartment carpet.
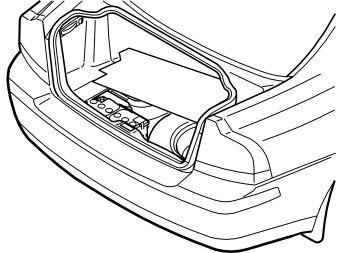
- Slide the entire cargo compartment carpet forward slightly. Twist slightly to remove the cargo compartment carpet through the tailgate opening
- Remove the cargo compartment carpet.
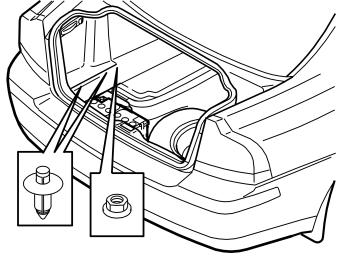
- Press the centres of the clips until a click is heard. Remove the clips
- Remove the plastic nut.
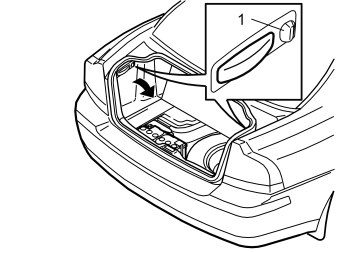
- Turn the handle (1) a quarter of a turn
- Fold the side panels down. Lift the panels out.
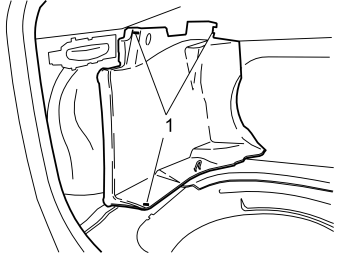
- Remove the clips (1) in the front side panel in the cargo compartment. Remove the panel.
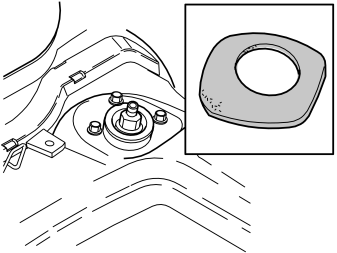
- Remove the foam rubber seal over the rear shock absorber mountings.
Installing the shock absorber
Remove:
- the nut (1) for the shock absorbers
- the screws (2) for the upper shock absorber bearings.
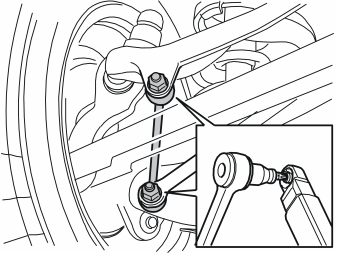
- Raise the car.
Remove:
- the rear wheels
- the lower screw (1) for the shock absorber
- the shock absorber (2) and the upper bearing.
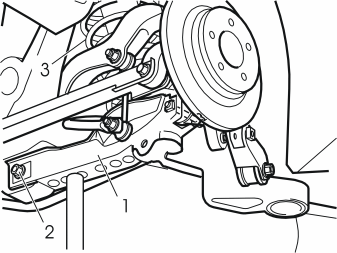
- Relieve the load from the lower trailing arm (1). Use a mobile jack
- Remove the screw (2) for the trailing arm
- Carefully lower the mobile jack
- Remove the spring (3) by pressing the trailing arm down.
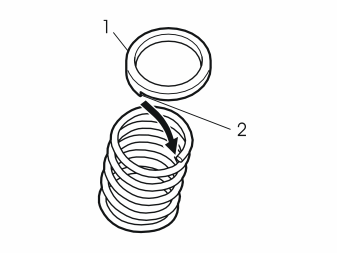
- Remove the rubber liner (1) for the spring turret. Position the liner on the new spring.
Подсказка: Lubricate the rubber lining using soap solution to facilitate installation.
Примечание: Position the groove (2) in the rubber lining on the end of the spring.
- Insert the spring into the turret with the rubber liner first
- Lift up the trailing arm slightly so that the spring is resting against the bottom of the trailing arm.
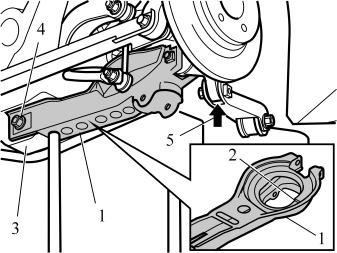
- Position the mobile jack under the trailing arm (1). Carefully press upwards. At the same time, adjust the position of the spring so that it aligns in the groove (2) on the bottom of the trailing arm.
- Press and adjust the trailing arm into the mounting (3)
- Install the new screw (4) in the trailing arm as far as possible
- Position the mobile jack according to the arrow (5). Adjust the screw (4) correctly in the trailing arm. Finger tighten the screw.
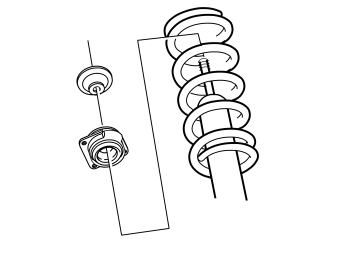
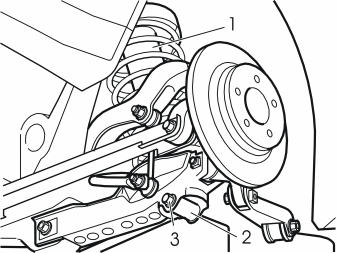
- Insert the shock absorber (1) through the lower trailing arm and the spring
- Install the new bearing and washer on the shock absorber through the spring so that the Volvo mark and part number are on the top. See illustration A
- Insert the shock absorber, the bearing and the washer into the spring strut turret. Align the three holes with the spring strut turret
- Align the lower mounting (2) of the shock absorber in the trailing arm. See illustration B
- Reinstall the screw (3). Tighten the screw. Tighten to 80 Nm (59 ft. lb.).
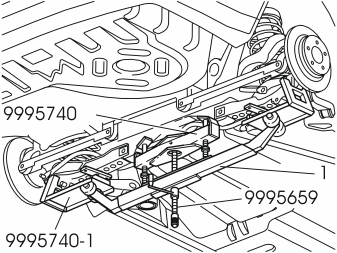
Tensioner 🔧 SPÄNNOK (BAKAXEL/ANVÄNDS MED -5660) 800 AWD is used when working on the suspension. It is vital that the screwed joints for the rubber bushings are tightened in the normal position; in the same position as when the car is on the ground. The tensioner relieves the load on suspension components during removal and installation. The tool is attached to the rear axle using mounting 🔧 FÄSTE ANV. MED -5659 OCH -5972 C-VERSION. This means that it has no effect on the stability of the hoist during work.
Install:
- the threaded bar 🔧 SPÄNNOK (BAKAXEL/ANVÄNDS MED -5660) 800 AWD on the mounting 🔧 FÄSTE ANV. MED -5659 OCH -5972 C-VERSION
- mounting 🔧 FÄSTE ANV. MED -5659 OCH -5972 C-VERSION on the sub-frame
- the rails 🔧 FÄSTE ANV. MED -5659 OCH -5972 C-VERSION on the control arm
- the tensioner (1)
- Ensure that the rollers lie against the rails on both sides of the control arm.
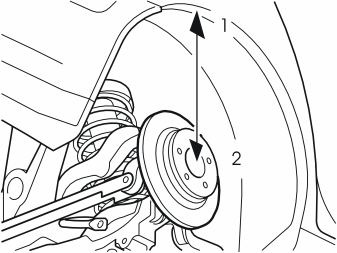
- Press the trailing arms up so that the distance between the points (1) and (2) is 397 mm ± 1 mm (15 5/8" ± 3/64")
- Tighten the screw in the inner mounting for the trailing arm. Tighten to 80 Nm (59 ft.lb)
- Remove the tensioner with the components included.
- Lower the car slightly. Install both wheels. Tighten the wheels crosswise
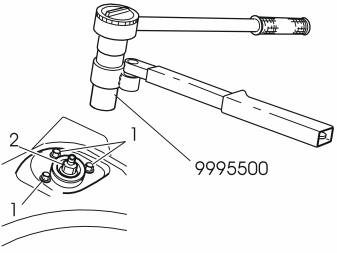
- Install the new screws (1) in the upper shock absorber bearing. Tighten to 25 Nm (19 ft.lb.)
- Install the new nut (2) on the shock absorber. Tighten the nut. Tighten to 80 Nm (59 ft.lb). Use the special tool 🔧 HYLSA ÖVRE MUTTER BAKRE STÖTDÄMPARE and a Torx 40 3/8” square ratchet
- Lower the car completely. Tighten the wheels. Tighten to 110 Nm (83 ft.lb.).
Reinstall:
- the foam rubber seals over the rear shock absorber mountings
- the panels in the cargo compartment
- the cargo compartment carpet
- Fold the rear backrests into position.