Применимость
| Модель | Двигатель | Год |
|---|---|---|
| XC60 | — | 2009–2015A |
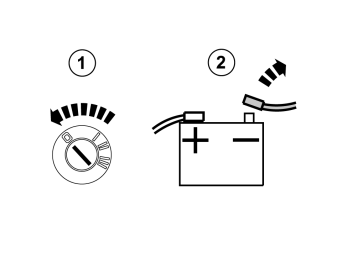
- Turn the ignition switch to position 0.
- Disconnect the battery negative lead.
Примечание: Wait at least three minutes before unplugging the connectors or removing other electrical equipment.
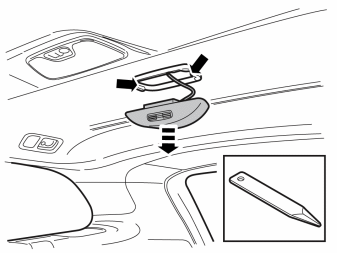
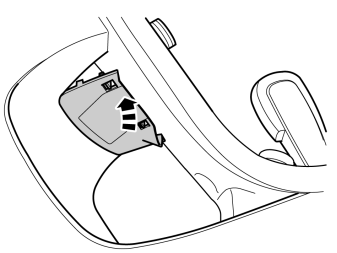
- Carefully pry off the cover at the rear of the roof panel using a weatherstrip tool. The cover is secured by two catches.
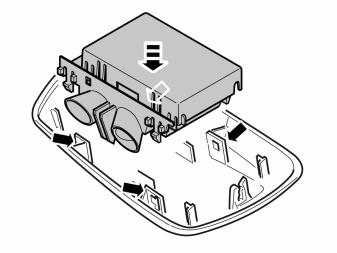
- Take the sensor from the kit and push into the cover. Ensure that all catches engage.
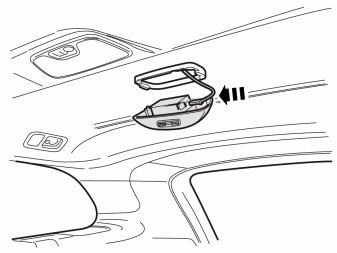
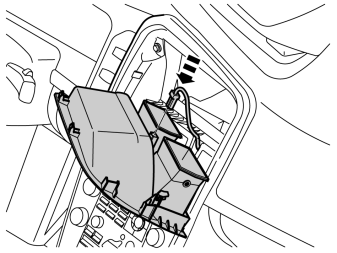
- Connect the routed connector to the sensor. It is in the cradle for the cover.
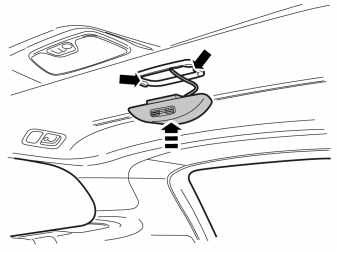
- Press the sensor with cover into the cradle. Ensure that all catches engage.
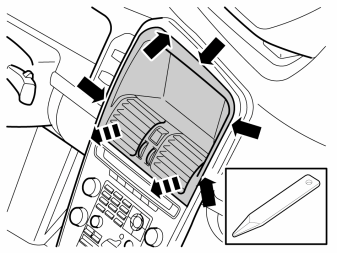
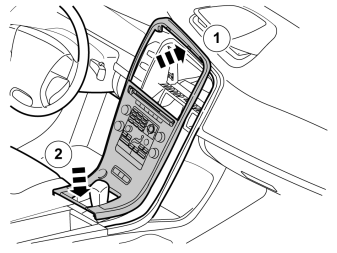
- Carefully pry off the air outlet panel all round, it is secured by five clips on the sides and at the top edge and with four catches on the bottom edge.
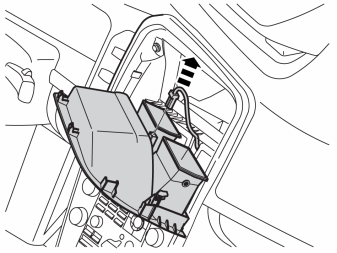
- Pull out the panel and disconnect the connector for the hazard warning lights.
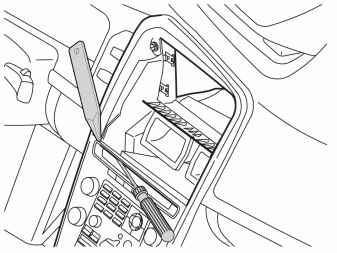
A
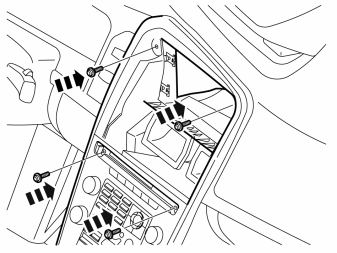
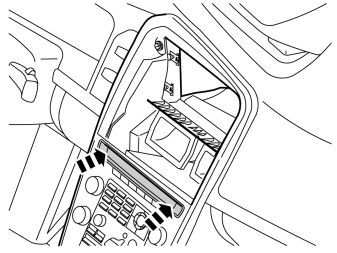
- Insert a small screwdriver in the gap on the media player. Push it in and carefully pry off the surround on one side using a weatherstrip tool. Repeat on the other side and remove it.
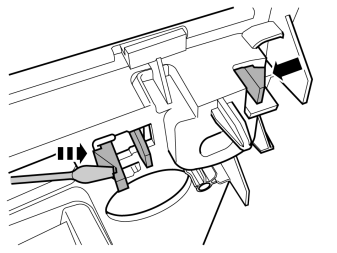
B
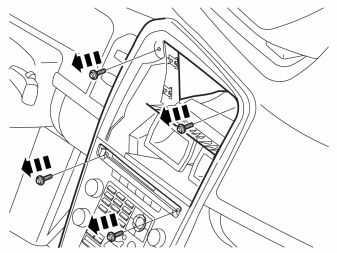
- Remove the four screws on the top edge of the panel.
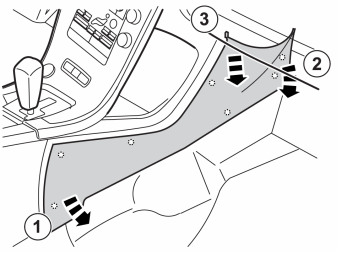
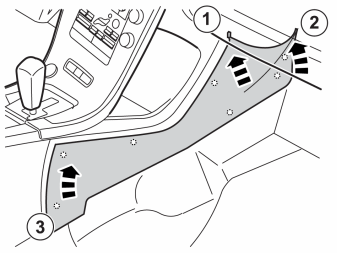
- Remove the tunnel console's panels on both sides. They are secured by seven clips on the inside.
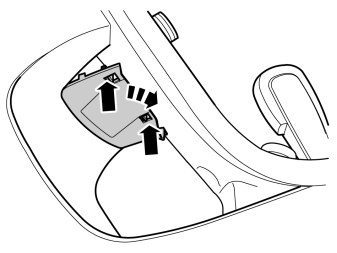
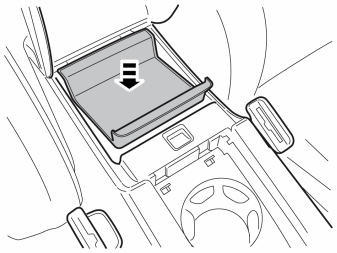
- Push in the catches on the cover, fold the cover downwards and remove.
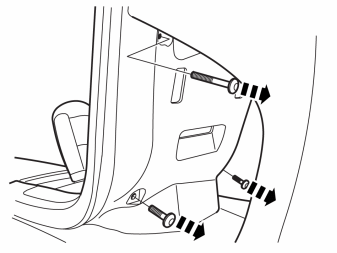
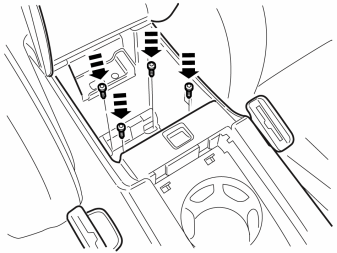
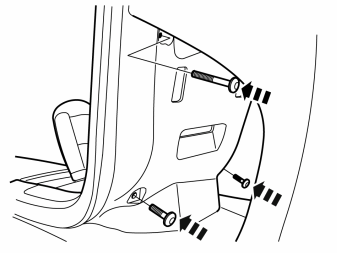
- Remove the three screws at the rear of the centre console.
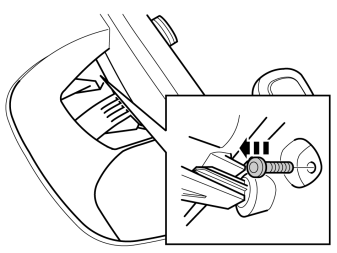
- Remove the last screw at the rear of the centre console.
Applies to cars with automatic gearbox
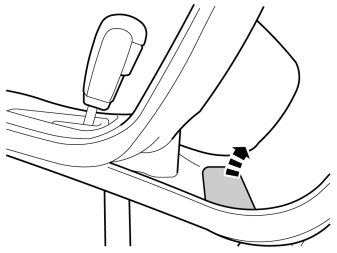
Applies to cars with automatic gearbox
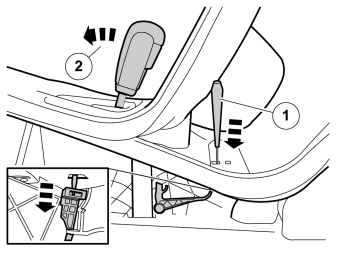
- Release the shift-lock function.
- Move the gear selector to position D.
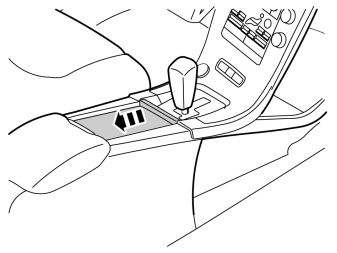
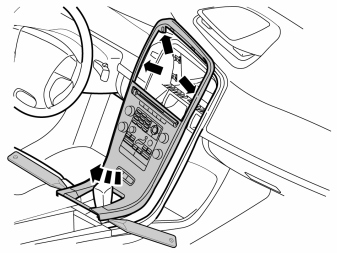
A
- Carefully pry off the centre console panel. Start with both sides of the rear edge. It is secured by two clips along the long sides and by four hooks around the gear selector panel.
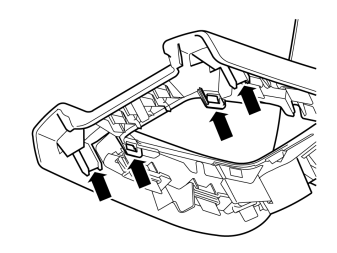
B
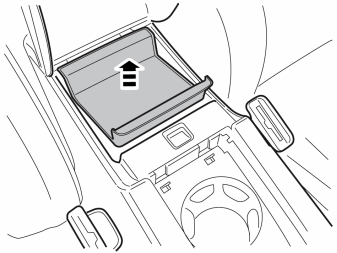
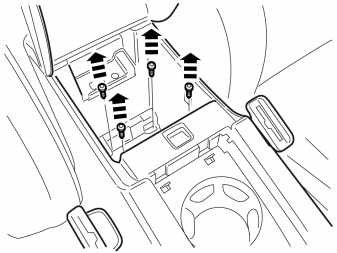
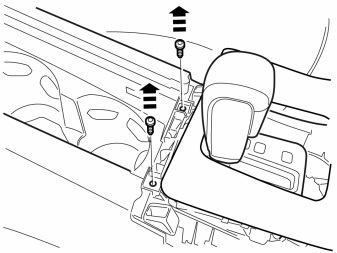
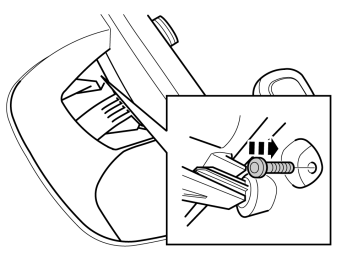
- Move the centre console panel to one side to access the screws in the cup holder's front edge.
- Remove the screws.
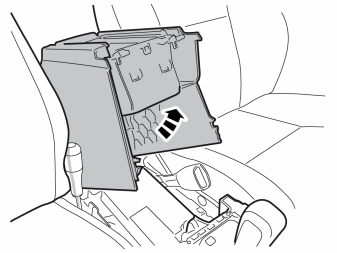
- Tilt the rear part of the tunnel console backwards and trestle it up.
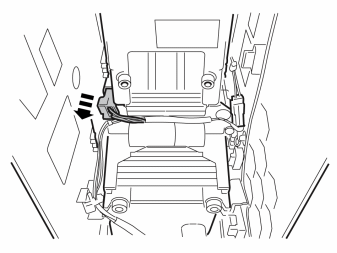
- Disconnect the 5-pin connector from underneath the compartment for the cup holder.
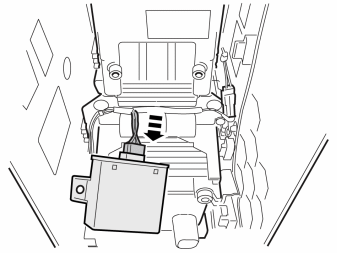
- Take the sensor from the kit and connect it to the disconnected connector.
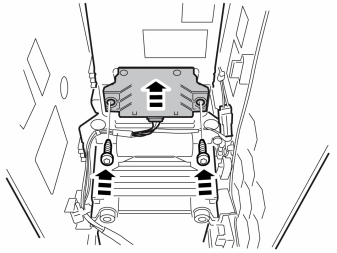
- Place the sensor between the two screw turrets and tighten using two screws from the kit.
A
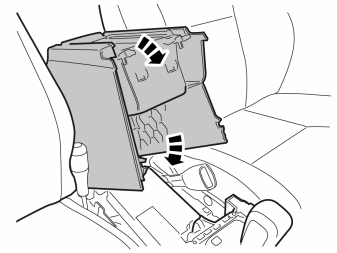
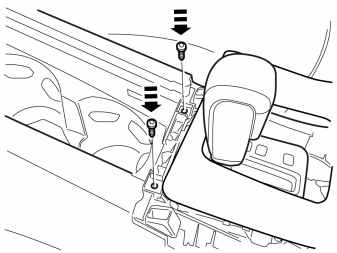
- Position the tunnel console's upper edge and secure using clips at the rear edge.
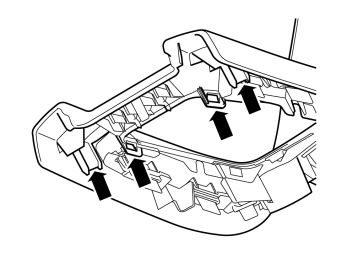
- Secure the panel in the centre console/tunnel console. Make sure that all clips engage.
B
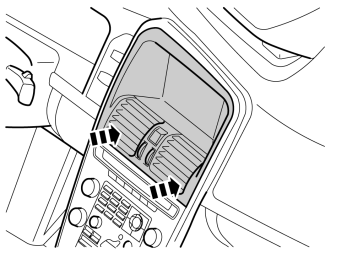
- Connect the connector to the hazard warning lights.
B
- Install the top panel. Make sure that all air nozzles align correctly in the air ducts in the dashboard and that all clips and catches engage.
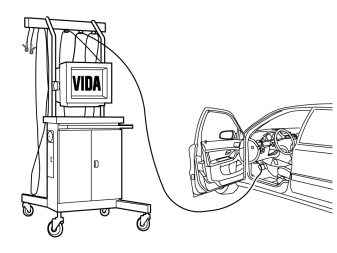
- Download the software for the accessory's function following the service information in VIDA.
Обсуждение и оценка
0Пока нет комментариев. Будьте первым.