Применимость
| Модель | Двигатель | Год |
|---|---|---|
| C70 (06-) | — | — |
| S40 (04-) | — | — |
| V50 | — | — |
Примечание: This accessory is connected to the car's electrical system. It requires software unique to the car.
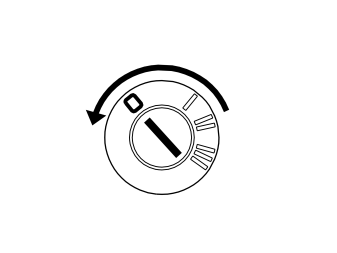
- Turn the ignition key to position 0.
Illustration A applies to left-hand drive cars
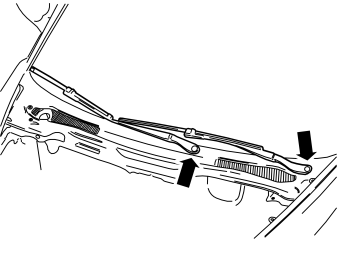
Illustration B applies to right-hand drive cars
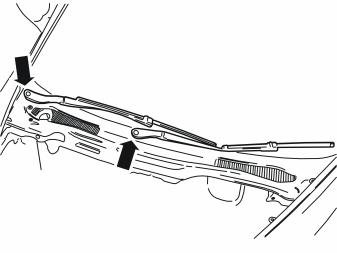
- Note the position of the windscreen wipers on the windscreen.Undo the nuts and remove the windscreen wipers.
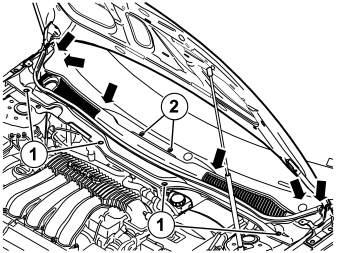
- Remove the four clips (1) in the panel by tapping out the centre pin.
- Rotate the two clips (2) 90° towards each other.
Applies to left-hand drive cars
- Detach the panel first on the right-hand side and pull it up from the right-hand wiper shaft.
- Pull the panel up from the left-hand wiper shaft.
Примечание: The panel has little space on the left-hand side. Pull carefully so that the clips on the underneath/rear edge do not break.
- Remove the panel carefully. Pull it up at the front edge and then pull it forwards.
Applies to right-hand drive cars
- Detach the panel first on the left-hand side and pull it up from the left-hand wiper shaft.
- Pull the panel up from the right-hand wiper shaft.
Примечание: The panel has little space on the right-hand side. Pull carefully so that the clips on the underneath/rear edge do not break.
- Remove the panel carefully. Pull it up at the front edge and then pull it forwards.
Illustration A applies to left-hand drive cars
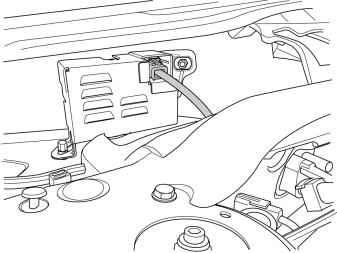
Illustration B applies to right-hand drive cars
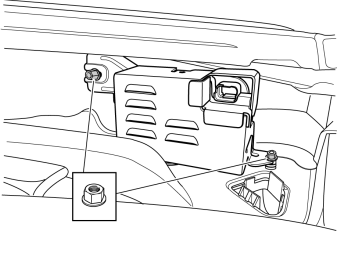
- Remove the protective nuts on the car's two studs below the front edge of the windscreen. The siren must be located on the right-hand side for left-hand drive cars and on the left-hand side for right-hand drive cars.
- Slide the siren as far as possible along the bracket's slot. On right-hand drive cars it must be slid to the right and on left-hand drive cars to the left.
- Install two nuts from the kit and torque tighten to 10 Nm (7 lbf.ft.).
- Remove the protective plug from the pre-routed connector and plug the connector into the siren.
- Reinstall the panel above the wiper motor.
- Reinstall the windscreen wipers and set them in the correct position.
- Tighten the nuts. Tighten to 24 Nm (18 lbf.ft.).
Illustration A
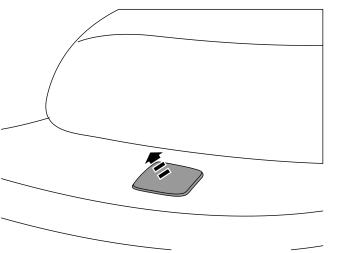
- Remove the covers for the nozzles for the headlamp washers on the right and left-hand sides. Carefully grip the cover. Pull the cover out until its catch becomes accessible.
Illustration B
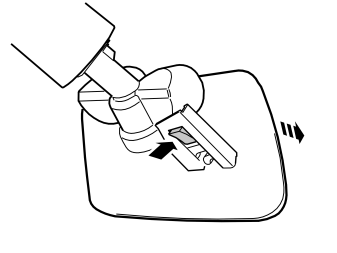
- Press the catch up. Remove the cover. Do not damage the painted surfaces or the washer nozzles.
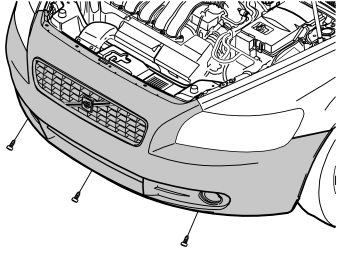
- Remove the screws to the air baffle.
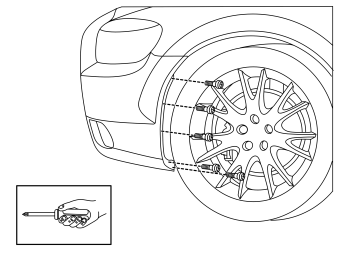
- Remove the five screws holding the bumper cover in the wing liner on the left and right-hand sides.
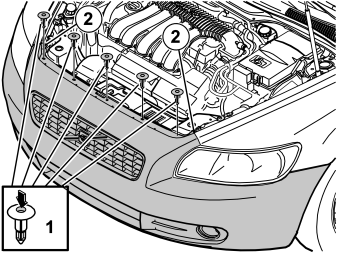
- Push in the centre of the clips (1). Remove the clips.
- Remove the screws (2).
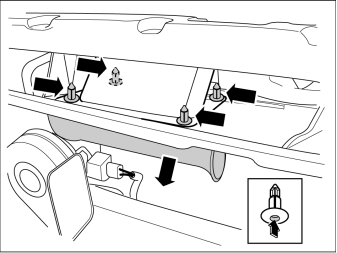
- Press in the centre of the four clips on the front air intake and remove them.
Примечание: One clip is concealed.
- Remove the cover.
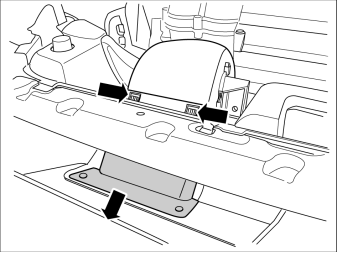
- Press the holders in and remove the front air intake.
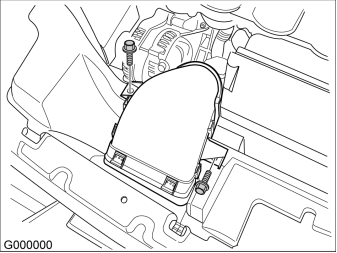
- Remove the two screws on the air intake.
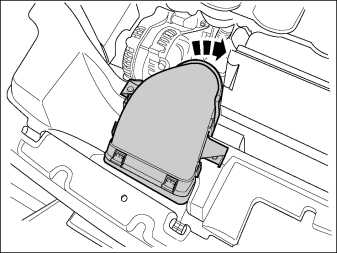
- Remove the air intake by turning it clockwise one quarter of a turn.
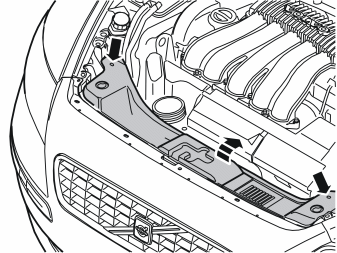
- Remove the two screws for the panel over the bonnet catch.
- Remove the panel. Lift it up at the rear edge and then pull it backwards.
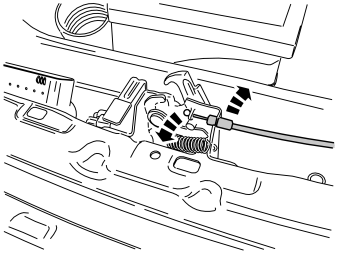
- Unhook the wire sleeve and the wire from the mounting in the bonnet catch.
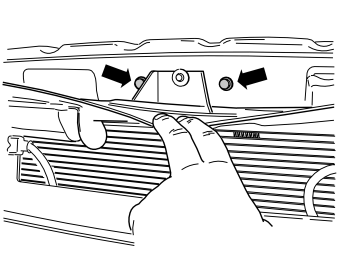
- Remove the bonnet catch screws.
- Remove the bonnet catch.
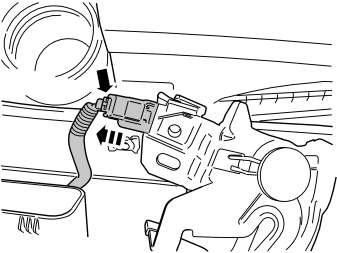
- Unplug the pre-routed connector from the parking module in the bonnet catch by pressing in the catch and pulling.
- Place the bonnet catch to one side, it shall not be used again.
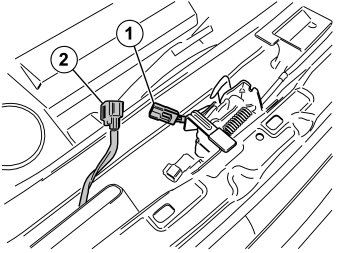
- Take the new bonnet catch from the kit and secure it with the existing screws.
- Torque tighten the screws to 24 Nm (18 lbf.ft.).
- Plug the bonnet catch's connector (1) into the pre-routed connector (2).
- Secure the wire and the sleeve in the new bonnet catch.
- Reinstall the panel above the bonnet catch.
- Reinstall the air intake.
- Reinstall the bumper cover using the five clips and the two screws in the upper edge.
- Reconnect the connectors for the fog lamps if applicable.
- Make sure that the air baffle engages its mounting correctly. Reinstall the air baffle screws.
- Press the end faces for the bumper cover into the body and reinstall the five screws at the front edge of the wheel housing (on the right and left-hand sides).
- Download the software for the accessory's function following the service information in VIDA.
Обсуждение и оценка
0Пока нет комментариев. Будьте первым.