Применимость
| Модель | Двигатель | Год |
|---|---|---|
| XC90 | — | 2003–2013A |
Примечание: This accessory requires software unique to the car.
- Raise the car
- Turn the wheels to the left.
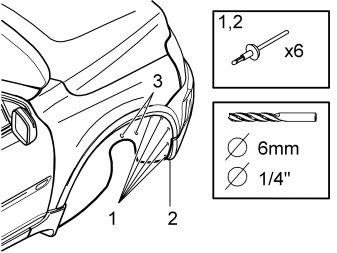
- At the right-hand front wheel: drill out the five rivets (1) holding the wheel arch lining and the rivets (2) in the lower edge of the bumper. Use a 6 mm (1/4” ) diameter drill bit.
Remove:
- any rivet remains
- the plastic nuts (3) holding the wheel arch lining in place
- the small protective panel.
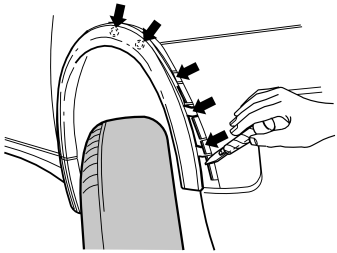
- Carefully pry off the bottom edge of the wheel arch extension. Use a plastic straightening tool
- Pull off the wheel arch extension up to the highest point of the wheel arch. The three catches at the bottom edge and the two clips a little higher up must release
- Turn the wheels to the right.
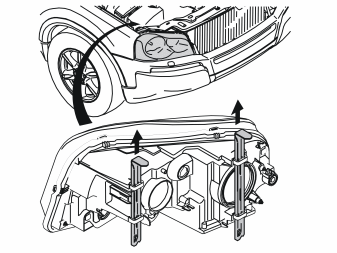
- Remove the right-hand headlamp. First pull up the two cotter pins. Then carefully pull the headlamp forward.
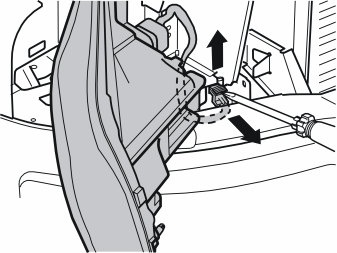
- Carefully pry up the catch on the headlamp connector. Use a screwdriver
- Pull up the catch completely. Disconnect the connector. Place the headlamp to one side.
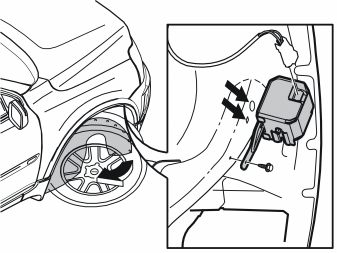
- Fold down the front edge of the wheel arch lining towards the brake calliper. Secure it there
- Disconnect the pre-routed connector in the wheel arch
- Insert the upper locating pin for the siren into the upper hole in the wheel arch. Insert the lower locating pin in the lower hole
- Tighten the siren using the screw. Tighten to 10 Nm (7.5 lbf. ft.)
- Connect the connector to the siren.
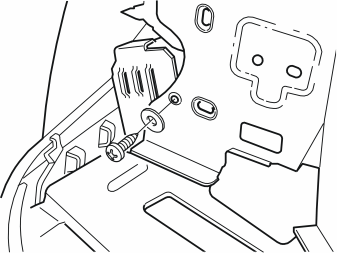
- Take the screw and washer from the kit. Secure the siren to the front cover plate through the existing hole
- Connect the connector to the headlamp
- Reinstall the headlamp. Ensure that the short, narrow lock pin is innermost and that the long, wide pin is outermost.
Reinstall:
- the wheel arch lining and the wheel arch extension. Rivet them into place. Use the rivets from the kit
- the small protective panel and the plastic nuts.
Bonnet catch, replacement
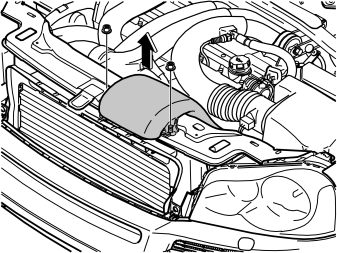
- Remove the air baffle for the air cleaner box. First slacken off the screws. Then pull off the air baffle
- Undo the left-hand headlamp. Apply the same method used for the right-hand headlamp previously in points 4-5.
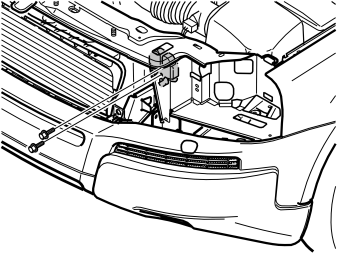
- Remove the screws for the bonnet catch.
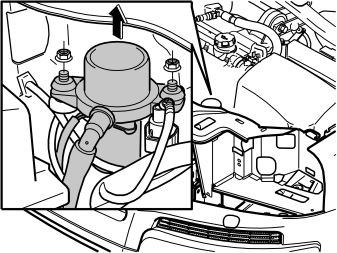
- Remove the nuts for the vacuum pump. Lift the pump from its mounting
- Fold it to the side.
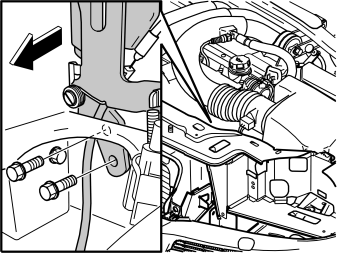
- Remove the screws for the latch. Lift the latch out from the bonnet catch.
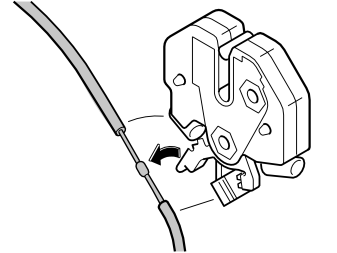
- Lift the bonnet catch. Unhook the cable from the bonnet catch. NOTE! Note the position of the mechanical lock cable!
- Take the new bonnet catch from the kit. Secure the mechanical cable to the catch in the same way as to the old catch.
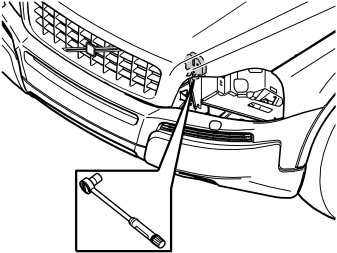
- Install the bonnet catch with the latch in position. Finger-tighten the screws.
Reinstall:
- the screws for the latch. Tighten the screws. Tighten to 24 Nm (18 lbf. ft.)
- the vacuum pump. Tighten the nuts fully. Do not damage the rubber bushings
- the air baffle. Tighten the screws. Tighten to 10 Nm (7.5 lbf. ft.)
- Close the bonnet. Then tighten the screws for the bonnet catch. Tighten to 10 Nm (7.5 lbf. ft.)
- Open the bonnet. Install the headlamp according to the instruction in point 7.
Finishing work
- Lower the car
- Program the software. See the service information in VIDA
- Check the function.
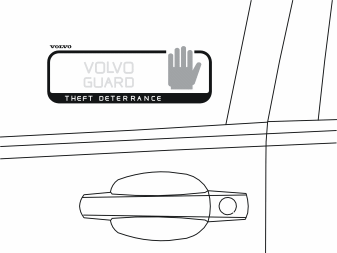
- Install the decals on the front side windows.
Applies to Sweden and Norway
- Install the type decal on the inside of the glove compartment.
Примечание: For Sweden: decal SSF. For Norway: decal FG
Обсуждение и оценка
0Пока нет комментариев. Будьте первым.