Примечание: This accessory requires software unique to the car.
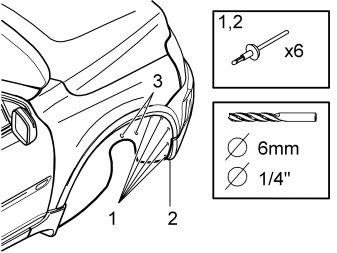
- Raise the car
- Turn the wheels to the left
- Drill out the five rivets (1) holding the wheel arch lining and the rivets (2) in the lower edge of the bumper. Use a 6 mm (1/4”) diameter drill bit
- Remove any rivet swarf
- Remove the plastic nuts (3) holding the wheel arch lining. Remove the small protective panel.
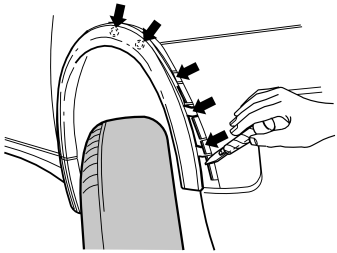
- Remove the wing extension. Carefully pry off the wing extension using a plastic weatherstrip tool
- Pull the wing extension up to the highest point until the three catches at the lower edge and the two clips slightly higher up have released.
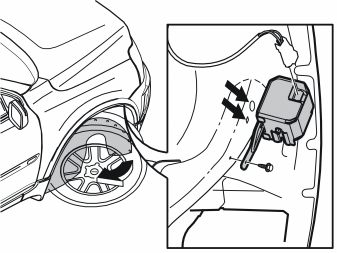
- Fold down the front edge of the wheel arch liner towards the brake calliper and secure
- Remove the existing connector in the wheel arch
- Insert the upper locating pin for the siren in the upper hole in the wheel arch and then the lower locating pin in the lower hole, as illustrated
- Tighten the siren using the screws. Tighten to 10 Nm (7.5 lbf.ft.)
- Connect the connector to the siren.
- Reinstall the wheel arch liner and the wheel arch extensions. Rivet the wheel arch liner and the wheel arch extensions using rivets from the kit
- Reinstall the small protective panel and the plastic nuts
- Lower the car
- Program the software. See the service information in VIDA
- Check the function.
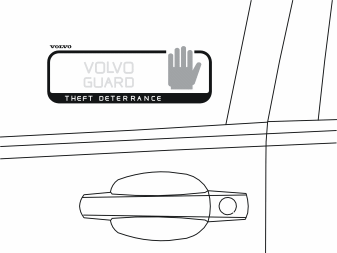
- Install the decals on the front side windows.
Applies to Sweden and Norway
-
Примечание: > For Sweden: decal SSF > > for Norway: decal FG
Apply the type decal to the inside of the glove compartment.
Обсуждение и оценка
0Пока нет комментариев. Будьте первым.