Применимость
| Модель | Двигатель | Год |
|---|---|---|
| C70 (06-) | — | 2006–2013 |
Preparations
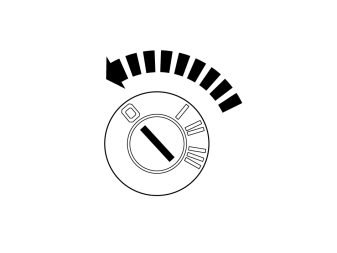
- Turn the ignition switch to position 0.
Примечание: Wait at least three minutes before unplugging the connectors or removing other electrical equipment.
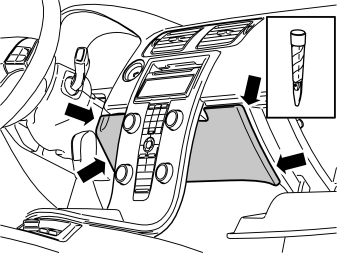
- Open the glovebox.
- Remove the panel in front of the centre console. It is secured by hidden clips, 4 pcs.
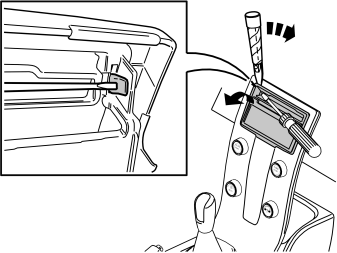
- Detach the rim around the display and the media player: Press in the catch at the edge of the media player cover. Use a small screwdriver and carefully pry off the rim at the corner. Use a plastic weatherstrip tool.
Примечание: Do not damage the panel and dashboard.
Repeat the operation on the other side.
Подсказка: If the panel is difficult to remove, press the panel on both sides again and repeat the procedure starting at the other side.
- Fold the surround backwards. Remove by pulling upwards.
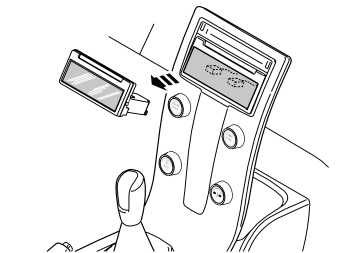
- Remove the ignition control module (ICM). It is secured by hidden clips, 2 pcs.
Подсказка: Grip the control module with both hands and pull the control module straight out of the centre console.
- Disconnect the two connectors. Put the display to one side.
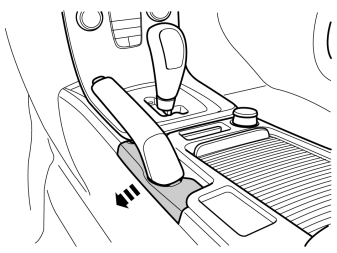
- Loosen the panel by the hand brake by carefully pulling it sideways.
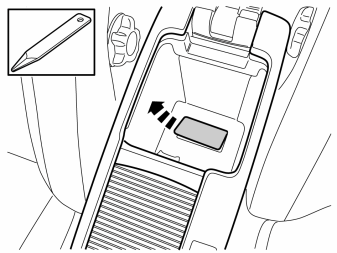
- Fold up the tunnel console's armrest and remove the cover.
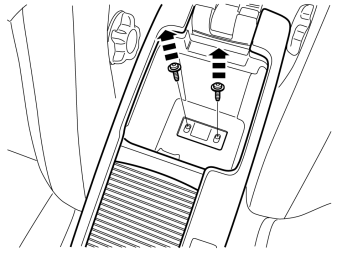
- Remove the screws.
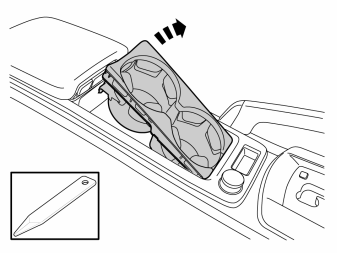
- Remove the cup holder by prying at the trailing edge with a weatherstrip tool.
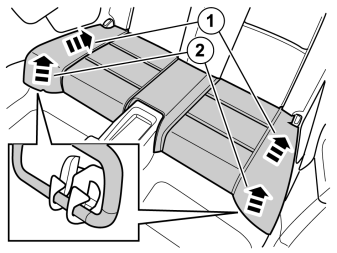
- Remove the rear seat cushion by first pressing the outer edges of the cushion backwards and then by pulling them upwards so that the outer hooks release.
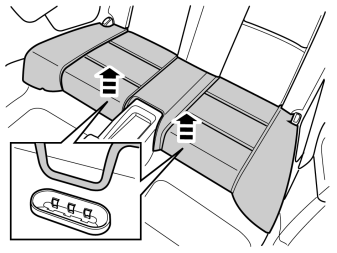
- Lift the cushion straight up in the middle so that the inner hooks release.
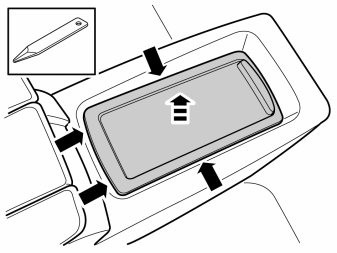
- Remove the cup holder from the rear tunnel compartment by prying at the leading edge and pressing in the catches, first at the leading edge and then on the sides.
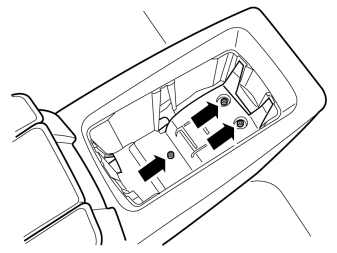
- Remove the screws.
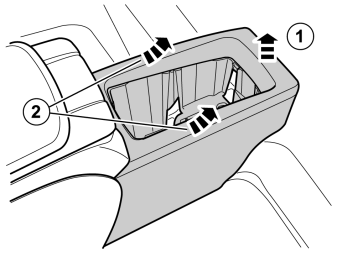
- Remove the rear tunnel compartment by pulling it upward/rearward so that it releases from its retainers.
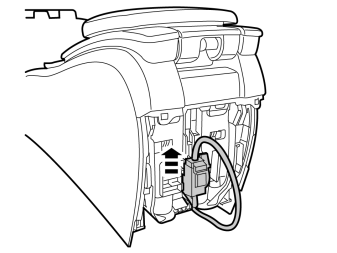
- Unplug the connector at the trailing edge of the tunnel console.
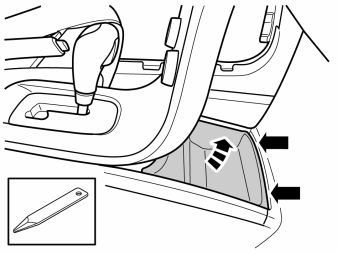
- Remove the front storage compartment by prying it off at the front edge using a weatherstrip tool and lifting it out.
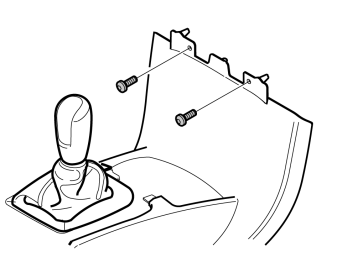
- Remove the 2 screws along the front edge of the tunnel console.
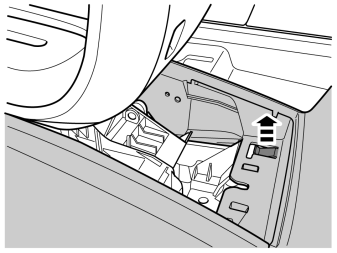
- Carefully lift the catches at the front edge of the tunnel console.
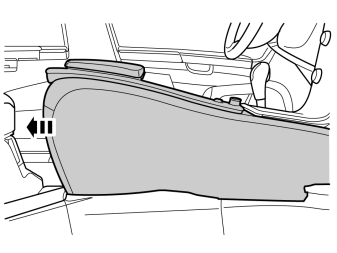
- Pull the console backwards approximately 20 mm.
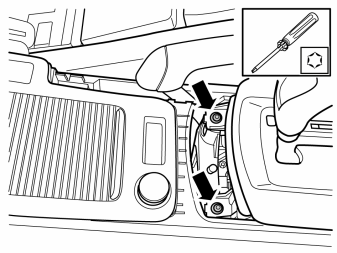
- Remove the screws.
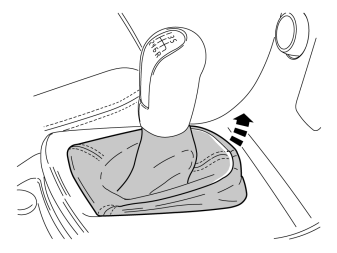
Applies to cars with manual gearbox
- Remove the gear selector lever boot from the center console. First pry it off at the front edge using a weatherstrip tool and then unhook it at the rear edge.
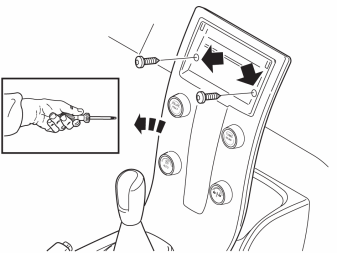
- Remove the two screws.
- Remove the connector on the reverse of the center console.
- Remove the centre console.
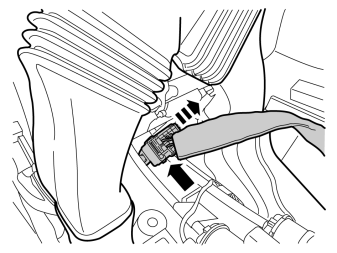
- Lift up the tunnel console and pull it back slightly.
- Unplug the big grey connector at the front.
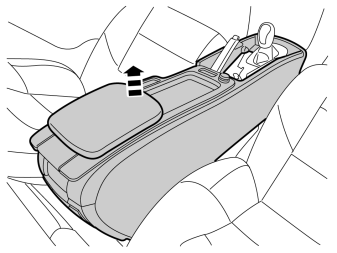
- Lift out the console and turn it upside down.
Примечание: Protect hand brake and gear lever when removing and installing the tunnel console.
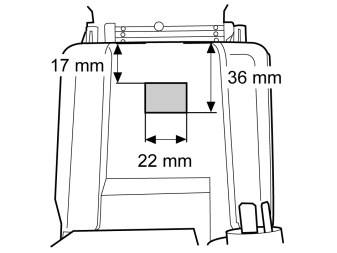
- Measure and mark up for slots at the leading edge on the cup holder compartment as shown.
- Cut out as marked.
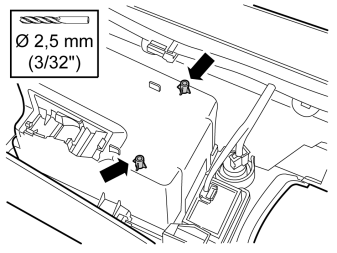
- Carefully drill through the 2 screw turrets with a Ø 2.5mm (3/32") drill bit.
Installation
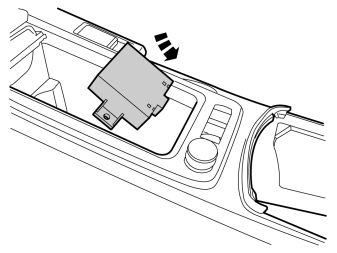
- Get movement sensor (Front) and 2 screws from the kit.
- Place the movement sensor in the cup holder compartment.
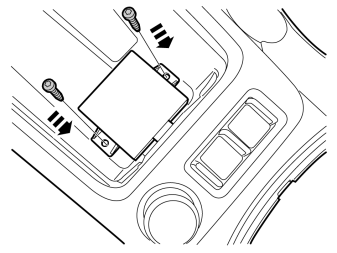
- Tighten down the movement sensor with the 2 screws.
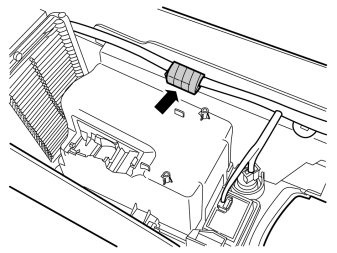
- Remove the tape that holds the pre-wired, 5-pin green connector.
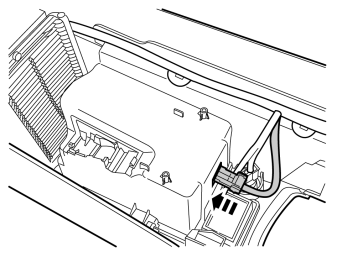
- Plug in the connector to the sensor.
Installing the rear movement sensor
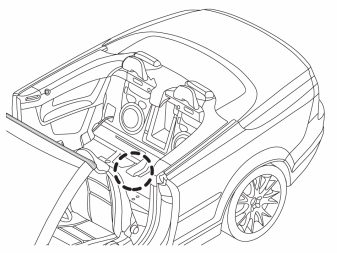
- Localise the two studs on the floor under the backseat.
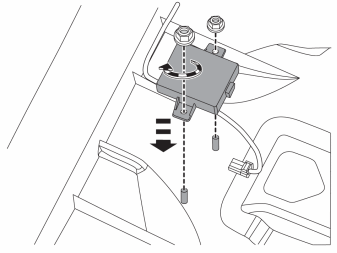
- Get movement sensor (Rear) and 2 nuts from the kit.
- Position the sensor on the studs and tighten down using the nuts.
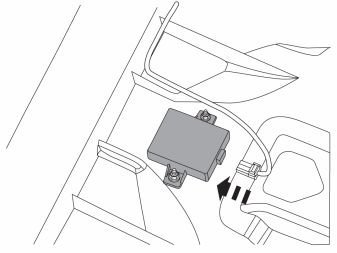
- Remove the tape that holds the pre-wired 5-pin blue connector, and connect it to the sensor.
Finishing work
Reinstall:
- the tunnel console and the connectors at the front and rear. Only slide it ahead so far that the centre console's screws are accessible.
- the centre console with its screws, two up and two down.
- gear lever gaiter, starting at the trailing edge.
- tunnel console completely. Slide ahead so that the lock lug locks it into place.
- the panel at the parking brake.
- the two screws and the cover under the armrest.
- the ignition control module (ICM) with the connectors, screws and panel.
- front storage compartment inside of the center console.
- the panel inside the centre console.
- the rear tunnel console with its screws.
- cup holders.
- the rear seat cushion.
Programming
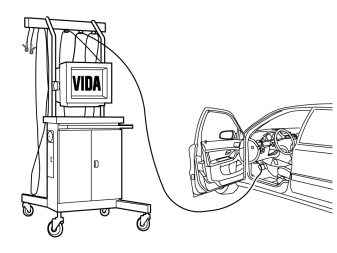
- Download the software for the accessory's function following the service information in VIDA.
Обсуждение и оценка
0Пока нет комментариев. Будьте первым.