Применимость
| Модель | Двигатель | Год |
|---|---|---|
| C70 (06-) | — | 2006–2013 |
Примечание: When affixing the tape, the underlying surface must maintain a temperature of at least +20°C (68°F).
Preparations
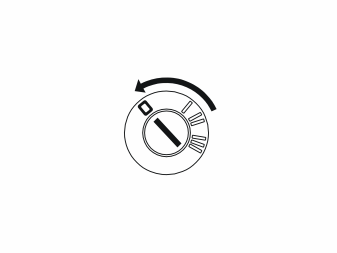
- Turn the ignition switch to position 0.
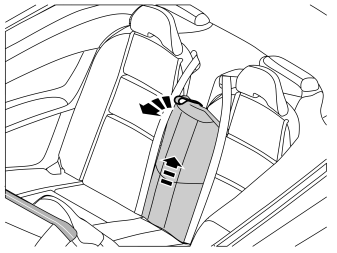
- Remove the centre section of the rear seat backrest.
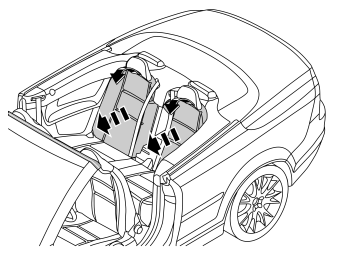
- Undo the two rear backrests by pulling them at the top.
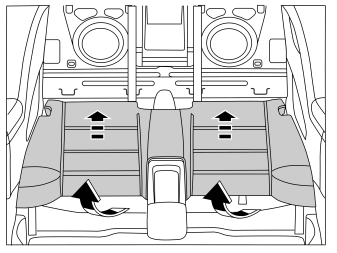
- Detach the seat cushion by gripping the front edge and pulling it forward.
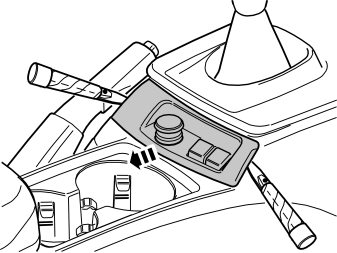
- Carefully use a weatherstrip tool to pry loose the panel at the rear edge of the centre console. Unplug the connectors.
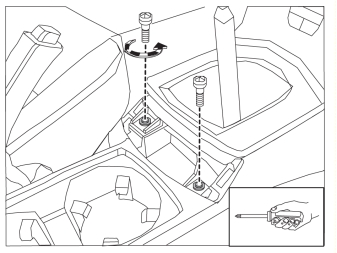
- Remove the screws.
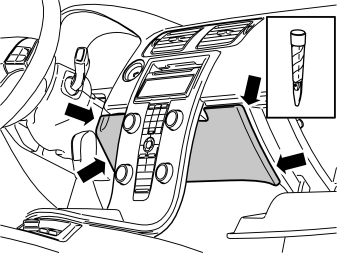
- Open the glovebox.
- Carefully pry off the panel inside the centre console. Use a plastic weatherstrip tool. The panel is secured by two clips on each of the short sides.
- Pull the panel away downwards.
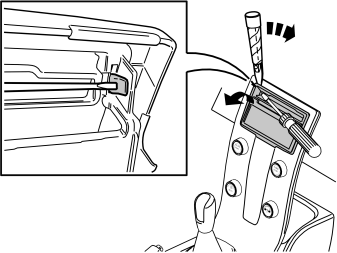
- Detach the surround around the display and the media player: Press in the catch at the edge of the media player cover. Use a small screwdriver. Carefully pry off the surround at the corner. Use a plastic weatherstrip tool.
Примечание: Do not damage the panel and dashboard.
Repeat the operation on the other side.
Подсказка: If the other side does not detach, press the detached side into position again and repeat the procedure, beginning from the other side.
- Fold the surround backwards. Remove by pulling upwards.
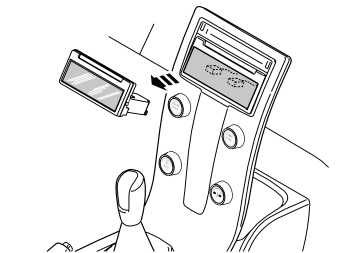
- Press out the display module (1) from the reverse of the centre console. Use both hands and press straight back.
- Disconnect the two connectors. Put the display to one side.
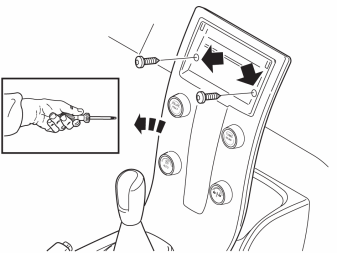
- Remove the two screws holding the centre console to the dashboard.
- Remove the connector on the reverse of the dashboard environment panel.
- Remove the centre console from the dashboard and tunnel console.
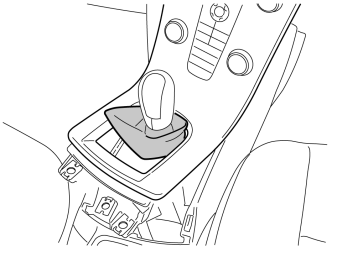
Applies to cars with manual gearbox
- Detach the gear selector boot by prying loose the front edge using a weatherstrip tool.
- Thread the boot through.
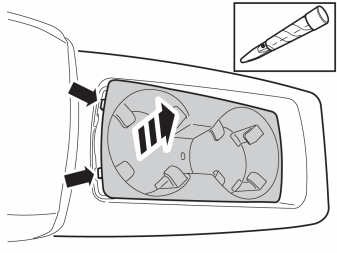
- Remove the rear cupholder from the rear tunnel compartment by prising the front edge and pressing in the two catches.
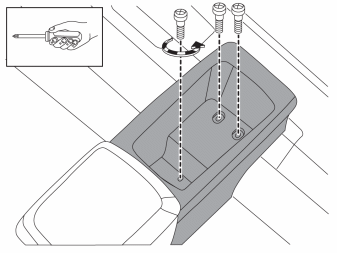
- Remove the screws.
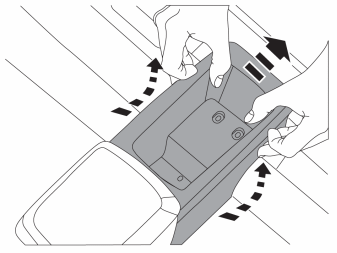
- Remove the rear tunnel compartment by pulling it upward/rearward so that it releases from its retainers.
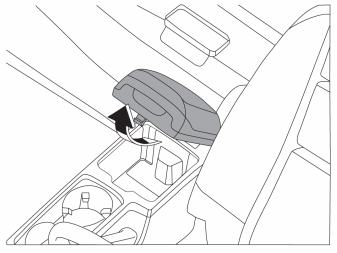
- Raise the armrest.
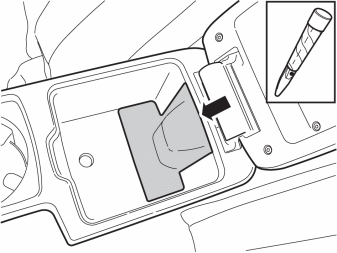
- Remove the cover.
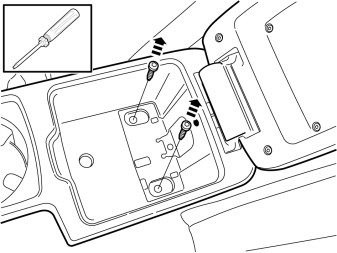
- Remove the screws.
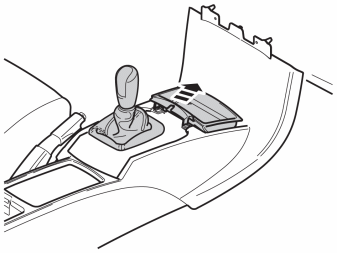
- Remove the cover panel.
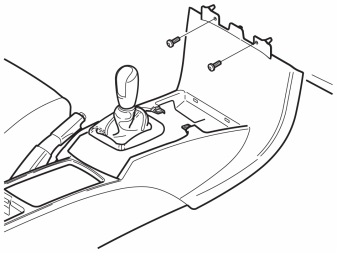
- Remove the screws.
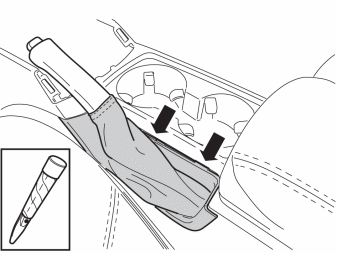
- Detach the handbrake boot frame from the tunnel compartment.
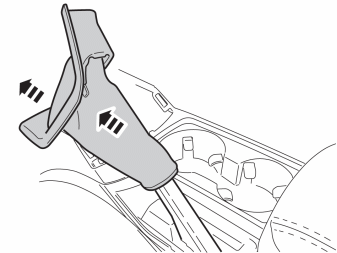
- Remove the boot from the handbrake lever.
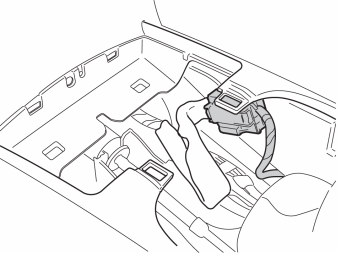
- Unplug the front connector.
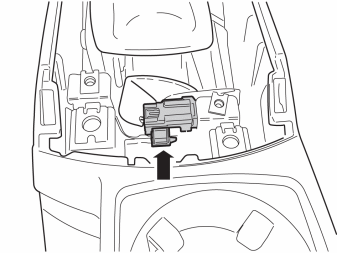
- Unplug the rear connector and clip.
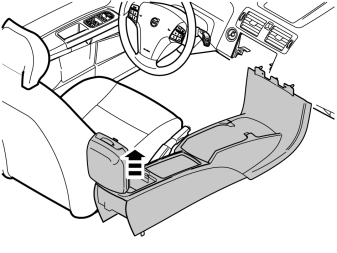
- Apply the handbrake.
- Raise the rear edge of the tunnel compartment about 45° so that it is free of the handbrake lever. The lift the compartment upwards and rearwards.
- Position the tunnel compartment bottom side up.
Installation
Installing the front movement sensor
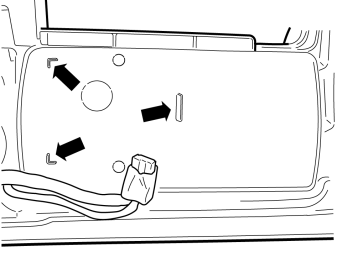
- Locate the three guide lugs on the back of the tunnel compartment.
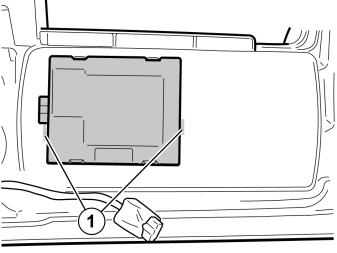
For tunnel compartment without pre-drilled holes
- Take the movement sensor without mounting eyelets from the kit. Position the sensor between the guide lugs with the label facing up and the connection facing forwards.
- Make markings (1) 18 mm from the lower long side at the edge of the sensor.
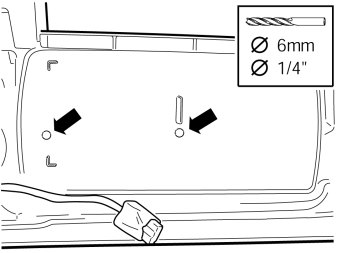
For tunnel compartment without pre-drilled holes
- Remove the sensor and drill holes in the markings using a Ø6 mm (1/4") bit.
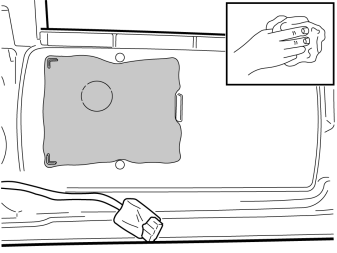
- Use isopropanol to clean the area of the tunnel compartment where the movement sensor will sit. Allow to dry.
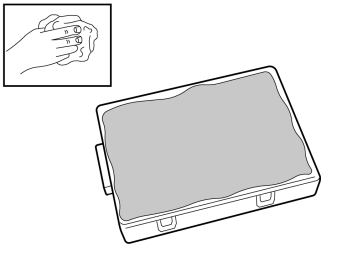
- Use isopropanol to clean the smooth side of the movement sensor without mounting eyelets. Allow to dry.
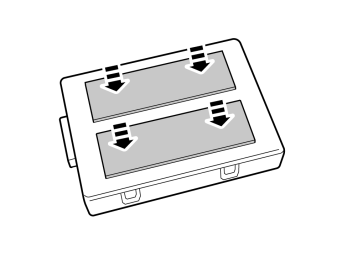
- Affix the double-sided tape to the movement sensor.
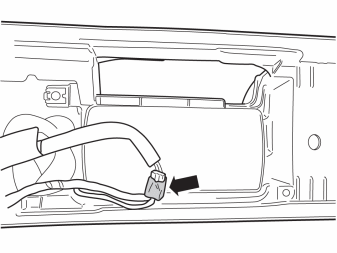
- Remove the tape holding the pre-routed, 4-pin green connector in place.
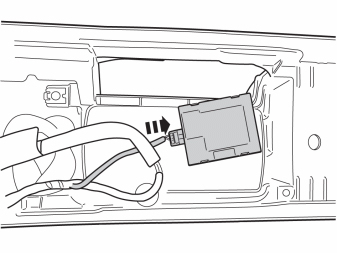
- Plug in the connector to the movement sensor.
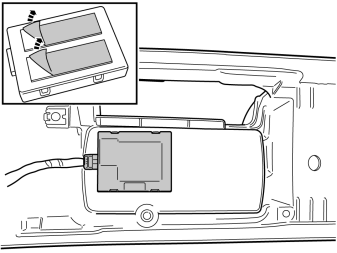
- Remove the protective backing from the tape and position the movement sensor between the guide lugs as illustrated. Press hard so that the tape adheres.
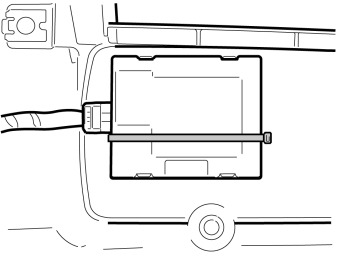
- Secure the sensor with a tie strap threaded first through the rear hole and then through the front. The tie strap catch should face rearwards.
Installing the rear movement sensor
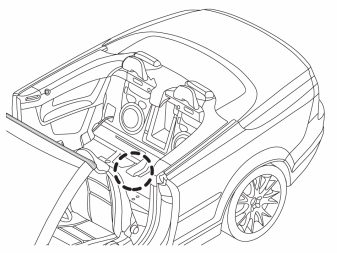
- Remove the tape holding the connector of the pre-routed cable harness on the floor beneath the rear seat.
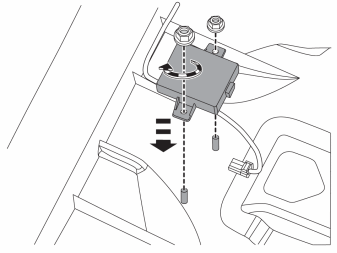
- Take the other movement sensor from the kit and position it at the back part of the floor on the existing screws. Secure it with two nuts from the kit.
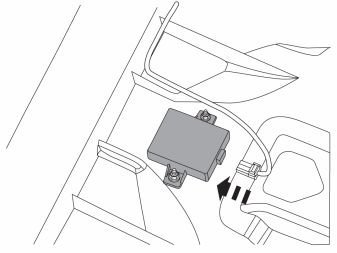
- Plug in the pre-routed connector to the movement sensor.
Reinstall:
- the tunnel compartment with panels
- the connectors
- the handbrake lever boot
- the rear tunnel compartment with cupholder
- the centre console
- the gear selector boot (hook the rear edge into place first)
- the display unit
- the panel behind the centre console
- the seat cushion
- the backrests.
- Download the software for the accessory's function following the service information in VIDA.
Обсуждение и оценка
0Пока нет комментариев. Будьте первым.