Примечание: This accessory is connected to the electrical system of the car. It requires software unique to the car.
- Turn the ignition switch to position 0.
Примечание: Wait at least five minutes before disconnecting the connectors or removing other electrical equipment.
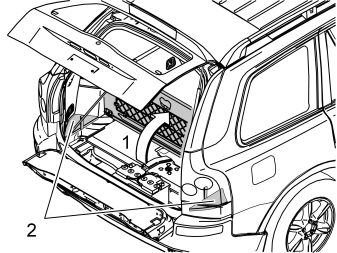
- Fold up the centre rear floor hatch (1)
- Remove the two side floor hatches (2).
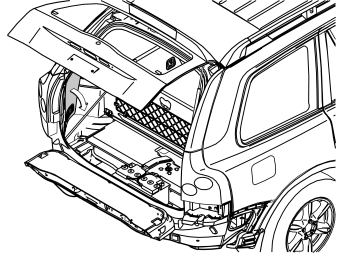
- Remove the folding side panels on the left and right-hand sides of the cargo compartment.
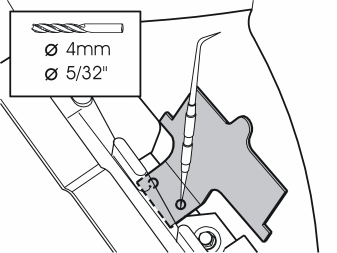
- Take the bracket from the kit. Position in the recess on the right-hand rear side member as illustrated
- Mark out for drilling both holes
- Drill out the holes. Use a 4 mm (5/32”) diameter drill bit
- Remove any swarf
- Treat the edges of the holes using a rust-proofing agent.
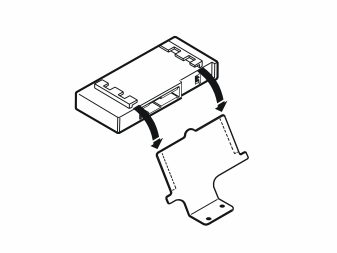
- Press the control module on to the bracket.
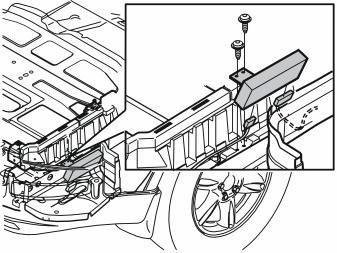
- Connect the pre-routed connector (positioned under the right-hand tail lamp) to the control module
- Install the bracket with the control module on the right-hand side of the floor support over the existing holes. Tighten the bracket using the two screws.
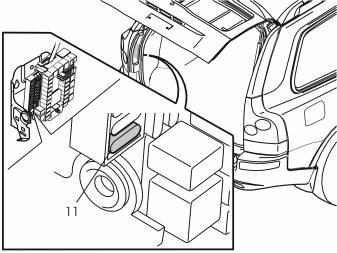
- Install the fuse from the kit in position 11 in the fuse holder.
- Reinstall the folding side panels
- Reinstall the side panels
- Fold the rear centre floor hatch back into position
- Program the software according to the service information in VIDA.
Обсуждение и оценка
0Пока нет комментариев. Будьте первым.